👕 Setting Up Quantity (SC-Item)
Unlike other print products, SC-Item supports products sold per piece, such as T-shirts, mugs, tote bags, and promotional items.
This component allows you to set up multiple quantity spaces — so customers can order different product variants (like T-shirt sizes or item types) in one order.
![dashboard screenshot]
🔹 What Is Quantity in SC-Item?
The SC-Item Quantity Component defines how many pieces a customer can order per size, variation, or item type.
It’s designed to handle apparel, merchandise, or product models that require multiple quantity fields (for example, T-shirt sizes XS–4XL).
💡 Think of it as the “quantity per variant” setup — you can define quantities for each size or product option.
🧭 Navigating to Quantity Setup
- Go to Component dashboard
- Click Quantity category
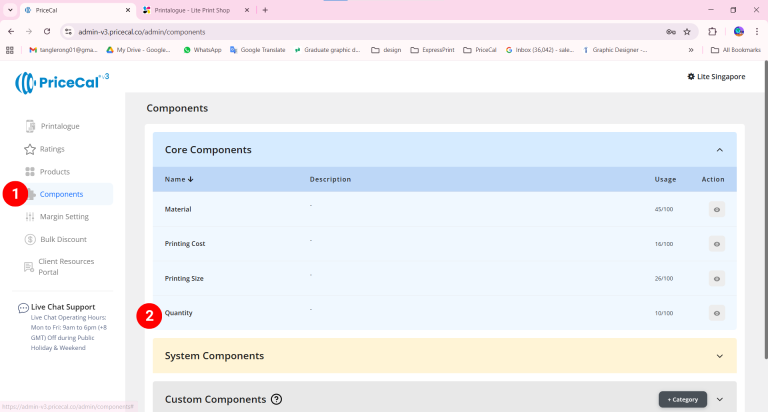
- Add Quantity
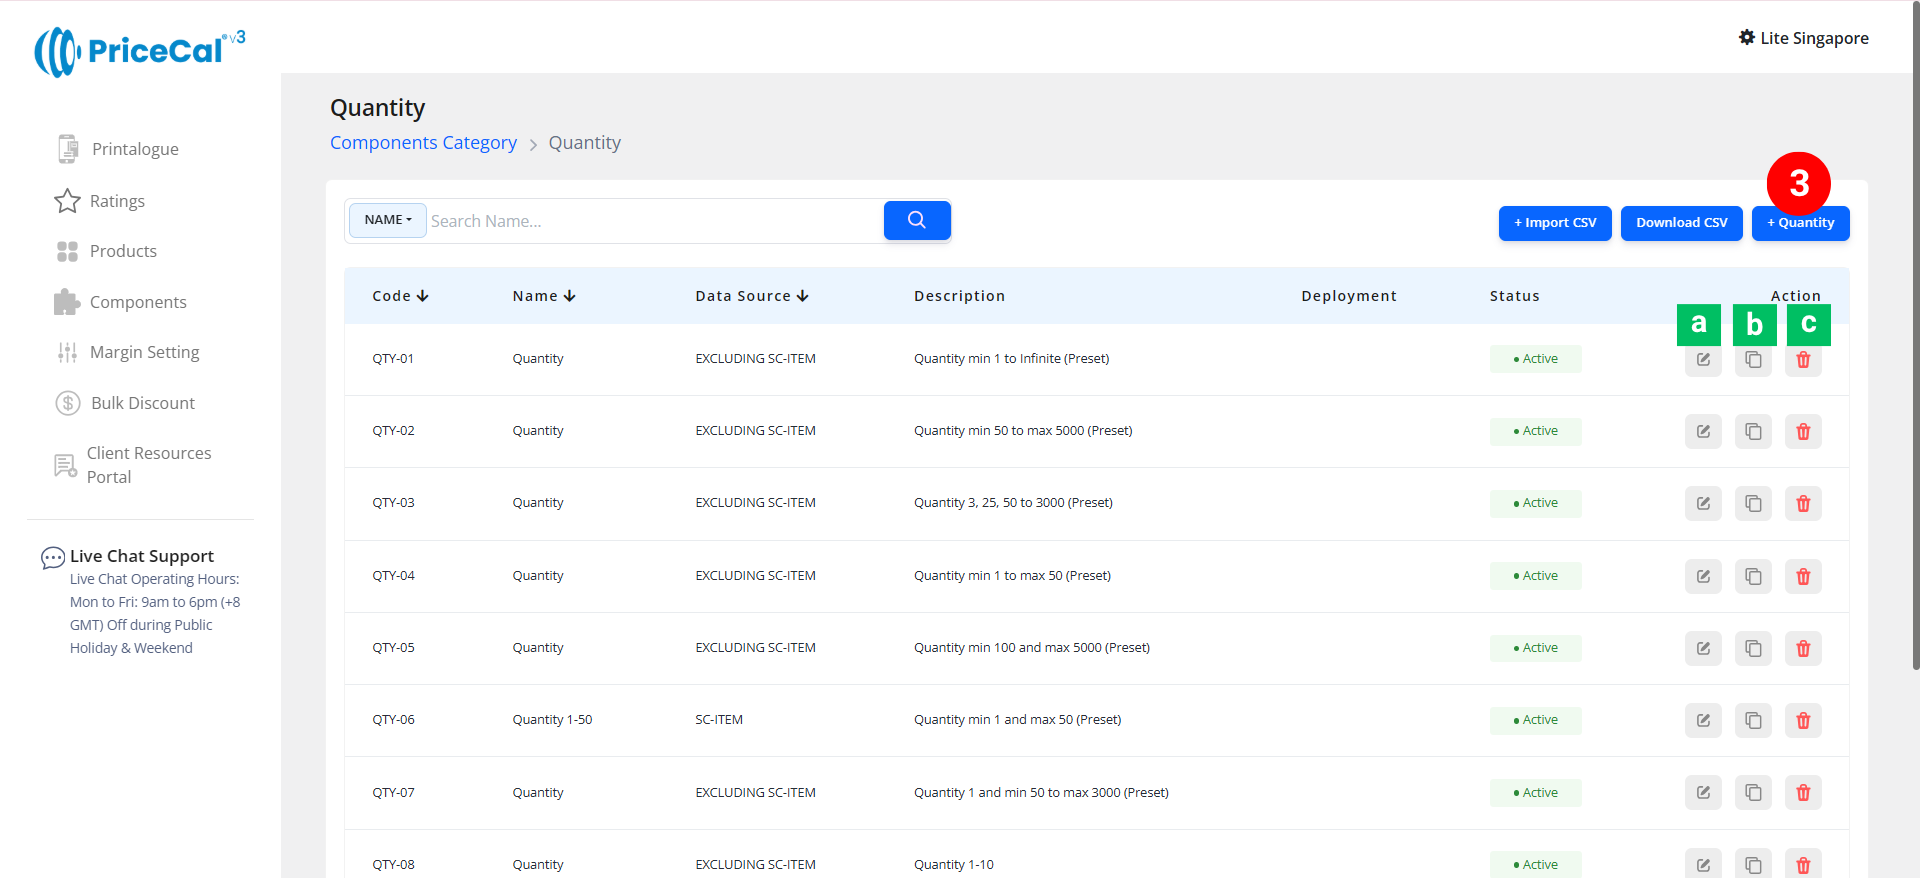
Edit [a]: modify existing components.
Duplicate [b]: clone a component setup to reuse and create new.
Delete [c]: remove unused component.

🧱 Create a Quantity Component (SC-Item)
Step-by-Step
-
select “SC-Item”
-
Put a unique code (up to 8 units)
-
Enter the component name. e.g. T-Shirt Quantity, Tote Bag Quantity
-
Enter the component description. 💡 Tips: Add a short note describing what quantity formula or limitation applies to this product. Example:
“Quantity range (min 100 – max 5000)” and “T-shirt size quantity XS – 4XL” -
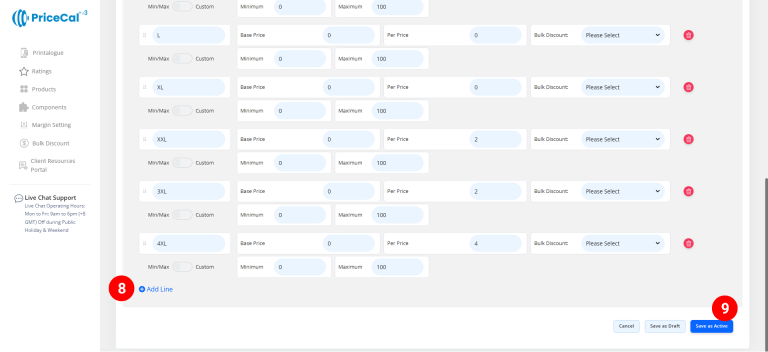
We can add multiple quantity spaces to the component, so we need to input the minimum total quantity.
💡 Tips: This ensures that even if customers split quantities across sizes, they still meet your minimum order requirement. - Enter the quantity detail
– Quantity Label: enter quantity label. (e.g., “XS”, “S”, “M”, “L”, “XL”, or “Quantity” if no size distinction is needed)
– Base Price: One-time setup or startup fee before any per-piece cost applies.
– Per Piece: Cost per piece of print quantity (💡 Tips: When the cost of clothing varies depending on size, the price difference can be factored in here.)
– Bulk Discount (optional): Set a Bulk Discount. If no need, just keep it in “Please Select”
💡 Tips: When the product cost you entered is higher than the original cost, you can offer a bulk discount to bring the product cost back down when printing quantity is large, thus preventing the product cost from becoming too high.“ -
Select the calculation type [?]
– Min/Max: Customers can print any quantity within the minimum and maximum range you set.
– Custom + Increment: System automatically generates preset quantities based on your settings.💡 Example Custom + Increment: Start from 100 pieces, increment by 100 , end until 1000→ customers see options: 100, 200, 300, until 1000. You can also add custom quantity number like 50, 1500, 2000, 3000 and 5000.

-
Add line if you have other multiple specifications, add more qauntity lins for your customers to fill in multiple entries within one order.
-
Click “Save as Active” to save your quantity setup.


⚙️ How PriceCal Uses SC-Item Quantity
When a customer selects and enters quantities:
-
The system sums up all quantity inputs across all lines.
-
Applies your Base Price and Per Absolute cost per piece.
-
Multiplies total quantity × unit cost.
-
Applies bulk discounts automatically (if enabled).
-
Displays an accurate total price instantly in the Printalogue.
✅ This ensures correct pricing even for mixed-size or mixed-color orders.
🎯 Why This Setup Is Important
A properly configured SC-Item Quantity component enables:
-
✅ Multiple quantity inputs for item variations (e.g., sizes, colors)
-
✅ Accurate total cost calculation across all variants
-
✅ Support for flexible or fixed order sizes
-
✅ Integration with bulk discount and per-item cost formulas
Together with Printing Size and Printing Cost, this creates a complete pricing structure for item-based products like apparel and merchandise.
✅ Test Your SC-Item Quantity Setup
After saving, preview your product on the product calculator preview and test entering different quantities per size.
Verify that:
-
Each quantity line calculates correctly
-
The total quantity adds up
-
Bulk discounts and pricing rules apply as expected
✅ Next: Configure Profit Margin or Bulk Discount Rules
After setting up your Quantity component, proceed to define Profit Margin or Bulk Discounts to make your pricing more responsive and competitive at higher volumes.