The SC-Box module in PriceCal allows printers to create their own box products based on pre-defined open-size algorithms.
Unlike SC-Packaging (which integrates with Pacdora’s 3D design models), SC-Box enables you to manually define box structures that your machine can cut and produce — giving you full control over model creation, cost setup, and finishing options.
Best for: printers who produce boxes in-house and want to define their own box formulas and models.
🧭 Navigating to SC-Box Product Creation
-
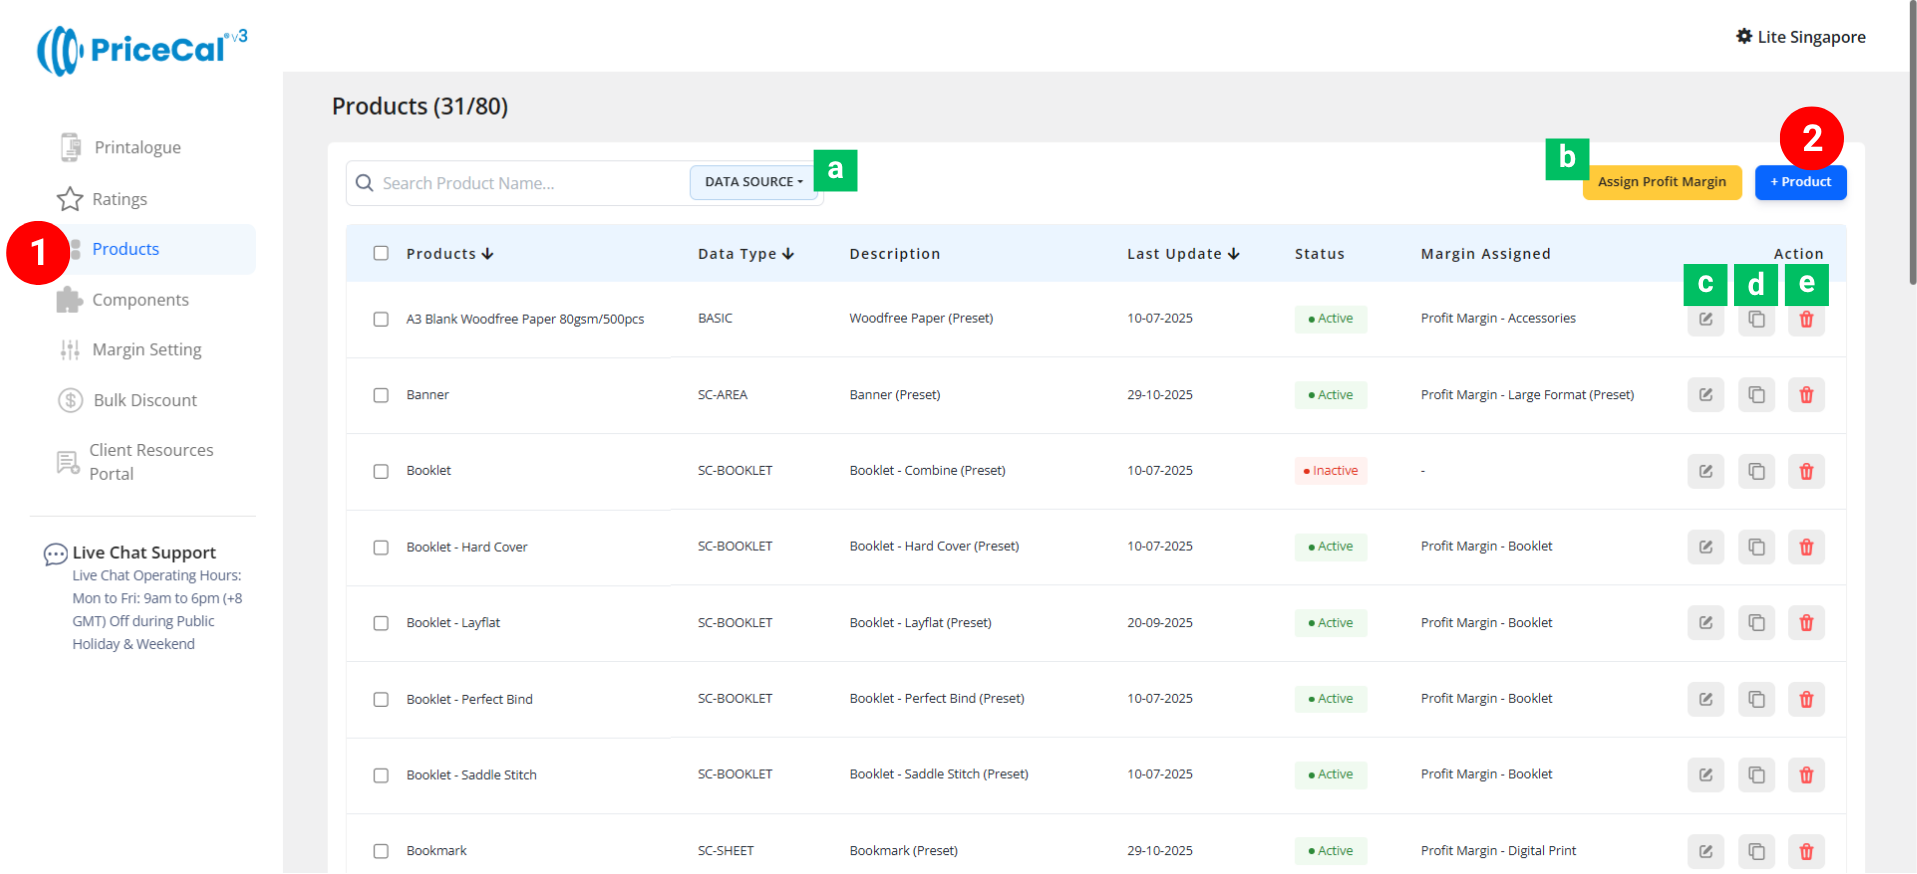
Go to your Product Dashboard.
-
Data Source Sorting [a] – Filter to view products from the same data source.
-
Assign Profit Margin [b] – Apply one profit margin setup to multiple products at once.
-
-
To create or manage a product, click Add Product – Start a new SC-Box product setup.
-
Edit [c] – Modify existing product details.
-
Duplicate [d] – Clone an existing product setup to reuse its structure.
-
Delete [e] – Remove unused or outdated products.
-
🧱 Create a SC-Box product
Step-by-Step Setup
-
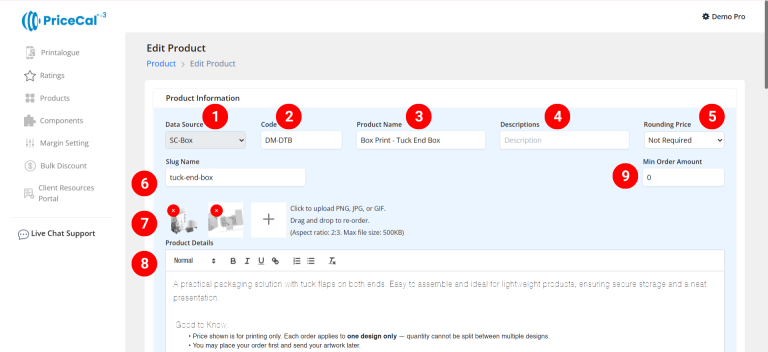
Select “SC-Box” as your product source.
-
Enter a unique code (up to 8 characters).
-
Input your Product Name, e.g., Box Print – Tuck End Box
-
Add a short Description to identify production type. Example: “Own Production”, “Outsource Production”
-
(Optional) Choose your Rounding Price— round price up/down to achieve integer pricing.
-
Enter a Slug Name to create a product link.
Example: Slug “tuck-end-box” → your link will be
https://lite.printmart.cc/products/tuck-end-box
If no slug is specified, a random code will be used. -
Upload Product and Box Model Images (up to 10).
-
Fill in your Product Details and Specifications, such as product, print specs, and production days.
-
(Optional) Set a Min Order Amount.
💡 Tip: Regardless of the print quantity or total price, there will be a minimum charge unless the calculated price exceeds the minimum order amount.
-
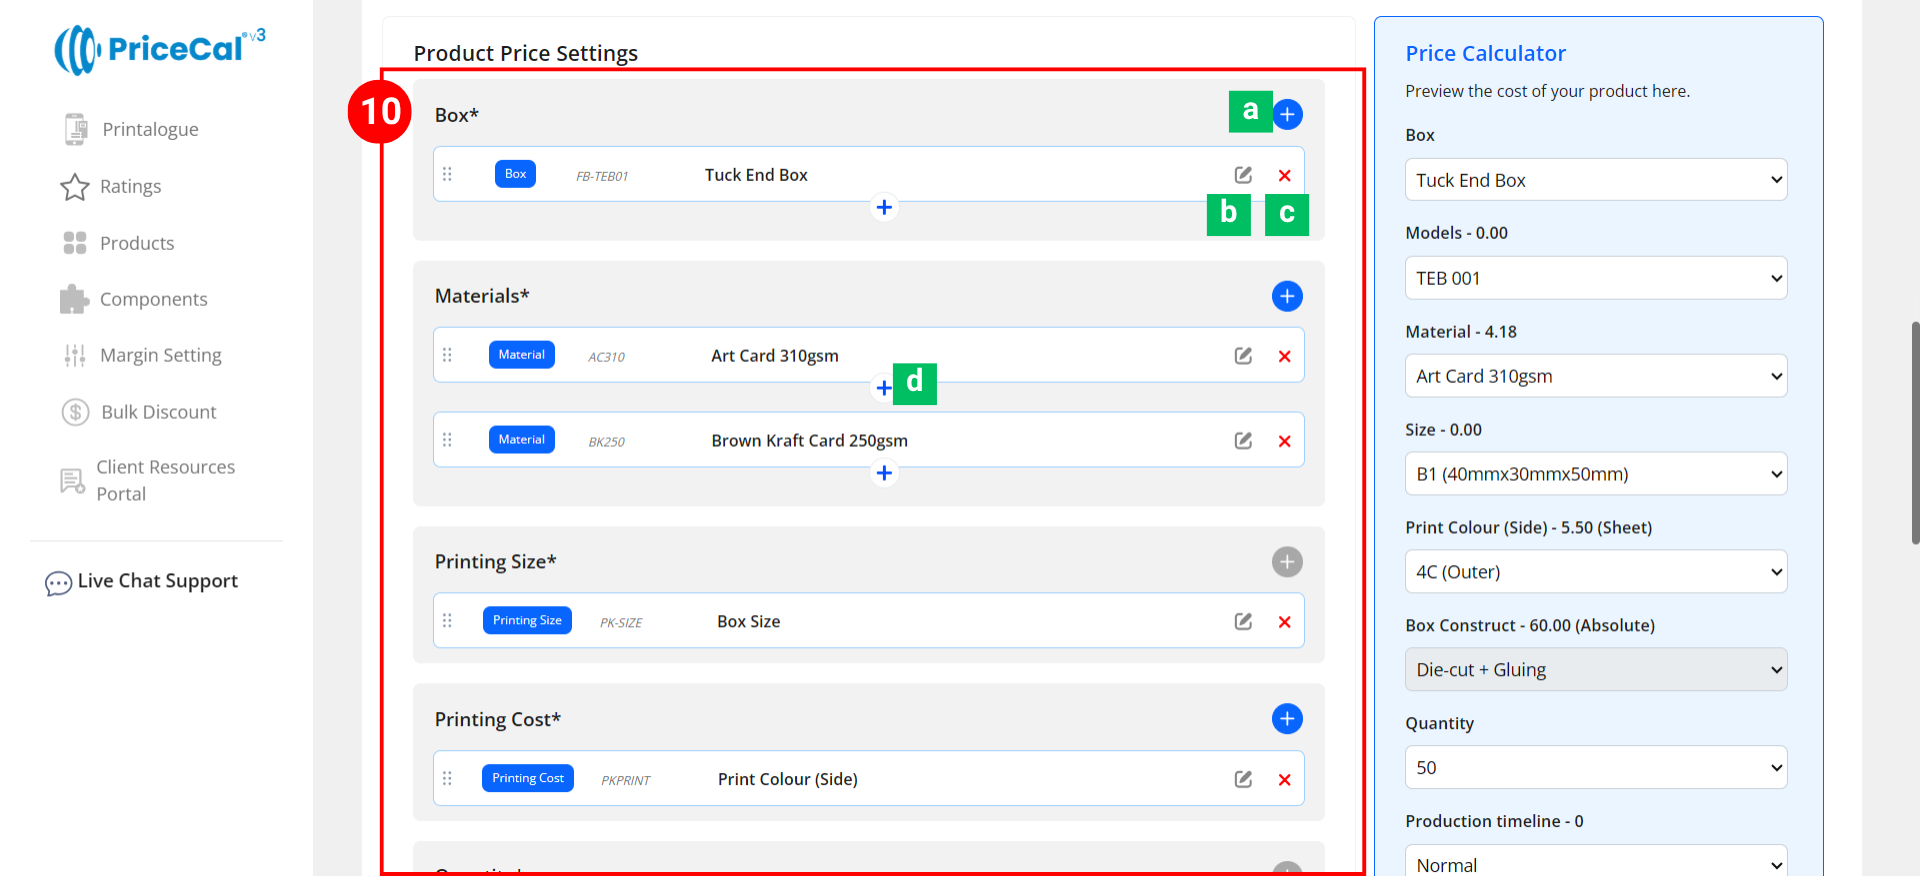
Assemble Product Components. Each product in PriceCal is built using multiple components.
Add and organize your components under the Component Section.- Add Component [a]:Click to add or create a new component for this product.
-
Edit [b]: Modify component setup (changes sync to all products using this component).
-
Delete [c]: Remove the component from the current product.
- Add Nesting Component for Material [d]: Add sub-components under a main one. Example: Add “Lamination” under “310gsm Art Card” so it only appears when that material is selected.

🔹 Required and Core Components
These must be included for every SC-Box product:
-
- Box– Add the Box component you created.
-
Material – Define the printing material (e.g., 310gsm Art Card, 128gsm Gloss Paper).
-
Printing Size – Set product print size
💡 Note: If the open size of your packaging or box model exceeds the Max Material Print Area, the system will stop the customer from proceeding to the next selection (printing cost, or finishing). -
Printing Cost – Configure Printing side and cost
-
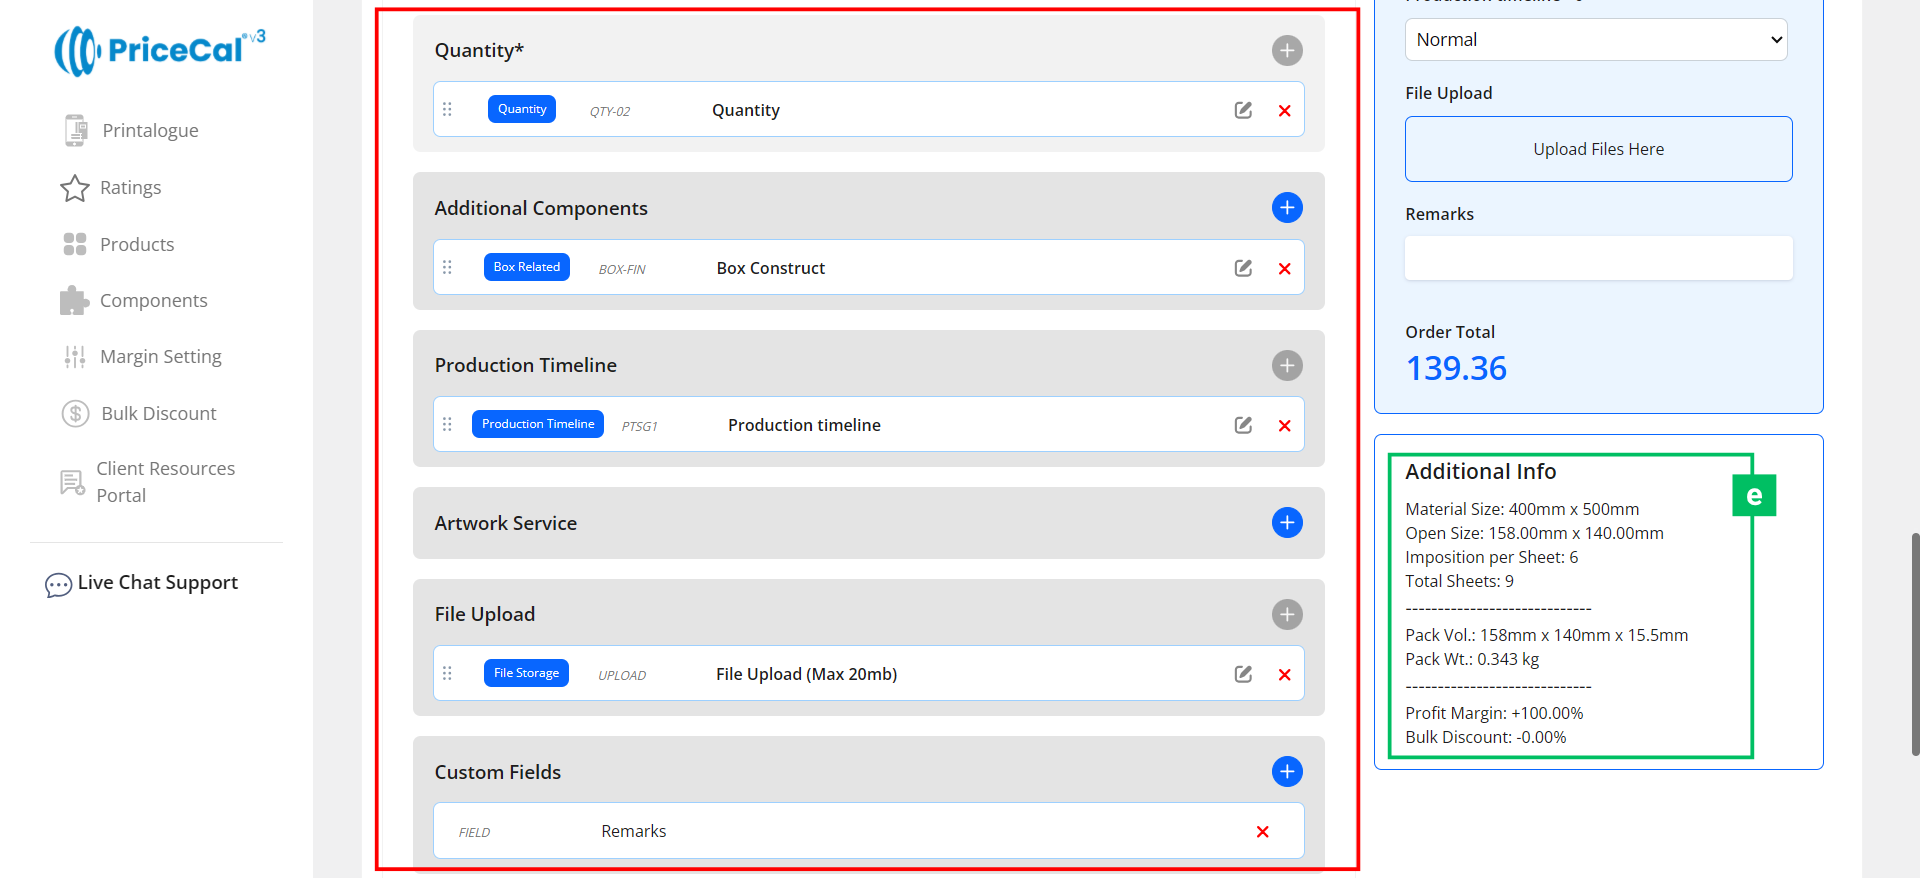
Quantity – Define customer-selectable quantities.
🔸 Optional System & Custom Components
Add these depending on your product requirements:
-
-
Additional Component – Finishing options such as Lamination, Cutting, Finishing.
-
Production Timeline – Offer flexible production speed (Normal / Next Day / Same Day).
-
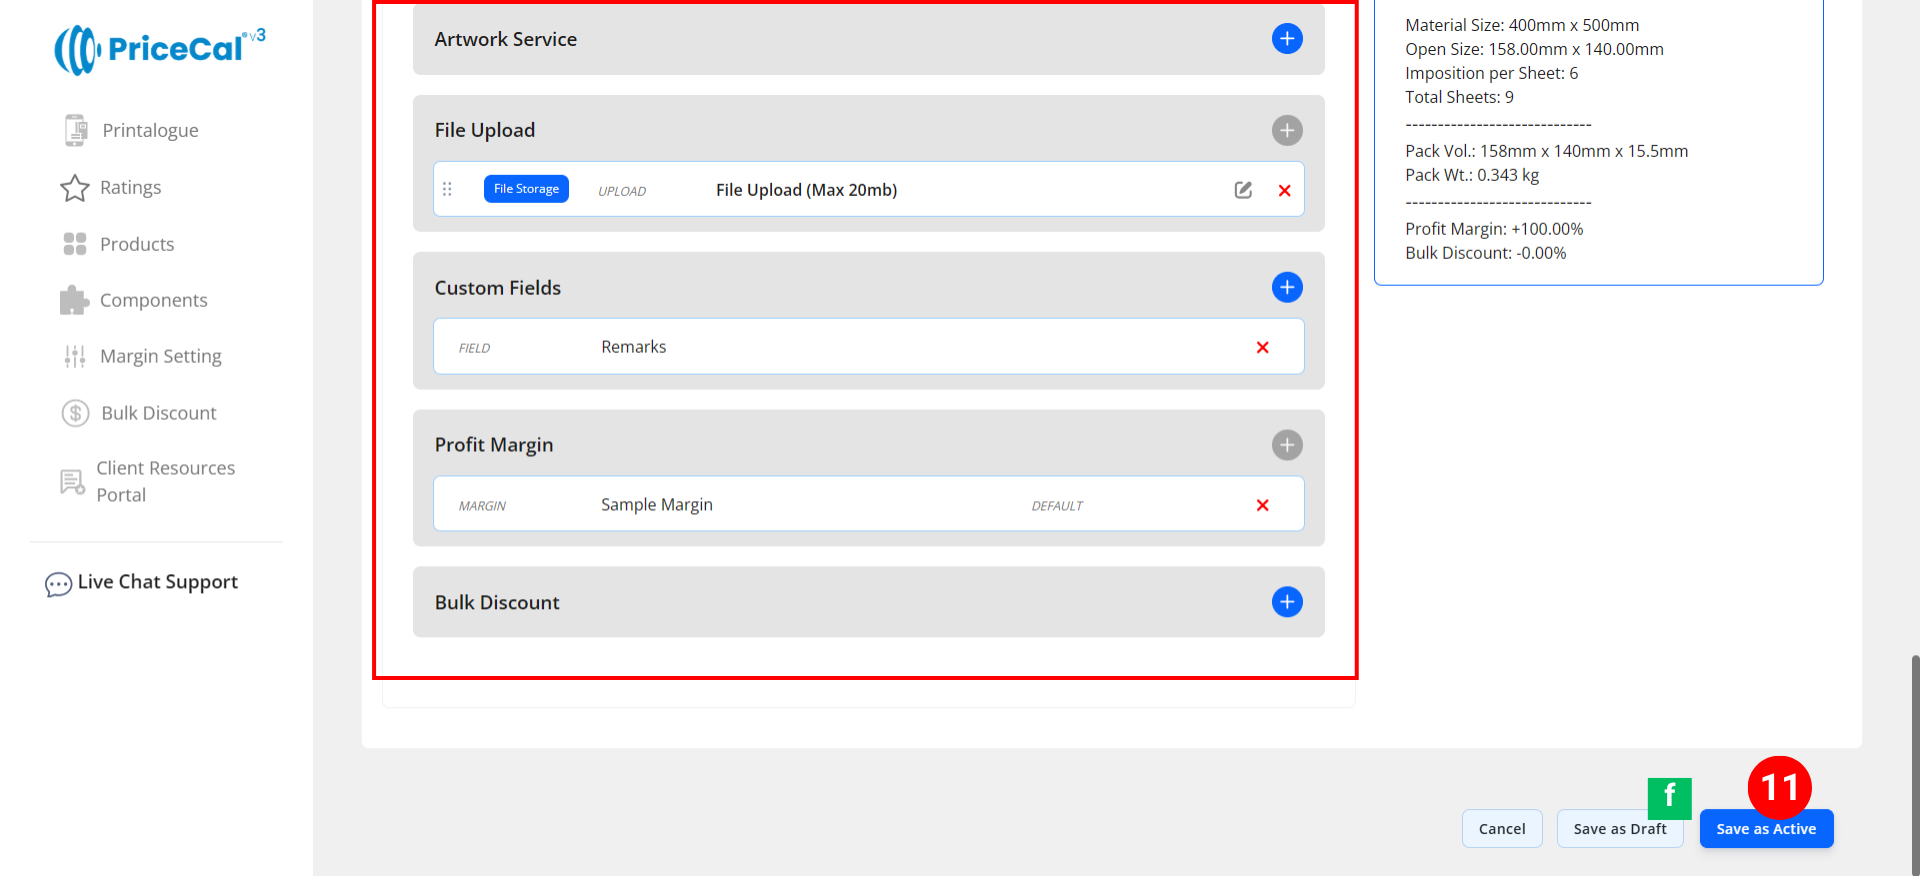
Artwork Service – Design or setup service options if applicable.
-
File Upload – Enable file upload and select storage location (WordPress or Dropbox). [Only displayed after integration into WordPress website]
-
Custom Fields – Collect extra info or artwork links (e.g., Google Drive link, ).[Only displayed after integration into WordPress website]
-
Profit Margin – Apply different profit percentage levels.
-
Bulk Discount – Automatically apply discounts for large orders.
-
🧾 Additional Info [e]: Get instant calculation insights
-
- Printing Parameters – Shows nesting type, material size, Imposition per Sheet, and Total Sheet.
-
Package Overview (est.) – Calculates estimated volume and weight based on GSM, thickness, and quantity.
-
Financial Overview – Displays applied profit margin and bulk discount summary.
11. Finalize the Product
After setting up all details and components:
-
-
Click “Save as Active” to publish the product to your storefront.
-
(Optional) Click “Save as Draft [f]” to keep the product inactive and hidden from the shop until ready.
-
💡 Best Practices & Tips
-
Understand the Difference:
SC-Box uses PriceCal’s built-in open-size algorithm — you manually define box sizes and formulas.
SC-Packaging, on the other hand, connects to Pacdora and lets you import box models directly. -
Test your formulas: Always test open-size calculations before publishing to ensure accurate sheet usage.
-
Use descriptive names: Clearly label box models (e.g., “Double Tuck End – Small”) to make them easy to identify later.
-
Upload multiple model images: Include structural, folded, and flat views to improve customer clarity.
-
Set minimum order amount: Prevent small-quantity orders from falling below profitable thresholds.
-
Apply profit margins per box type: Different materials or box models may require different markup levels.
-
Clone & modify: Save time by duplicating existing SC-Box setups and adjusting parameters for new models.