Overview
The CSV Product setup is designed for products with complex or highly customized pricing structures that are best managed through a CSV price list.
This is ideal for items with many price permutations — such as Tent Cards, NCR Forms, or Calendar — where each option, size, or quantity has a specific price.
With PriceCal’s CSV Data Source, you can upload a full pricing file directly, saving countless hours of manual setup while maintaining full flexibility to add optional components and profit margins.
🧭 Navigating to CSV Product Creation
-
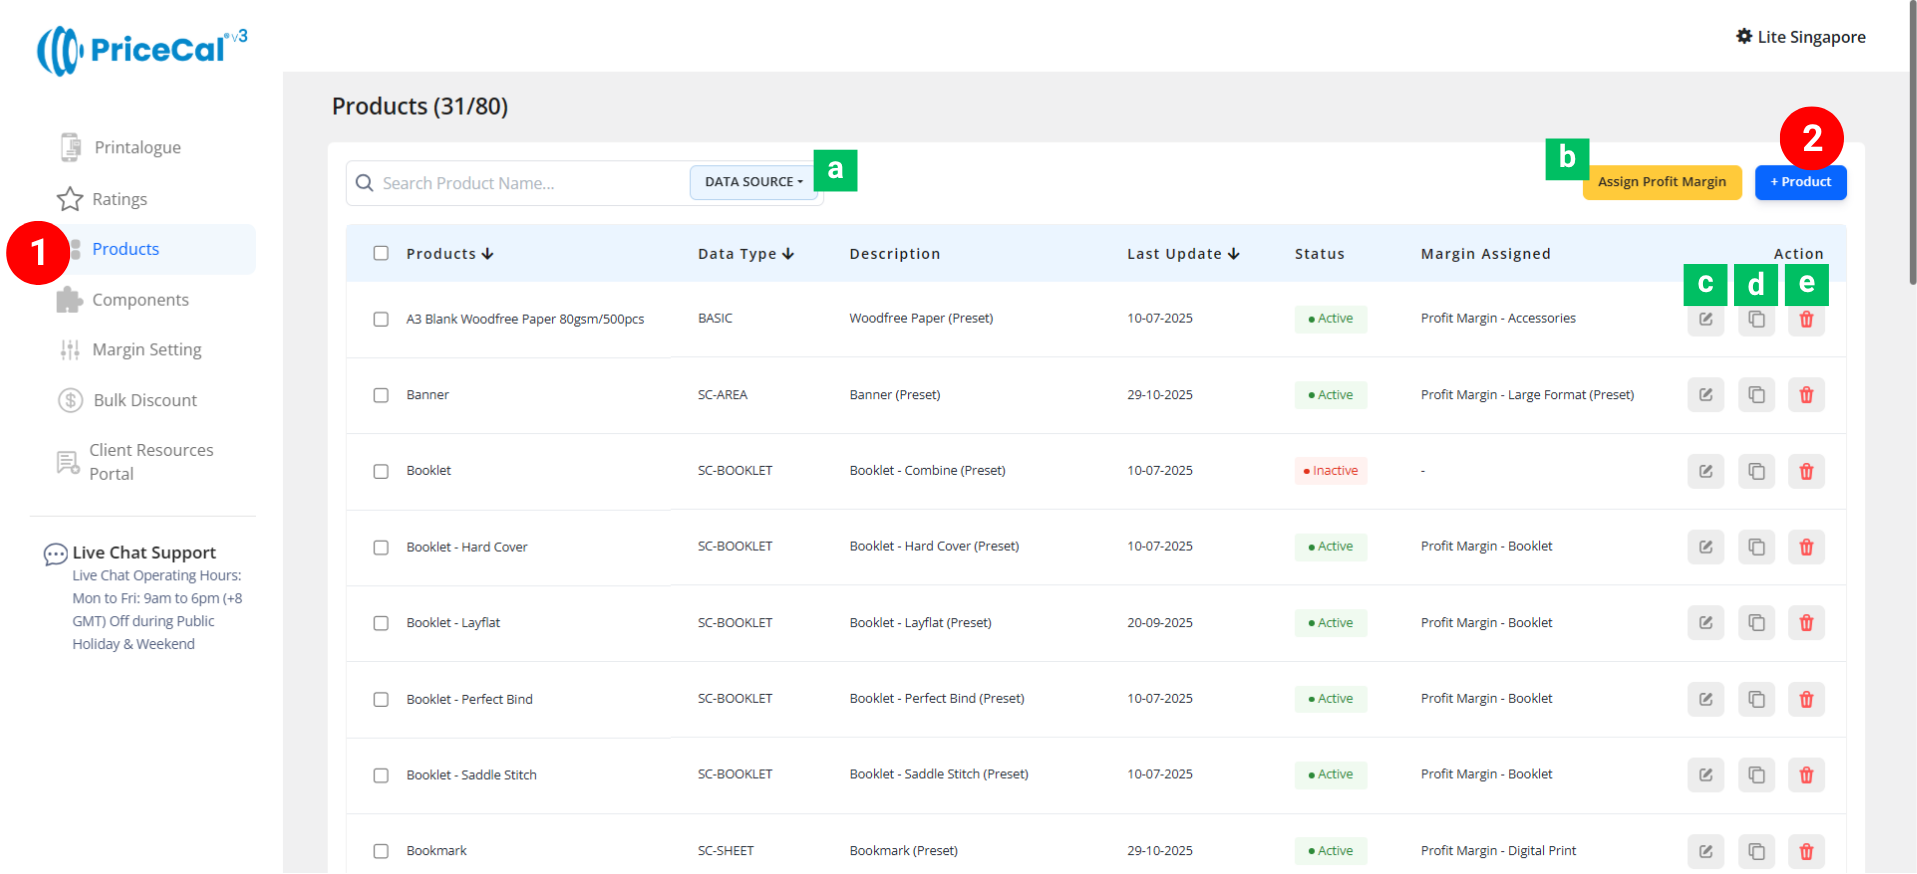
Go to your Product Dashboard.
-
Data Source Sorting [a] – Filter to view products from the same data source.
-
Assign Profit Margin [b] – Apply one profit margin setup to multiple products at once.
-
-
To create or manage a product, click Add Product – Start a new product setup.
-
Edit [c] – Modify existing product details.
-
Duplicate [d] – Clone an existing product setup to reuse its structure.
-
Delete [e] – Remove unused or outdated products.
-
🧱 Create a CSV product
Step-by-Step Setup
-
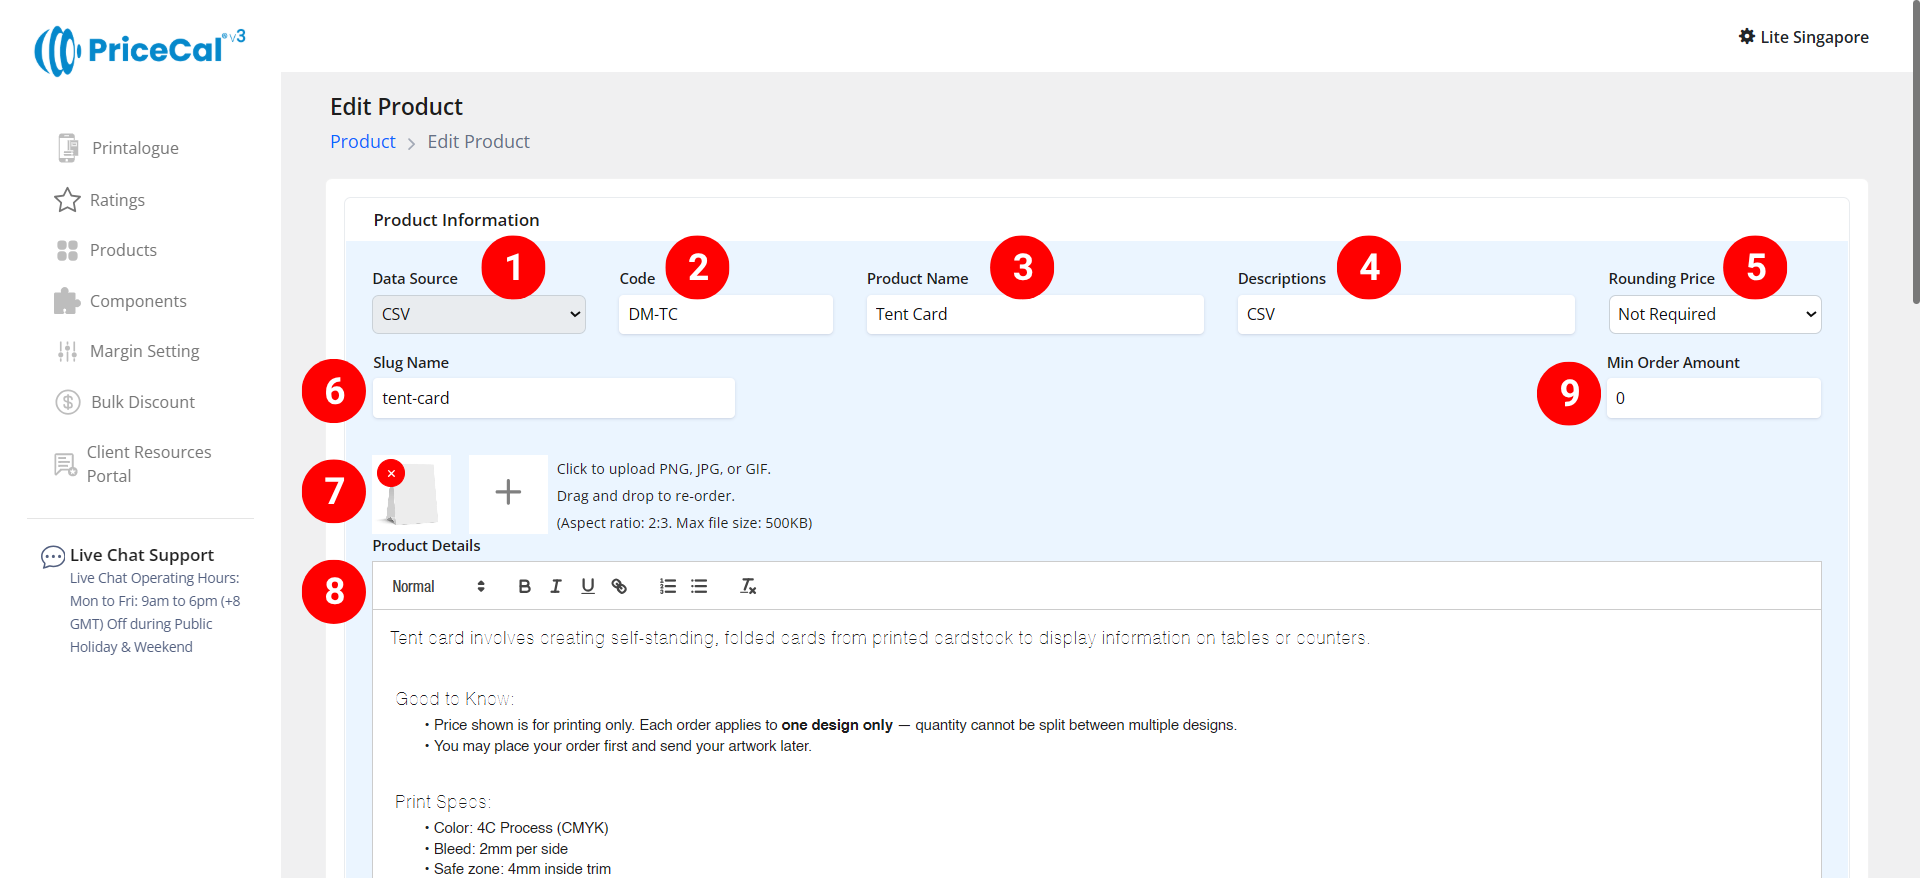
Select “CSV” as your product category.
-
Enter a unique code (up to 8 characters).
-
Input your Product Name based on the CSV pricing file you prepared
-
Add a short Description to identify production type. Example: “Own Production”, “Outsource Production”
-
(Optional) Choose your Rounding Price— round price up/down to achieve integer pricing.
-
Enter a Slug Name to create a product link.
Example: Slug “tent-card” → your link will be
https://lite.printmart.cc/products/tent-card
If no slug is specified, a random code will be used. -
Upload Product Images (up to 10).
-
Fill in your Product Details and Specifications, such as product, print specs, and production days.
-
(Optional) Set a Min Order Amount.
💡 Tip: Regardless of the print quantity or total price, there will be a minimum charge unless the calculated price exceeds the minimum order amount.
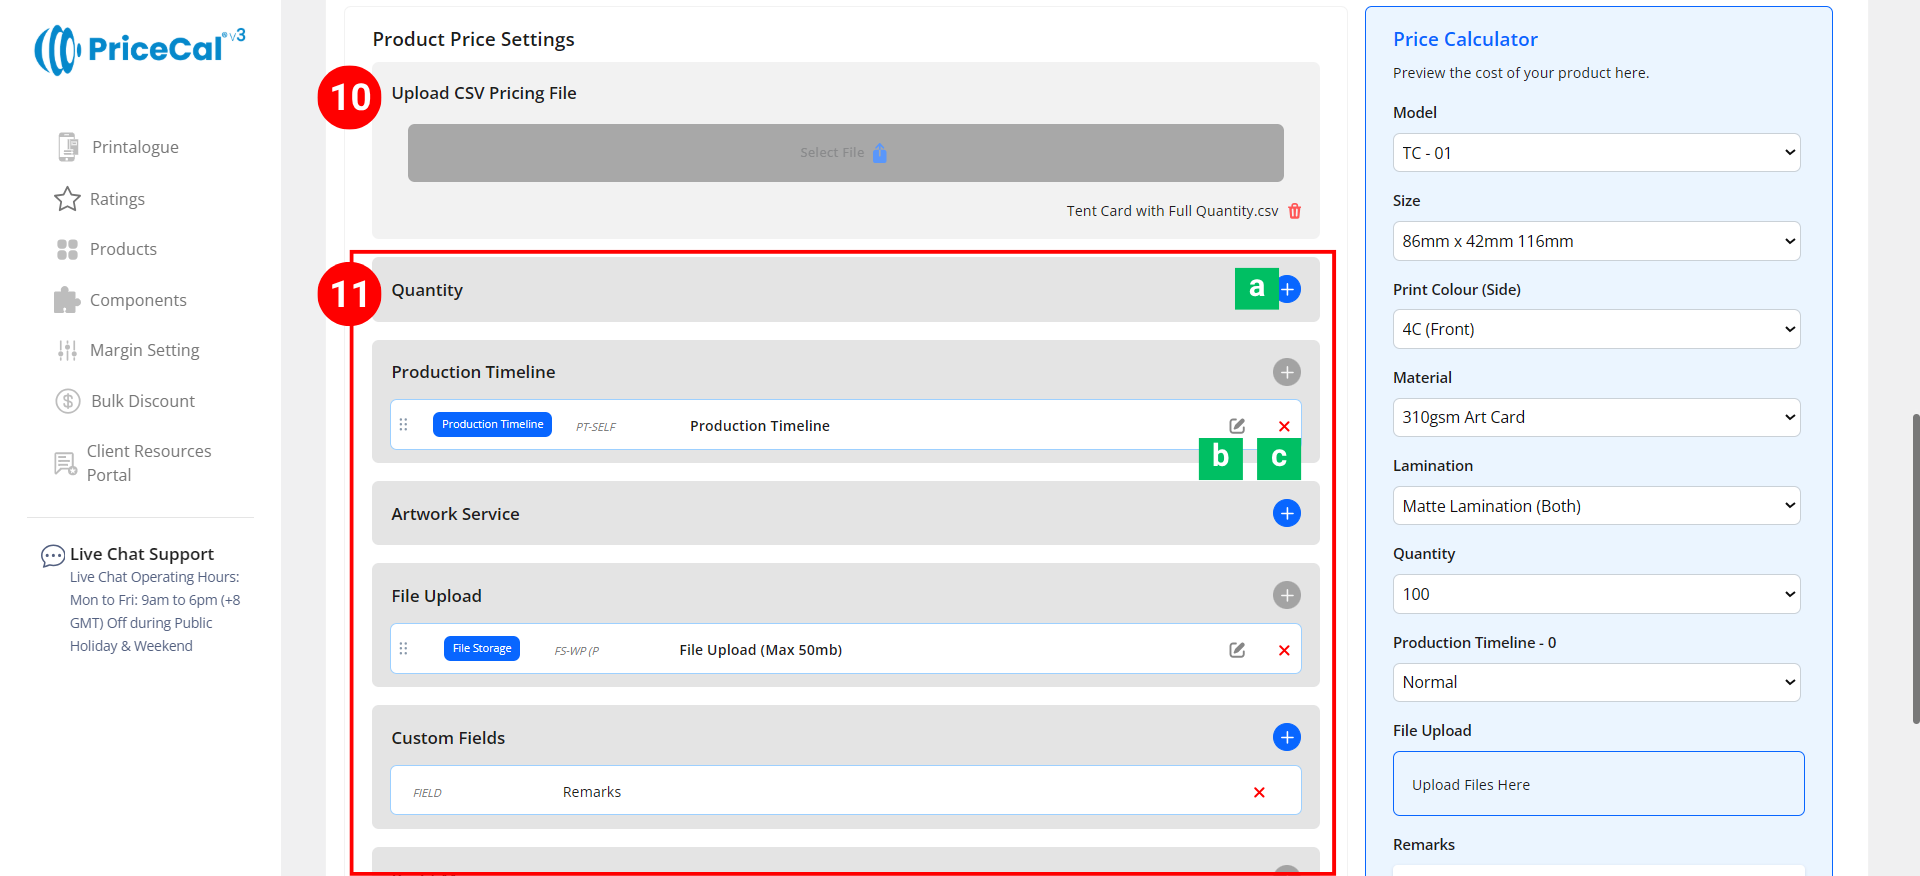
- Upload your CSV pricing file. [How to create CSV pricing file?]
-
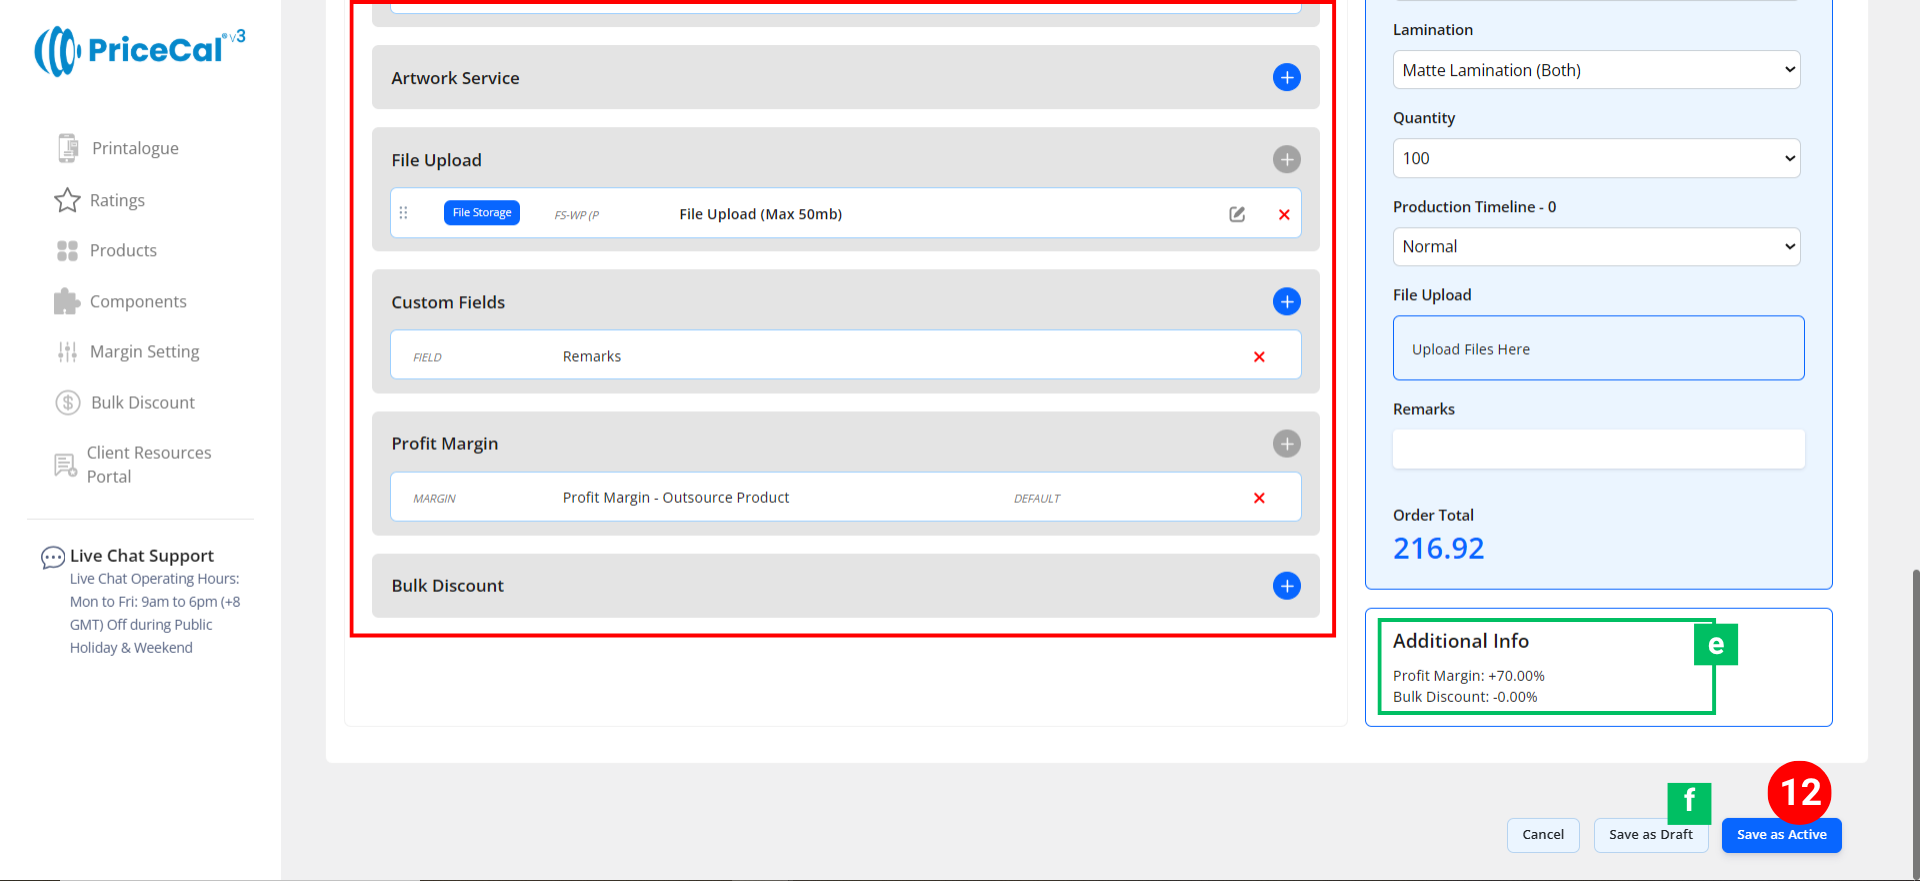
Assemble Components. You can still add extra services, margins, or options using the Components section.
- Add Component [a]: Add or create a new component (e.g., Artwork Service, Timeline).
-
Edit [b]: Modify component setup (changes sync to all products using this component).
-
Delete [c]: Remove the component from the current product.
🔸 Optional System & Custom Components
Add these depending on your product requirements:
-
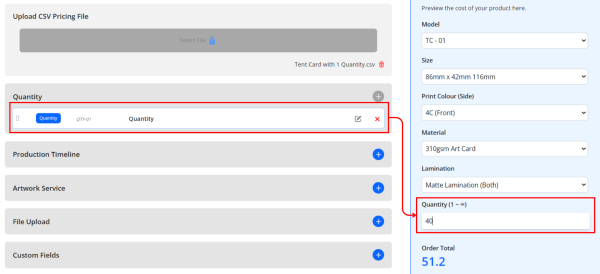
- Quantity – Define customer-selectable quantities. (for CSV price file with 1 Quantity only)
Just prepare the 1-piece cost in your CSV file — the system will automatically calculate the total price by multiplying 1 piece cost × quantity.
-
Production Timeline – Offer flexible production speed (Normal / Guaranteed Date).
-
Artwork Service – Design or setup service options if applicable.
-
File Upload – Enable file upload and select storage location (WordPress or Dropbox). [Only displayed after integration into WordPress website]
-
Custom Fields – Collect extra info or artwork links (e.g., Google Drive link, ).[Only displayed after integration into WordPress website]
-
Profit Margin – Apply different profit percentage levels.
- Bulk Discount – Automatically apply discounts for large orders.
- Quantity – Define customer-selectable quantities. (for CSV price file with 1 Quantity only)

🧾 Additional Info [e]: Get instant calculation insights
-
-
-
Financial Overview – Displays applied profit margin
-
-
12. Finalize the Product
After setting up all details and components:
-
-
-
Click “Save as Active” to publish the product to your storefront.
-
(Optional) Click “Save as Draft [f]” to keep the product inactive and hidden from the shop until ready.
-
-
💡 Best For
The CSV Product Data Source is ideal for:
- 🧾 Tent Cards
- 📋 NCR / Invoice Books
- 🎫 Event Passes or Labels
- 📘 Certificates / Certificates with Options
- 💎 Promotional Items with tiered pricing
🧠 Best Practices & Tips
-
Prepare your CSV clearly — keep column titles simple and consistent.
-
Use Full Quantity CSV for complex pricing, or 1 Quantity CSV if using system Quantity component.
-
Include optional components like profit margin and timeline for more flexibility.
-
Add a minimum order amount to protect from underpriced small orders.
-
Use rounding for clean pricing and better customer perception.
-
Test uploaded prices before publishing to ensure accurate display.
-
Add clear product images to make each option easy to identify visually.