🧾 Setting Up Printing Cost (SC-Sheet / SC-Box / SC-Packaging)
Every print job has two essential sides of cost — material and printing.
This tutorial focuses on setting up Printing Cost for SC-Sheet, SC-B0x and SC-Packaging products — covering everything from print sides to color types and page-based logic.
🔹 What Is Printing Cost?
The Printing Cost component defines how much it costs to print on each material — based on ink coverage, print sides, and method.
For sheet-based or packaging jobs, this determines how your total print price scales with quantity and layout.
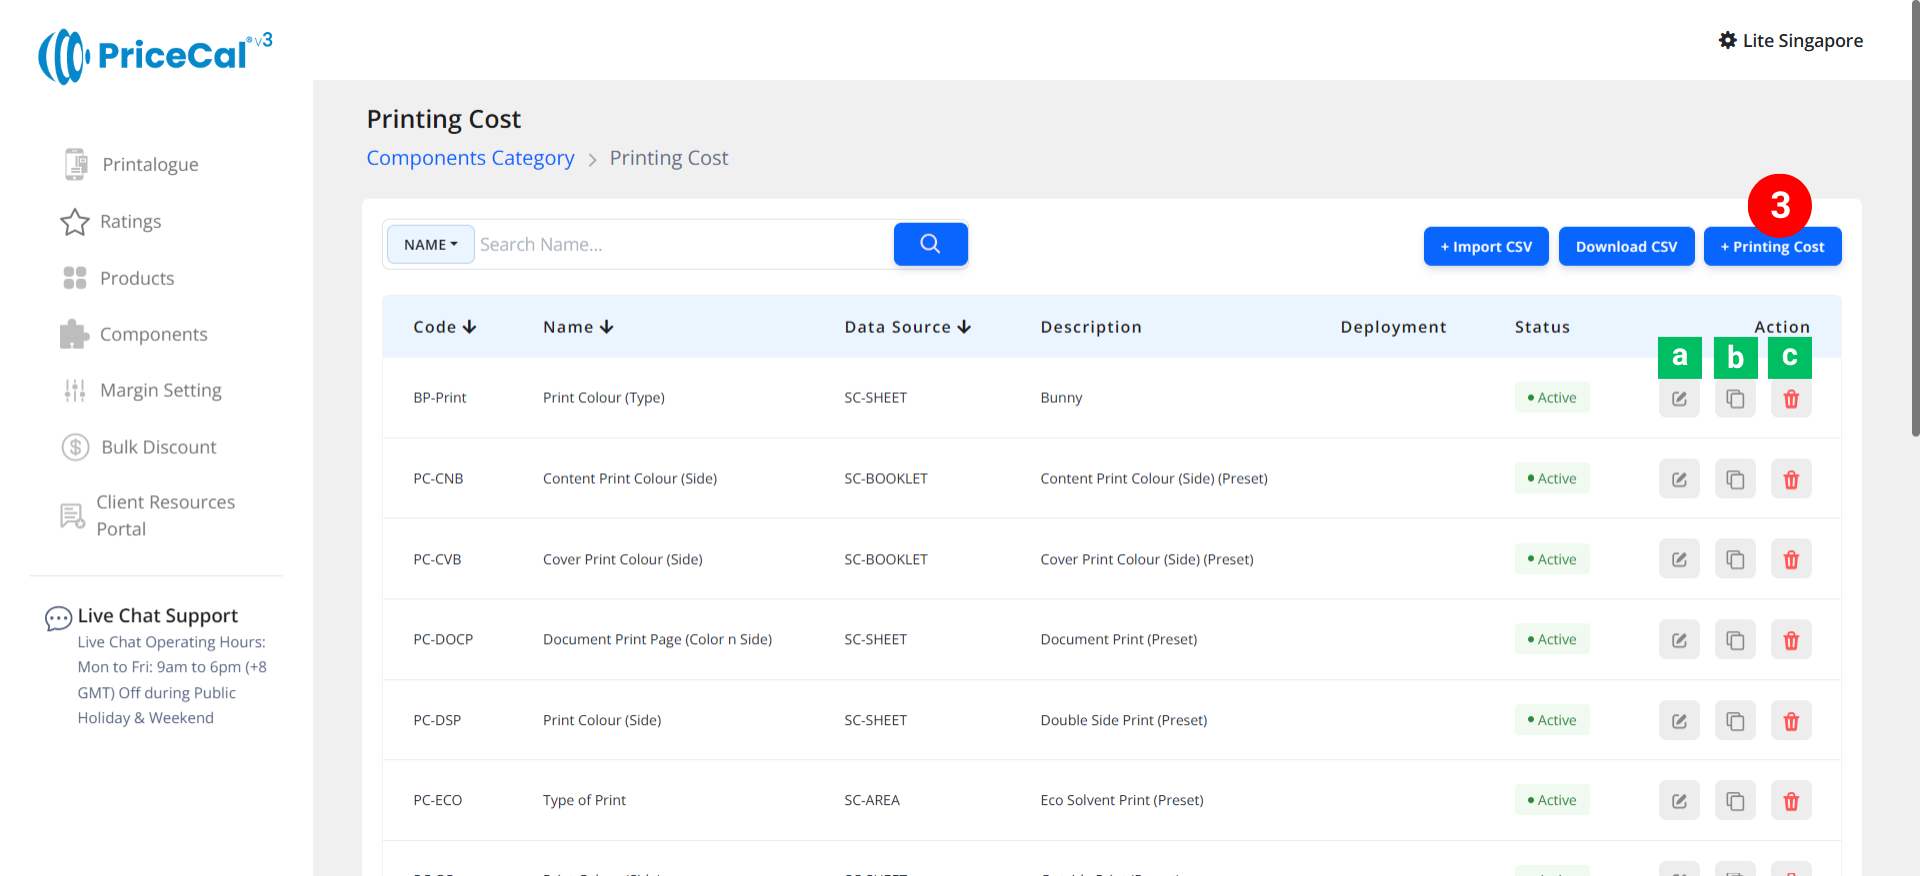
🧭 Navigating to Printing Cost Setup
- Go to Component dashboard
- Click Printing Cost category

- Add Printing Cost
Edit [a]: modify existing components.
Duplicate [b]: clone a component setup to reuse and create new.
Delete [c]: remove unused component.

🧱 Create a Sheet Form Printing Cost (SC-Sheet / SC-Box / SC-Packaging)
Step-by-Step
-
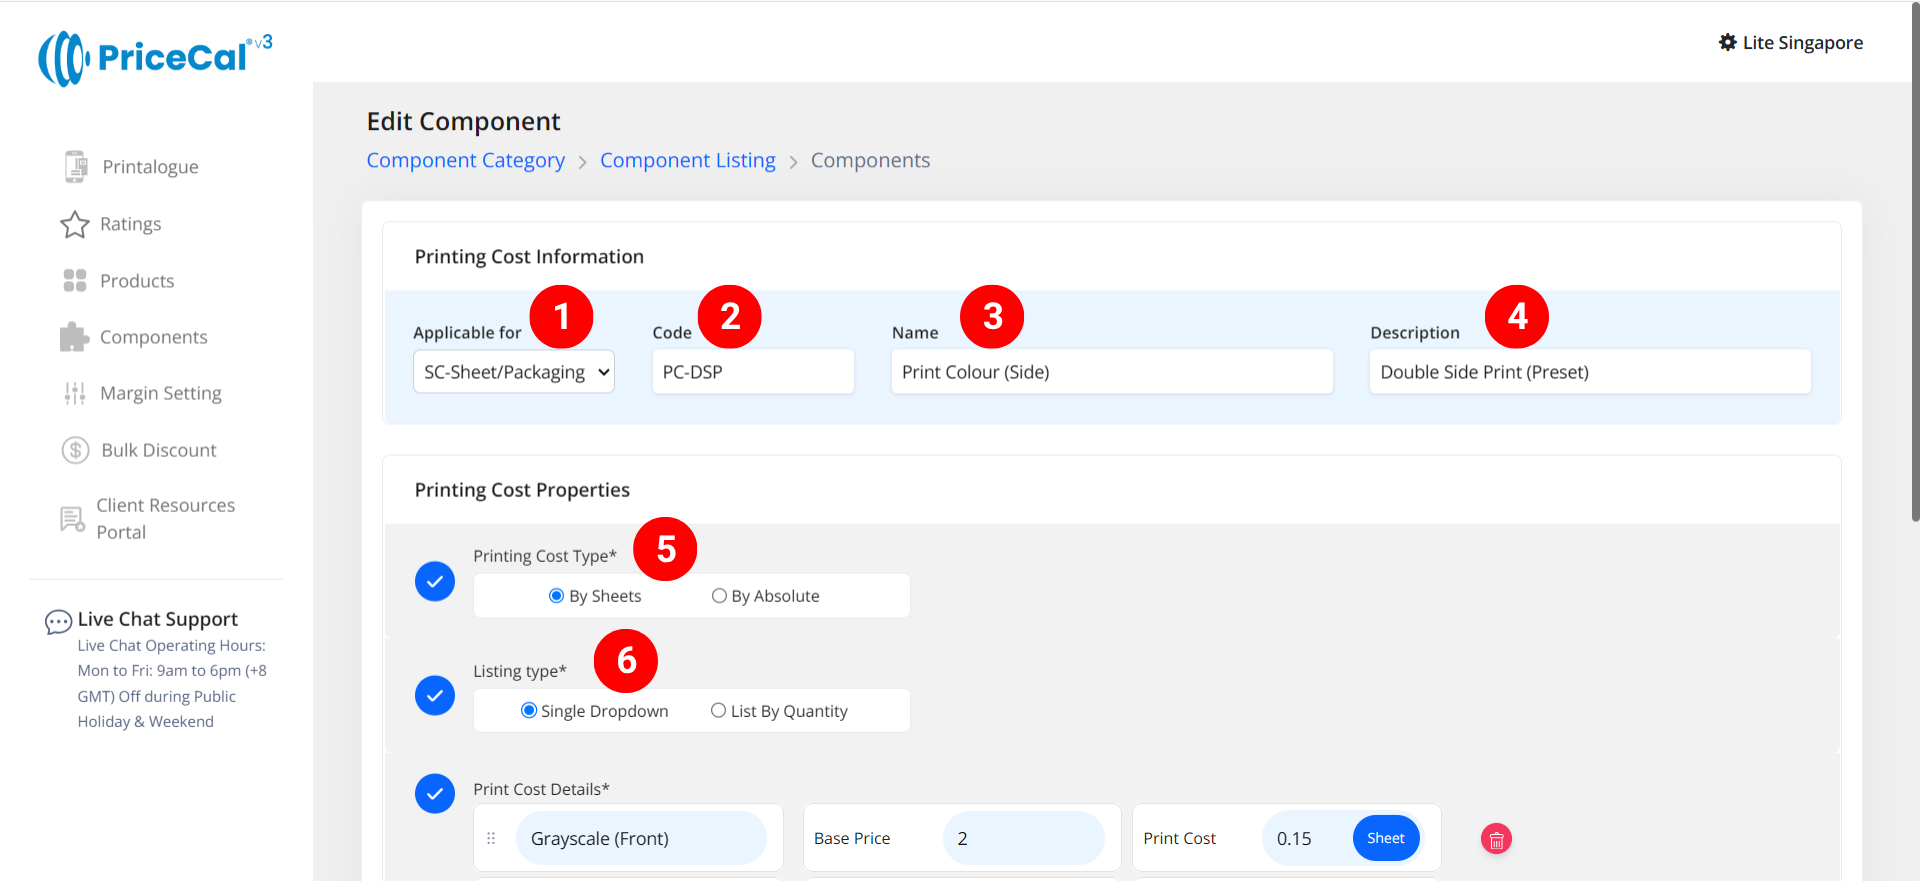
select “SC-Box/Sheet/Packaging”
-
Put a unique code (up to 8 units)
-
Enter the printing cost name. i.e. Print Colour (Side)
-
Enter the printing cost component description. (description is important, it will help you to quickly know the information of this printing type, such as print side)
-
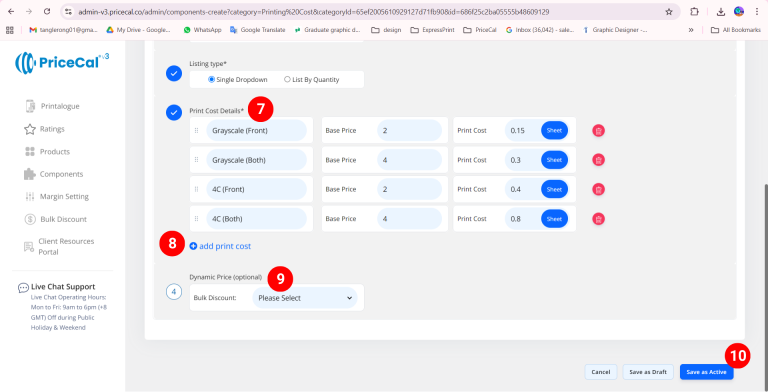
Select the printing cost type.
– By Sheet: calculates how many print pieces can fit within the maximum printable area of one sheet.It then multiplies the number of sheets needed by your per-sheet print cost. (total sheets required x print cost per sheet).
– By Absolute: Calculates the print cost per piece, multiplying the total print quantity by a per-piece rate. (print quantity x print cost per absolute) -
Select the listing type
– Single Dropdown: Customer can only choose one printing specification (e.g., “Single Side” or “Double Side”).
– List By Quantity: Each printing specification appears as a separate field where customers can enter page counts or quantities.(💡 Tips: Best for document or packaging jobs where color and B/W pages need separate counts.)
-
Enter the print cost detail
– Selection Name: The name of the specification customers will see (e.g., “Single Side,” “Double Side”).
– Base Price: This is the startup price. Regardless of the number of copies printed, there will be a one-time fixed cost for this print type first before calculate the cost per sheet.
– Per Sheet: Cost per sheet of print cost. i.e. Ink Cost (used when “By Sheet” is selected).
– Per Absolute: Cost per piece of print quantity (used when “By Absolute” is selected). -
Add print cost if you have other specifications available for your customers to choose from
-
(optional) Set a Bulk Discount. If no need, just keep it in “Please Select”
💡 Tips: When the cost per sheet of paper you entered is higher than the original cost, you can offer a bulk discount to bring the paper cost back down when printing volumes are large, thus preventing the paper cost from becoming too high. -
Click “Save as Active” to finalize your printing cost setup.

⚙️ How PriceCal Calculates Printing Cost
When customers place an order:
-
The system identifies how many sheets (or pieces) are needed.
-
It multiplies by your per-sheet / per-absolute cost.
-
Adds your base price once per job.
-
Displays the total printing cost automatically in real time.
✅ This ensures your cost remains accurate, consistent, and scalable regardless of print quantity or product type.
🎯 Why This Setup Is Important
Accurate printing cost setup allows you to:
-
✅ Reflect real press cost and efficiency
-
✅ Offer correct pricing for both small and bulk jobs
-
✅ Maintain stable profit margins
-
✅ Simplify updates for different packaging print methods
Together with Material, Size, and Quantity, the Printing Cost forms one of the “Four Heavenly Kings” — the foundation of smart print pricing in PriceCal.
✅ Next: Configure Printing Size or Quantity
After completing your printing cost setup, continue to define Printing Sheet Size, Booklet Size, Box Size and Quantity to fully automate your quote and sales workflow.