How Your Customers Get and Use the Online Design Studio (Printalogue)
This guide explains how the online design studio (powered by Pacdora) works from a customer’s point of view on your Printalogue shopfront, and how your team can support them and access their design links.
1. Overview: What Is the Online Design Studio?
The online design studio is a browser-based editor that lets your customers:
- Create and preview packaging box designs in 3D
- Automatically use the correct custom dieline based on their selected specs
- Save and return to their design any time
- Download print-ready files after payment


On Printalogue, the design link is generated automatically from the PriceCal / Printalogue shopfront flow—no manual setup needed from your side.
2. Customer Flow: From Selection to Design [Customer View]
Here’s the full journey your customers will follow on the Printalogue shopfront.
Step 1: Customer Selects Product & Fills in Contact Details
-
- Customer selects the packaging box product and configures options (size, material, quantity, etc.) using the PriceCal interface.
- After selection, the customer needs to fill in:
- Name
- Phone number (ideally a WhatsApp number)
- Email address

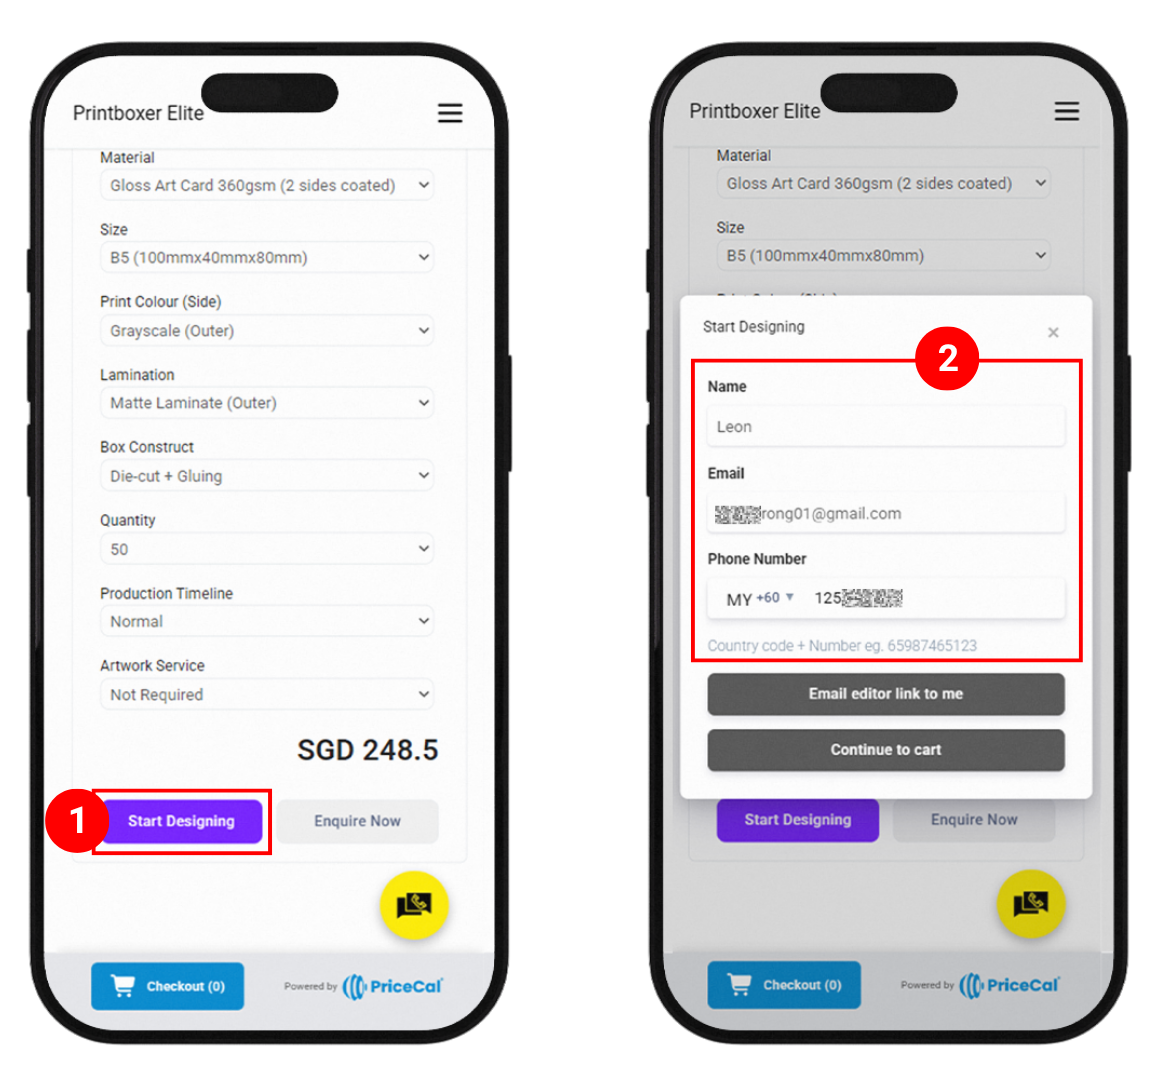
These details are used to send the editor link and order/cart information.
Step 2: Customer Chooses How to Proceed
After filling in their details, the customer can choose one of two ways:
Option 1: “Send Editor Link to me”
-
- The customer chooses “Send Editor Link to me”.
- They will receive:
- A Design Studio link (Pacdora editor link)
- A Cart link to checkout
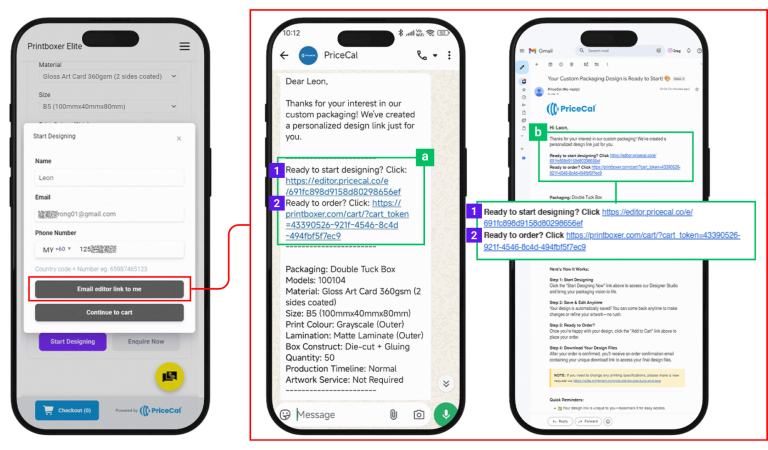
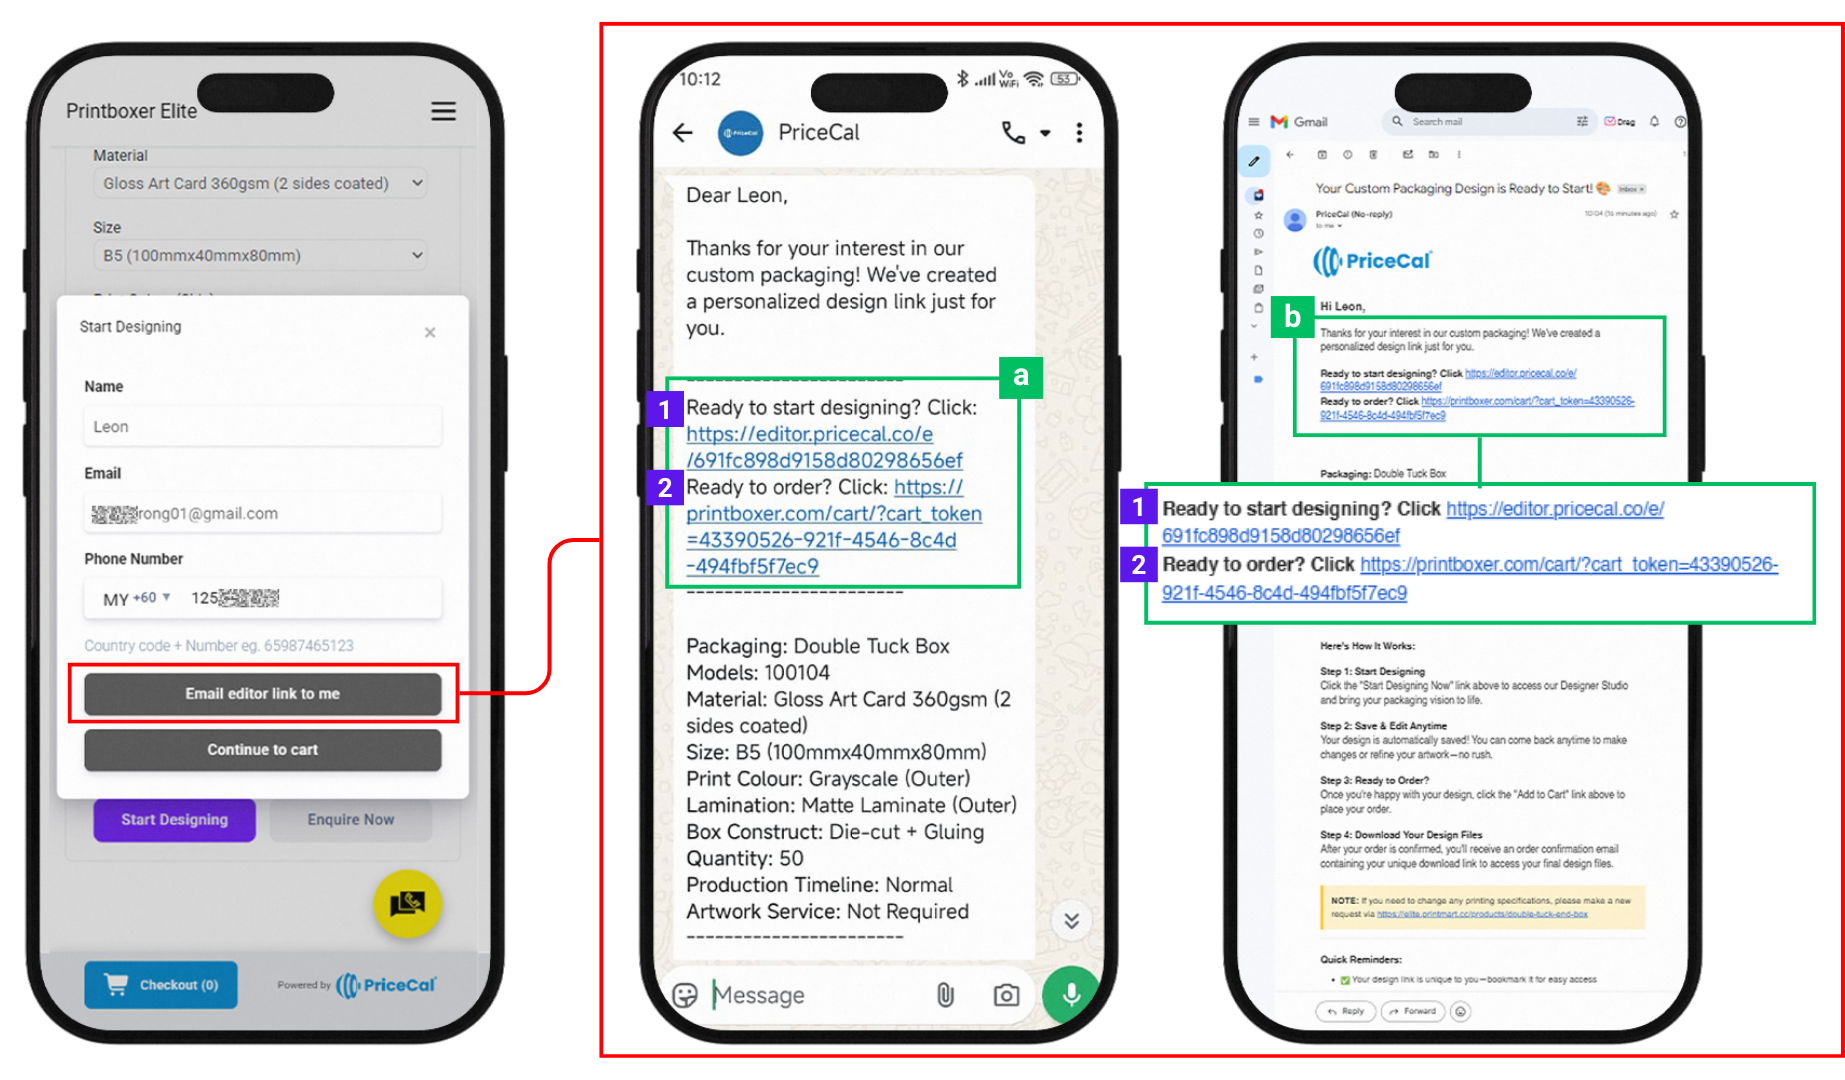
How they use it:
-
- Click the Design Studio link to open the online editor.
- Design their box (add logo, text, colors, etc.).
- When they are happy with the design, they must click the Cart link to:
- Return to the cart
- Proceed to Checkout and make payment
This option is ideal for customers who want to design later or on another device.
Option 2: “Continue add to cart”
-
- The customer chooses “Continue add to cart”.
- They can then click the Checkout button to jump directly to the Cart and proceed with payment.
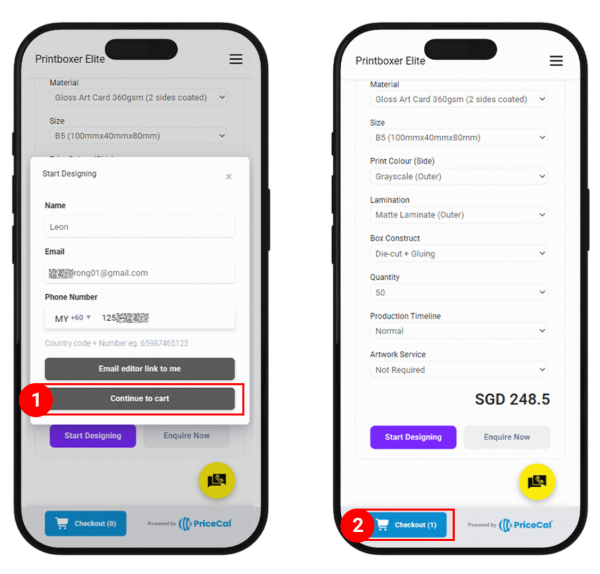

From there, they can:
-
- Click “Continue Design” on the cart page to open the editor and design before paying, or
- Pay first (if they only want the dieline) and download files after.
3. Designing and Editing on the Cart Page
When the customer is on the Cart page:
- They will see a “Continue Design” link next to the item.
- Clicking “Continue Design” opens the online design studio (Pacdora) for that specific order.

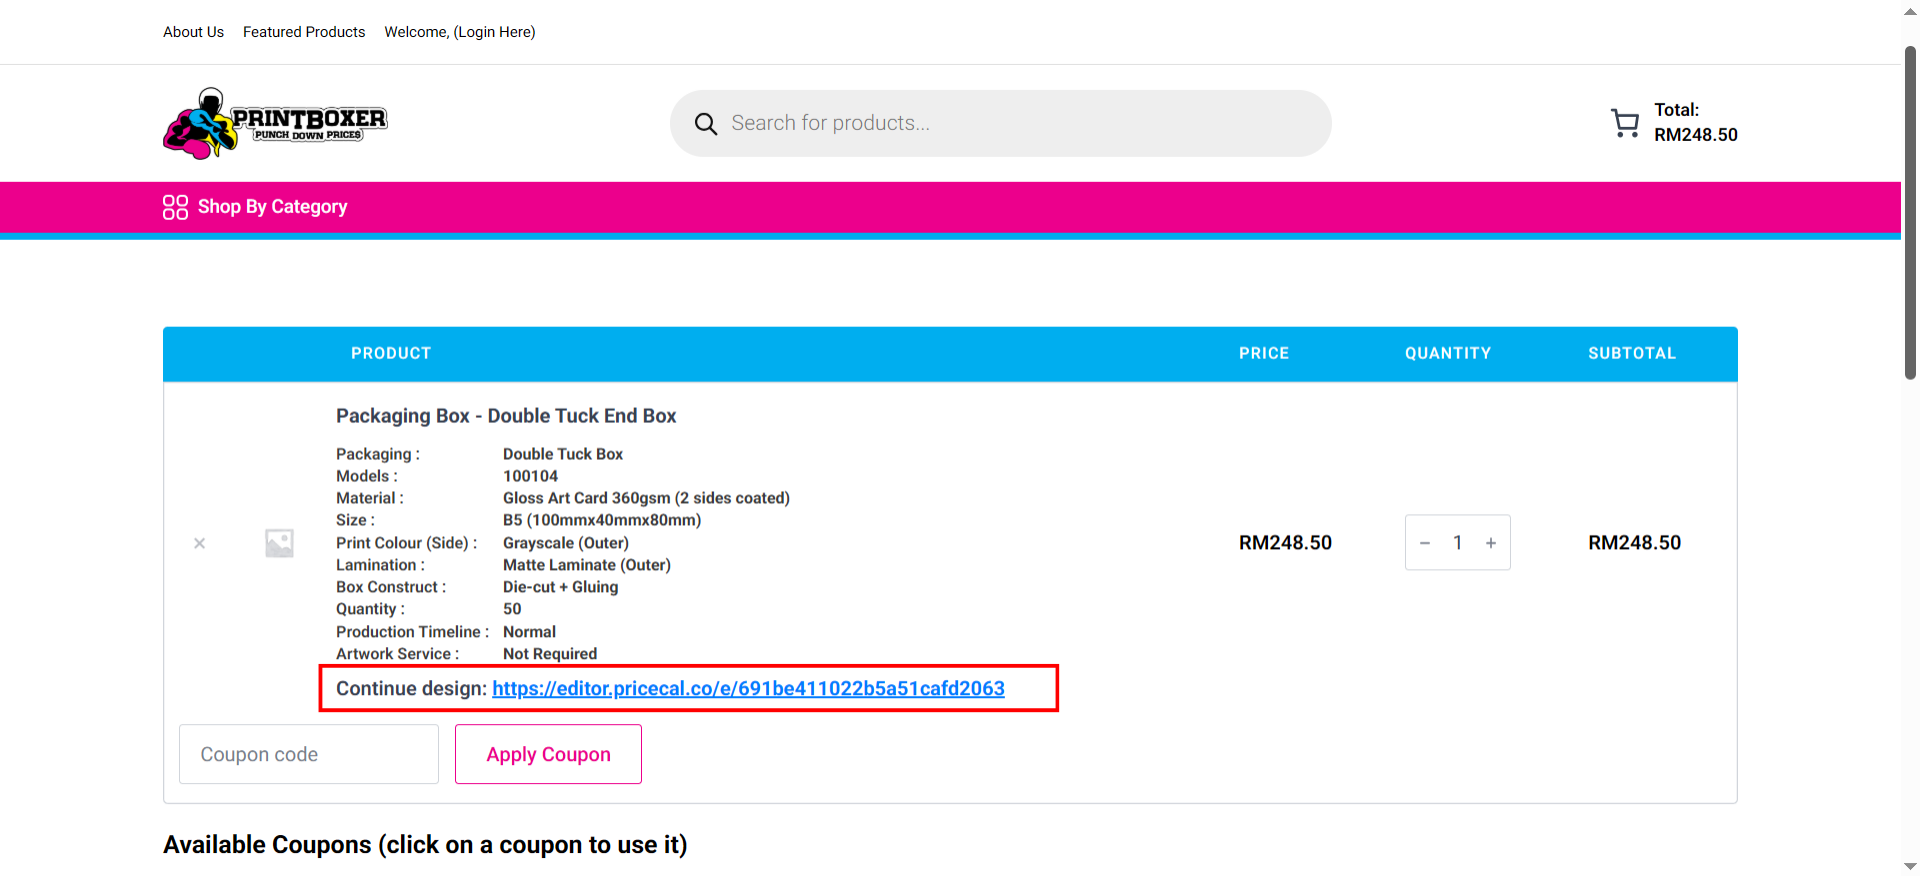
Key points:
- The “Continue Design” link is tied to that exact product configuration.
- The customer can edit the artwork multiple times before payment.
- If they close the editor, they can come back to the cart and click “Continue Design” again to continue editing.
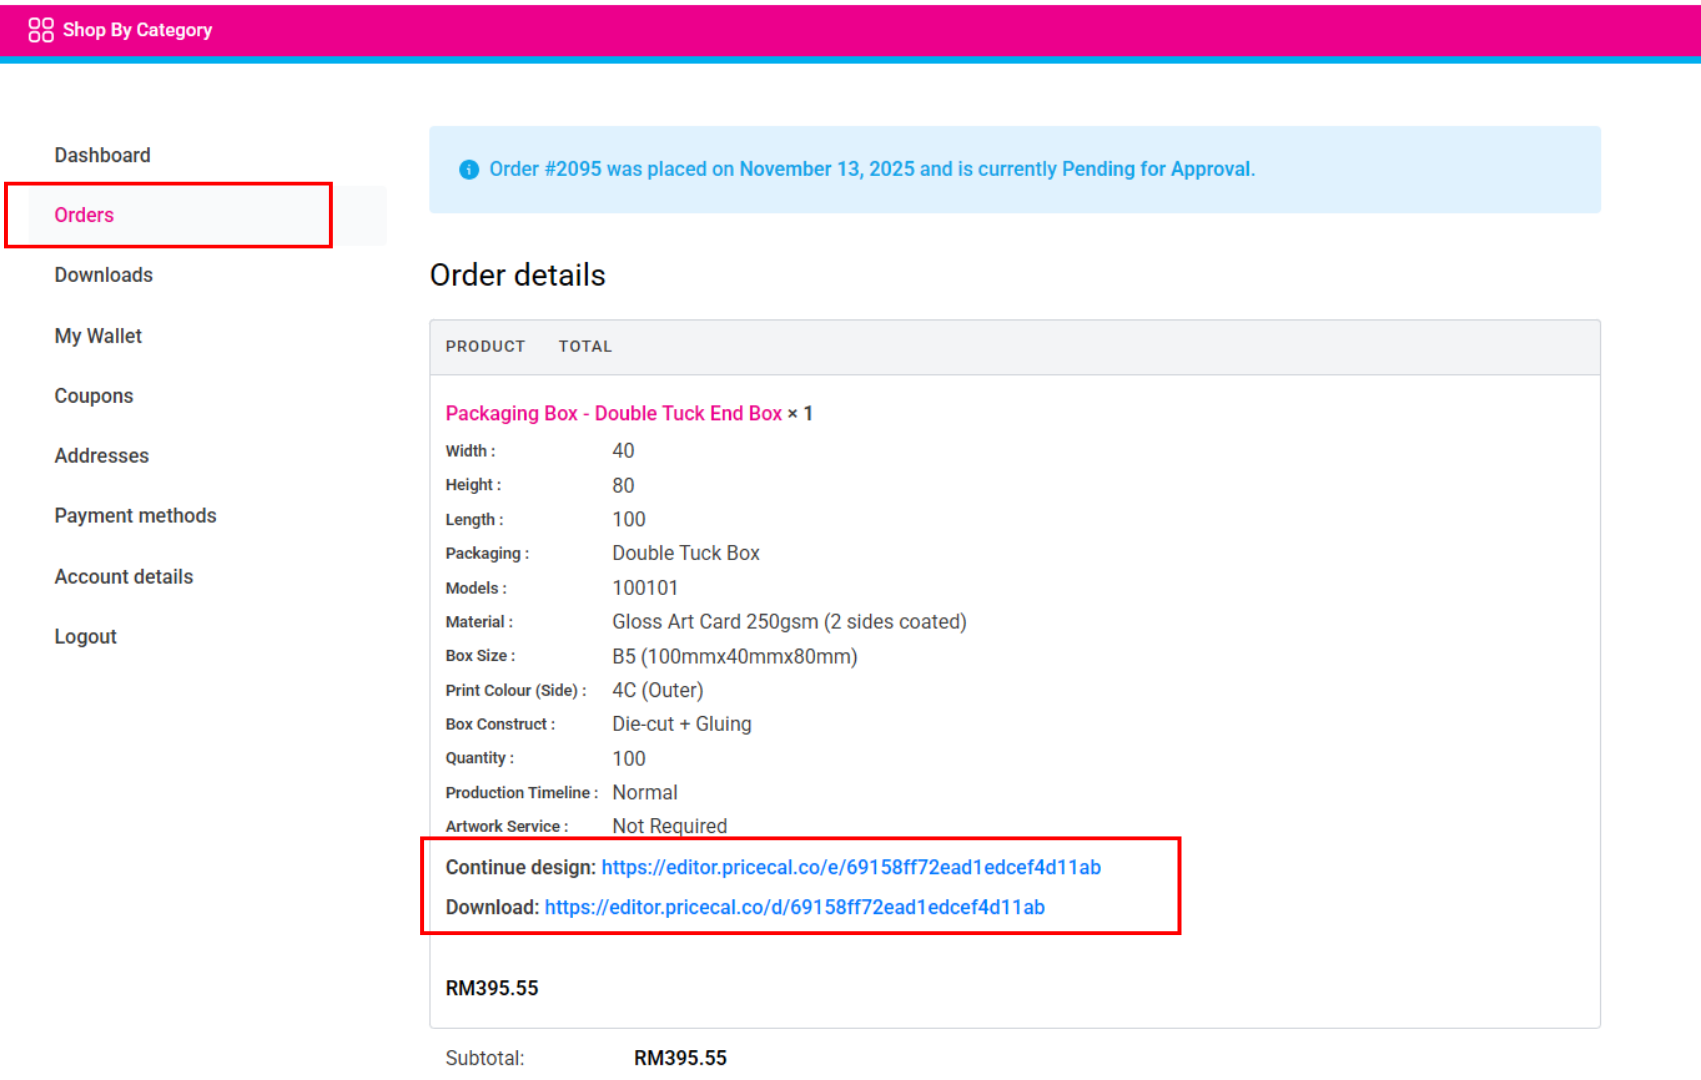
4. After Payment: How Customers Get Their Files
Once the customer has completed payment:
- They can Edit/Download their design files from:
- My Account > Order
- Log in to their account on Printalogue
- Go to My Account > Order
- Open the relevant order and download the dieline / design files
- Thank You Order Email
- They receive a Thank You / Order Confirmation email
- This email includes links to view/edit/download their design files
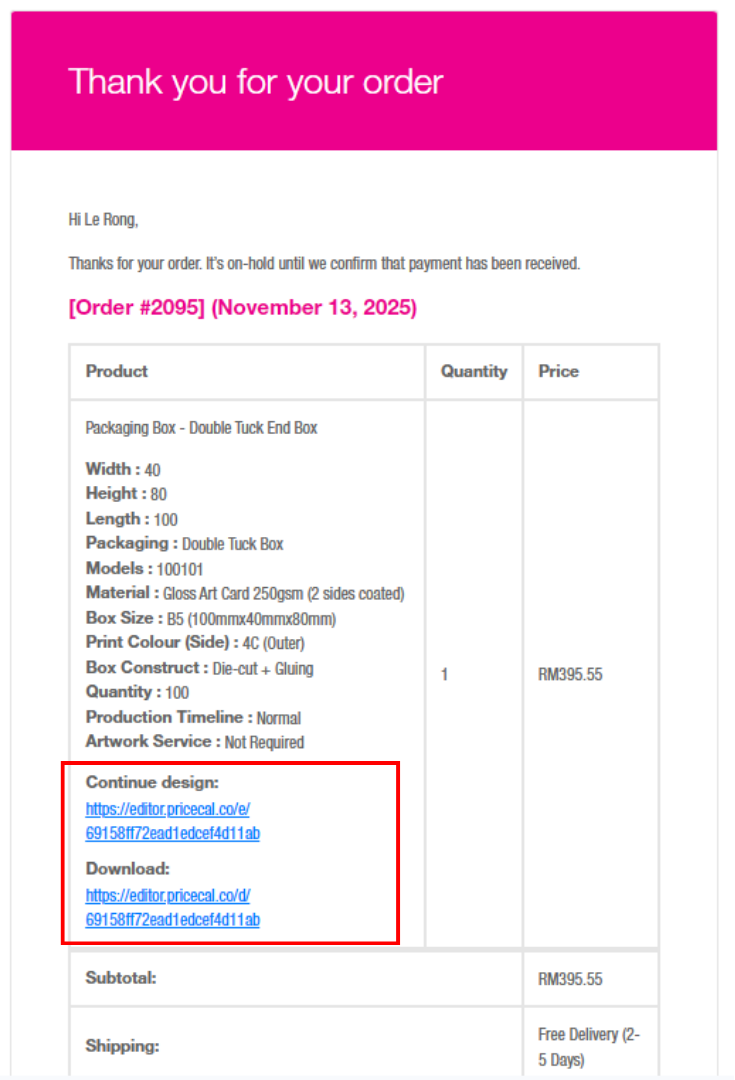
- My Account > Order
If they still want to make small changes after payment (depending on your policy), they can use the design link to edit, then inform your team if necessary.
5. When Customers Only Want the Dieline Template
For customers (e.g., designers) who only need the dieline and don’t want to design online:
- Configure the box via PriceCal on the Printalogue shopfront.
- Choose “Continue add to cart” and go to the Cart.
- Proceed to Checkout and make payment (they can skip using “Continue Design”).
- After payment, they can:
- Download the dieline template from My Account > Order, or
- Use the download links in the Thank You / Order Confirmation email.
They can then design in Adobe Illustrator, Photoshop, or other professional tools.
6. How the Print Shop Can Get the Customer’s Design Link [Admin View]
Besides the customer’s own access, you as the Print Shop can also retrieve the design link for checking artwork or assisting with changes.
You have two main ways:
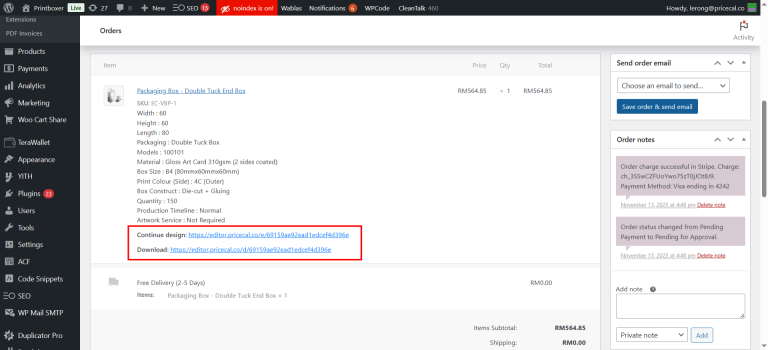
A. From the Cart / Site Backend
- In the Cart / order backend of your Printalogue shopfront, each item will store the Design Studio link.
- Your team can open this link to:
- Review the customer’s design
- Confirm layout, text, and artwork before production
- Help the customer if they report issues (“I can’t open my design,” etc.)

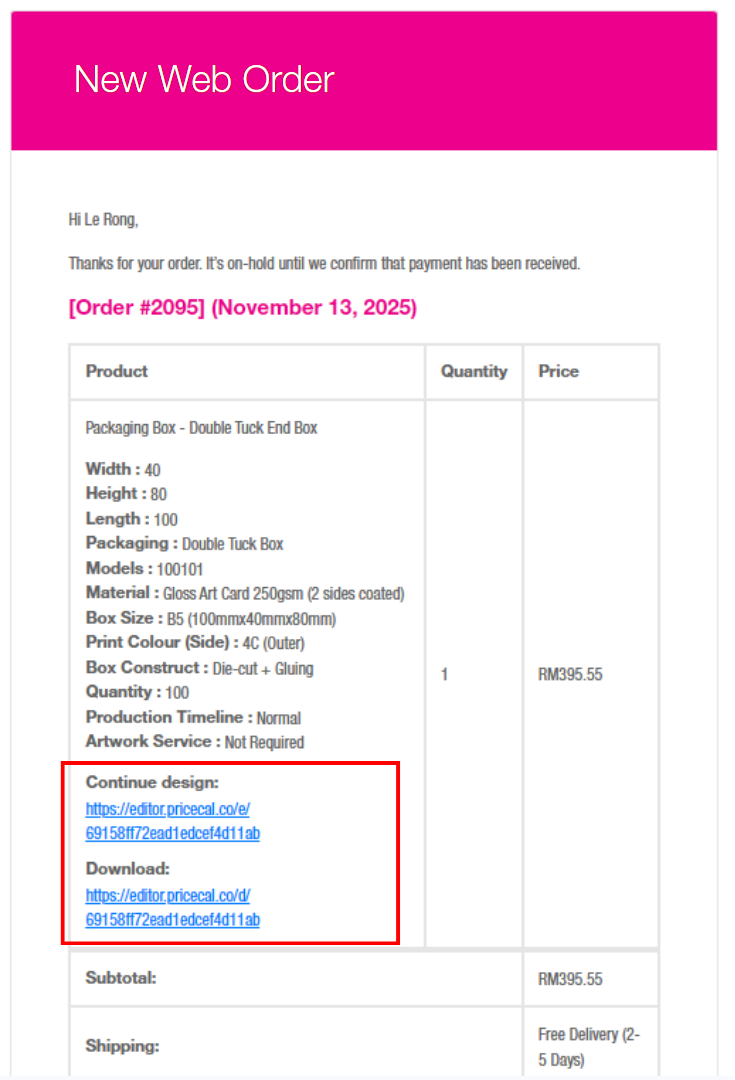
B. From the Received Order Email (Print Shop Email)
- When a new order is placed, your shop receives an order email.
- This email can include the customer’s design link as part of the order details.
- Your team can click that link directly from the email to open the design.
Use cases:
- Quick access to the design without logging into the backend
- Production team can open the design directly from the email
- Easy reference when communicating with the customer
7. Quick Reference Script for Support Staff (Printalogue Version)
You can give this script to your CS team:
To use our online design studio for your packaging box on our Printalogue shopfront:
- Select your box product and choose your size, material, and options.
- Fill in your Name, WhatsApp phone number, and Email.
- Choose one of the following:
- “Send Editor Link to me” – We’ll send you a design studio link and a cart link. Use the design link to create your artwork, then click the cart link to go to checkout and make payment.
- “Continue add to cart” – Go straight to the cart and click Checkout to proceed with payment. On the cart page, you can still click “Continue Design” to edit your artwork before paying.
- After payment, you can edit/download your design from My Account > Order or from the Thank You / Order Confirmation email.
If you need help, we can also open your design link from our backend or from the order email and check your artwork for you.