📊 Create CSV Price List File
In the printing industry, pricing variations can be overwhelming due to factors like paper type, quantity, size, finishing options, and more.
Even a single product like a business card can have thousands of permutations.
Managing these pricing combinations becomes even more challenging when using eCommerce platforms such as WordPress or WooCommerce, which aren’t built to handle complex print pricing logic.
That’s where PriceCal’s CSV Upload Module comes in.
It allows printers to prepare a complete price list in CSV format, defining all the variations and their corresponding prices. Once uploaded, the system automatically applies these prices to your online calculator — saving time, avoiding manual setup, and keeping your pricing accurate.
This feature streamlines pricing management, simplifies configuration, and gives your customers a smoother, more consistent eCommerce experience.
🧾 Step-by-Step Guide: CSV File (Full Quantity)
-
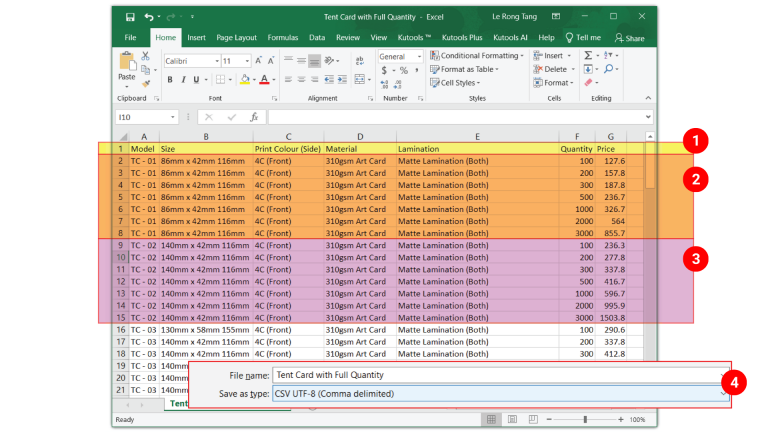
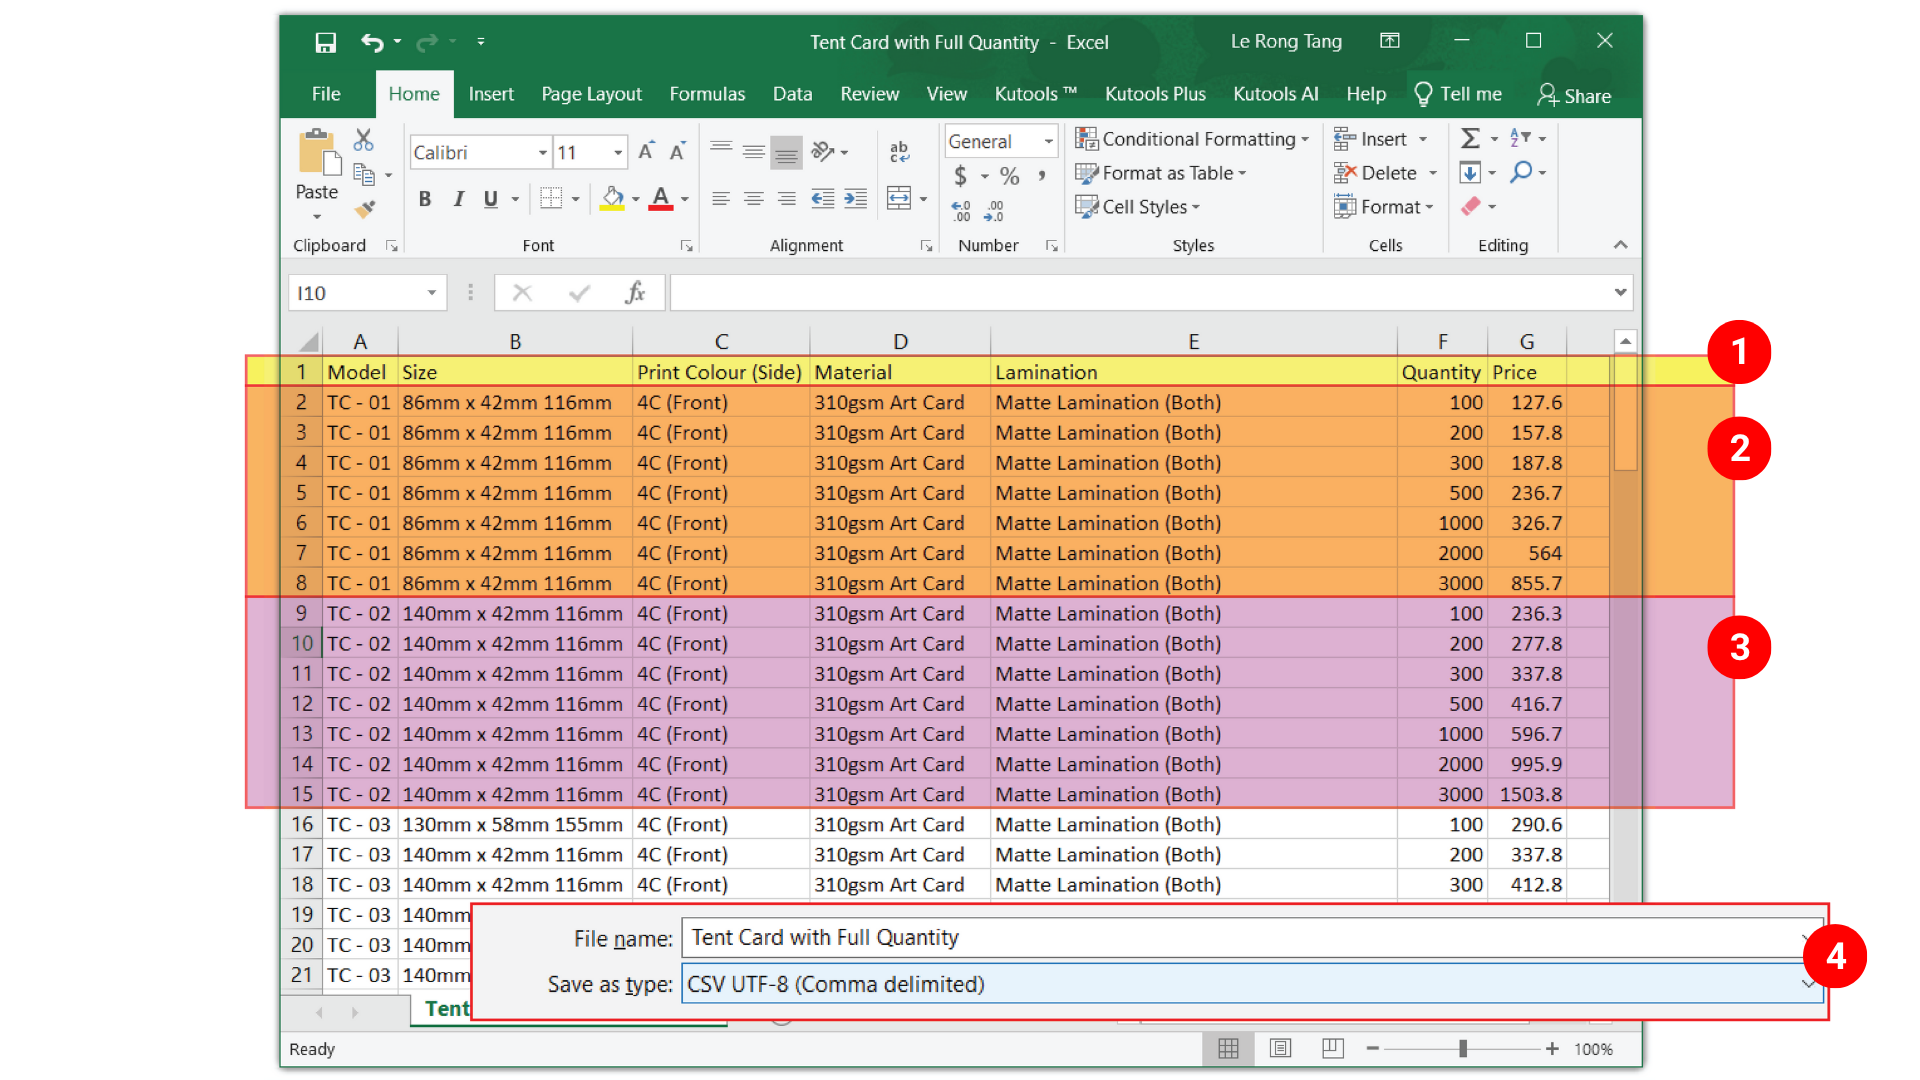
Prepare Your CSV File
-
Open Excel (or Google Sheets).
-
The first row should contain your option names — you can have up to 20 columns for different options.
-
The last two columns must be named “Quantity” and “Price”.
Example:
Model Size Print Colour (Side) Material Lamination Quantity Price TC – 01 86mm x 42mm 116mm 4C (Front) 310gsm Art Card Matte Lamination (Both) 100 127.6 TC – 01 86mm x 42mm 116mm 4C (Front) 310gsm Art Card Matte Lamination (Both) 200 157.8 TC – 01 86mm x 42mm 116mm 4C (Front) 310gsm Art Card Matte Lamination (Both) 300 187.8 -
-
Enter Pricing for All Quantities
-
Add a row for each combination of options and quantity.
-
For example, 100pcs, 200pcs, 500pcs, and so on.
-
Each row must include both Quantity and Price values.
-
-
Duplicate for New Product Options
Once you’ve completed one pricing set, you can copy and paste the whole block and simply change the option values (like paper type or size).
This saves time and keeps your pricing structure consistent. -
Save as CSV
Once your Excel file is complete, go to File → Save As → CSV (.csv) format.
Now your price list is ready to be uploaded into PriceCal.
🧮 Step-by-Step Guide: CSV File (1 Quantity Only)
-
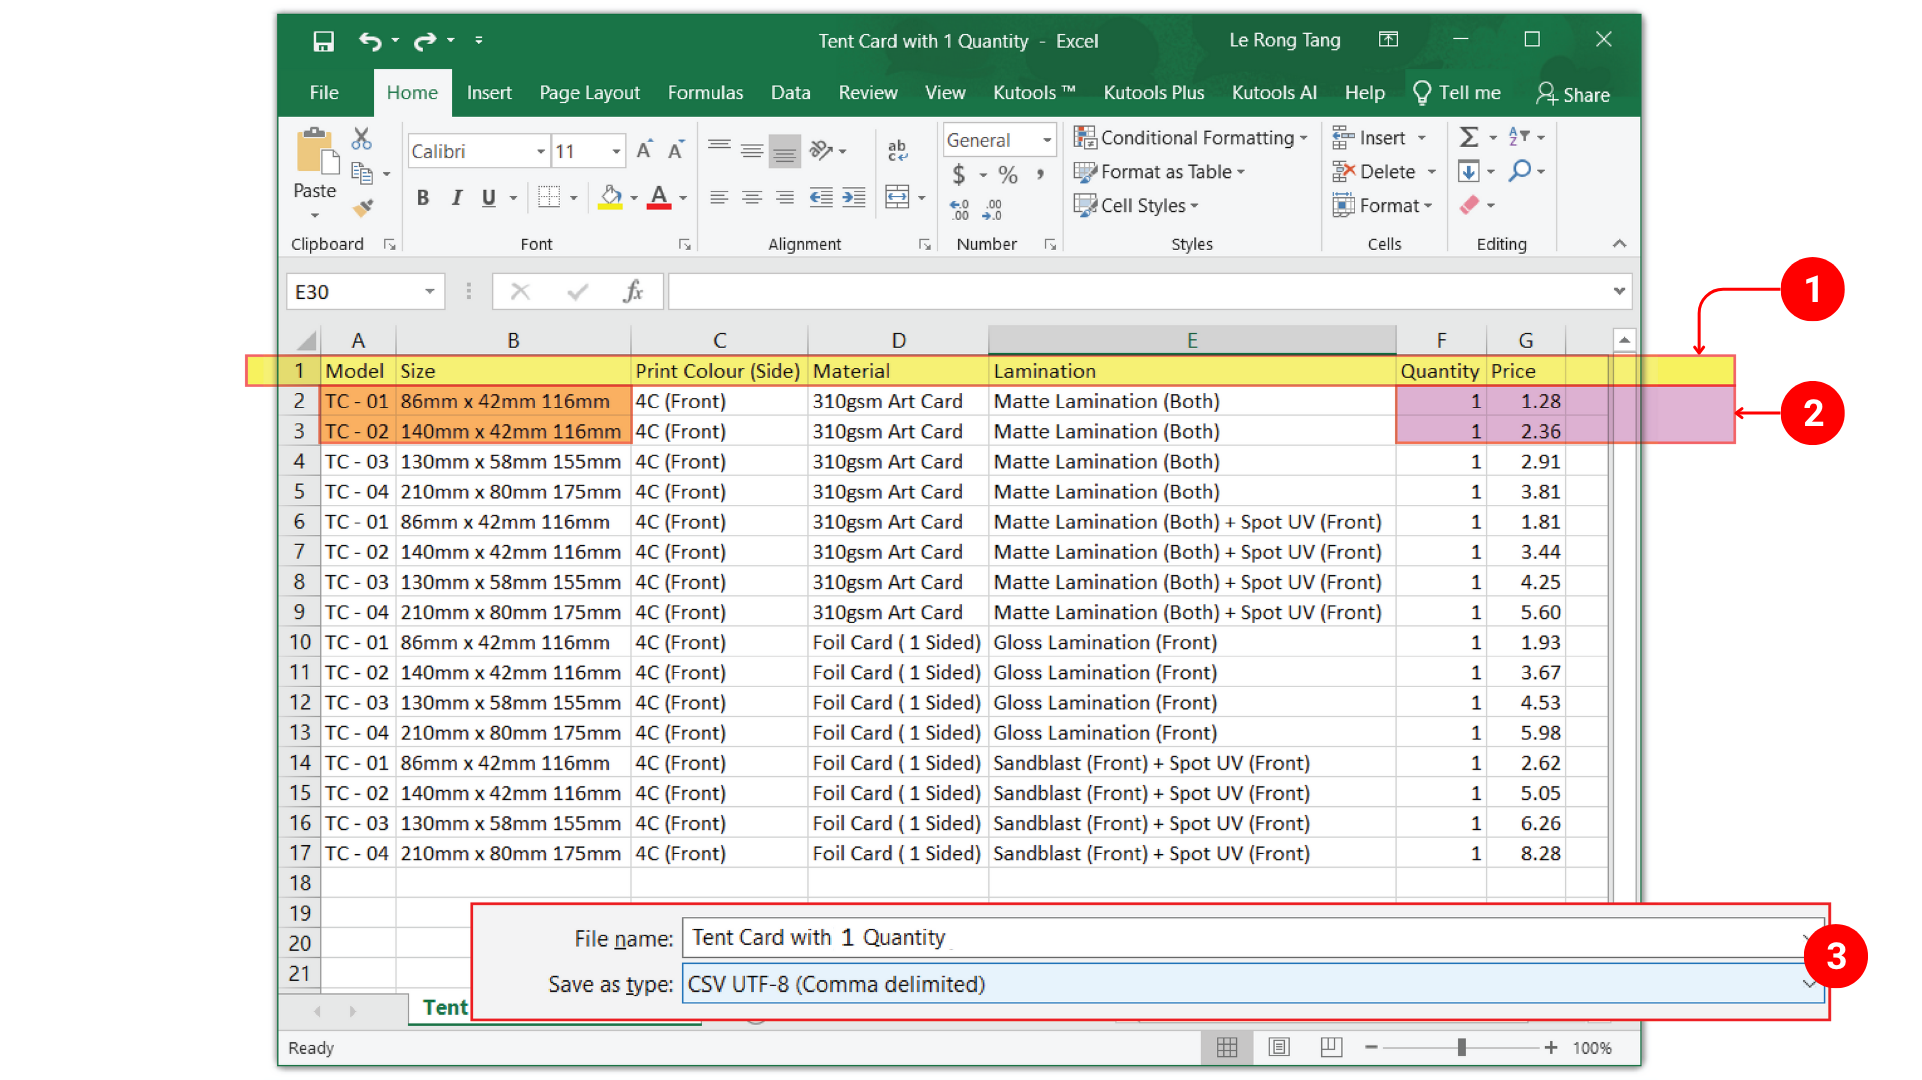
Prepare Your CSV File
-
The first row should contain your option names (up to 20 columns).
-
The last two columns must still be “Quantity” and “Price”.
-
-
Input 1 Quantity Price
-
For each variation, set Quantity = 1.
-
In the Price column, enter the price per piece (1pc price).
Example:
Model Size Print Colour (Side) Material Lamination Quantity Price TC – 01 86mm x 42mm 116mm 4C (Front) 310gsm Art Card Matte Lamination (Both) 1 1.28 💡 Note: For 1 quantity CSV files, you can use the Quantity Component in PriceCal to let the system automatically multiply the unit price by the order quantity.
💡 Tips: If you want to offer discounts for larger quantities, you can configure a Bulk Discount Formula in your PriceCal setup.
This will automatically reduce the total cost for high-quantity orders. -
-
Save as CSV
After finishing your setup, export your Excel file as a CSV (.csv) file for upload.

✅ Summary
PriceCal’s CSV Upload Module gives you full control over your pricing structure — whether it’s per piece or by quantity range.
By preparing your CSV file properly, you can:
-
Manage complex product variations easily
-
Update prices quickly in bulk
-
Provide real-time, accurate pricing to customers
No more manual edits, no more pricing errors — just smooth, automated pricing for your print business.