Best for:
In-house printing · Digital / Offset sheet printing · Automatic sheet & cost calculation
Label stickers are typically printed in large quantities on sheets and later cut into individual pieces.
When you produce label stickers in-house and want the system to automatically calculate sheet usage, nesting, material cost, and printing cost, SC-Sheet is the recommended approach.
When to Use SC-Sheet for Label Stickers
Use SC-Sheet if you:
- Print label stickers in-house
- Use sheet-based sticker materials (e.g. Sticker Paper, PP Sticker, Vinyl)
- Need automatic nesting & imposition per sheet
- Offer multiple sizes, quantities, and finishing options
- Want pricing based on real production logic
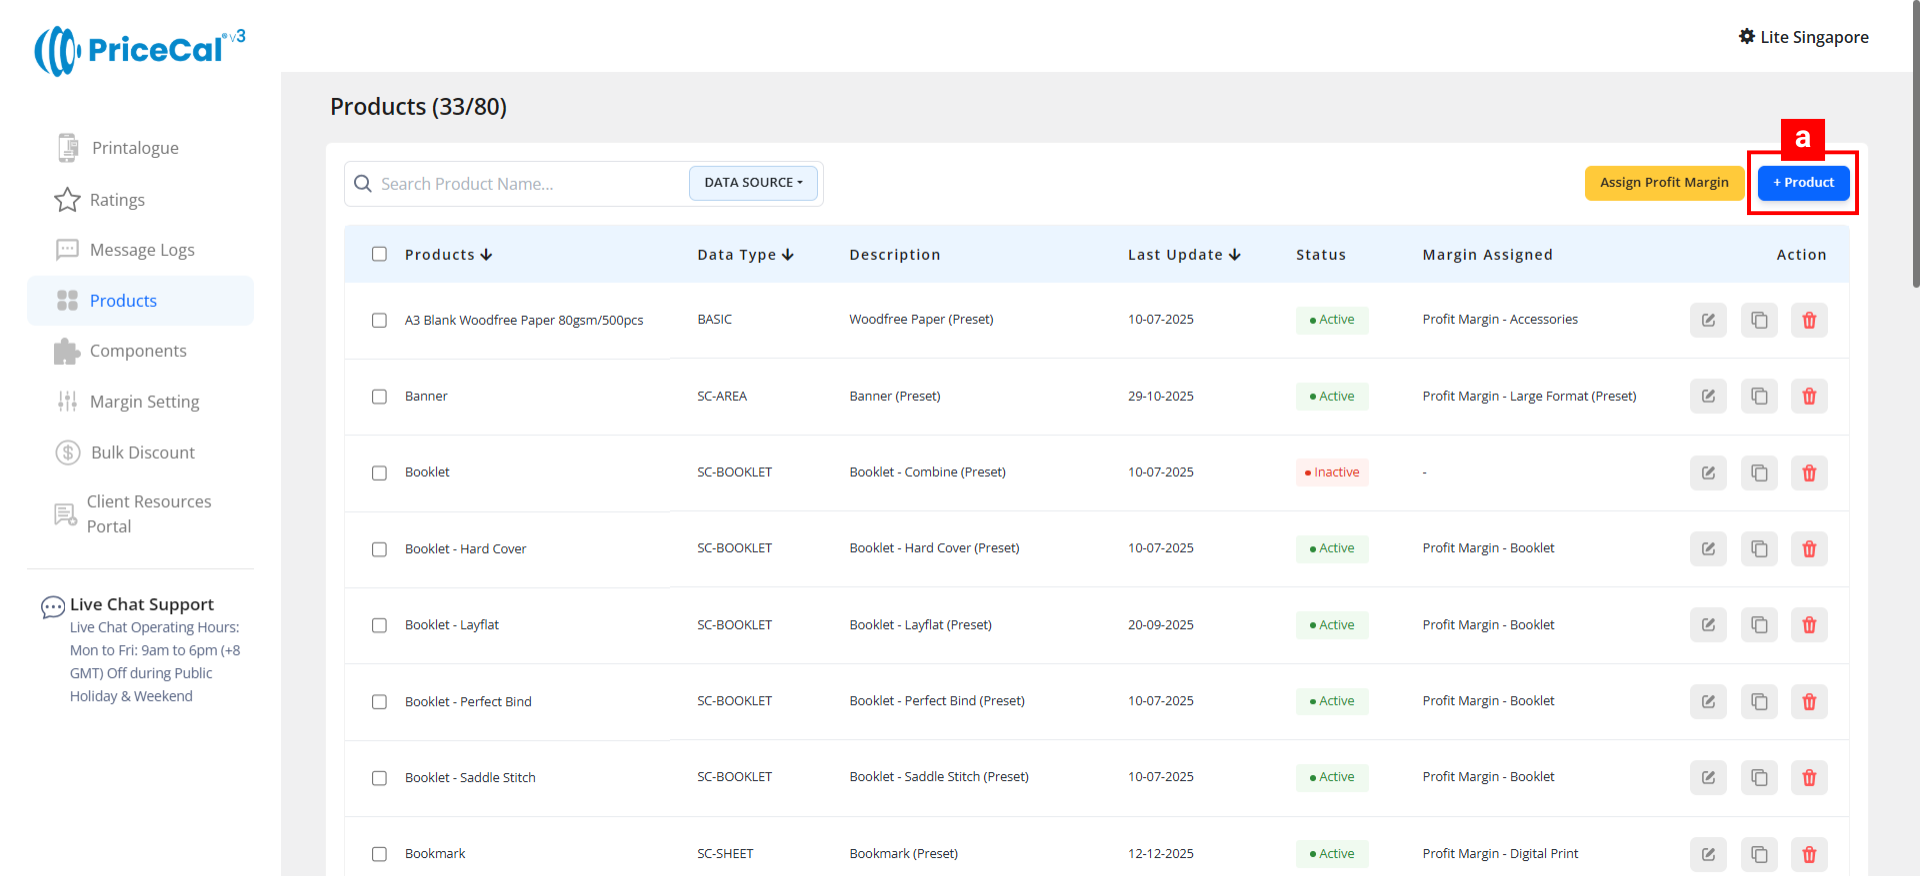
A. First for all, you need to add a new product
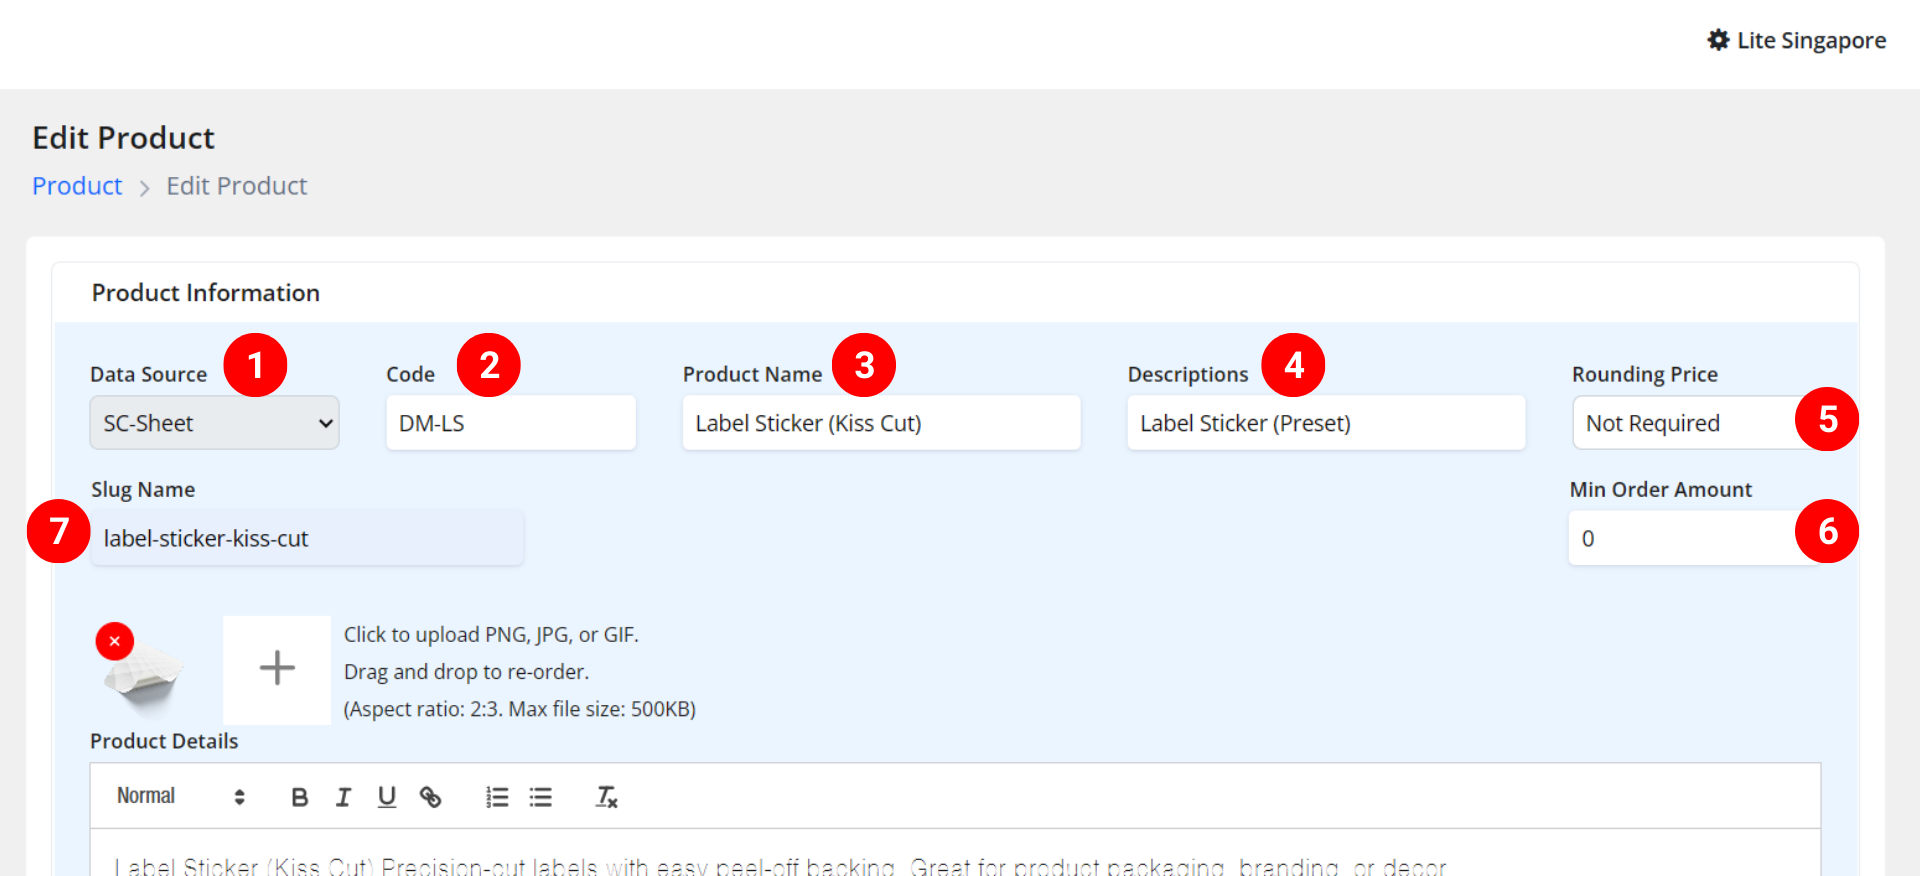
1. Select Product Source: SC-Sheet
2. Enter the product code: You can enter your product SKU or product abbreviation. Example, Demo-Label Sticker Kiss Cut >> DM-LSK
3. Product Name: Label Sticker (Kiss Cut)
4. Description: In-house production or Product name (only admin can view this in the PriceCal dashboard)
5. (Optional) Set rounding to set the price to an integer based on your market price
6. (Optional) Min Order Amount: for min charge for this job no matter the size or quantity.
Example: If you select a print price of $9, but the minimum order amount is $15, then this order will be charged $15 unless the print price is higher than $15.7. Enter the slug name: label-sticker-kiss-cut
Slug must be lowercase, contain only letters, numbers, and ‘-‘, and cannot start or end with a ‘-‘
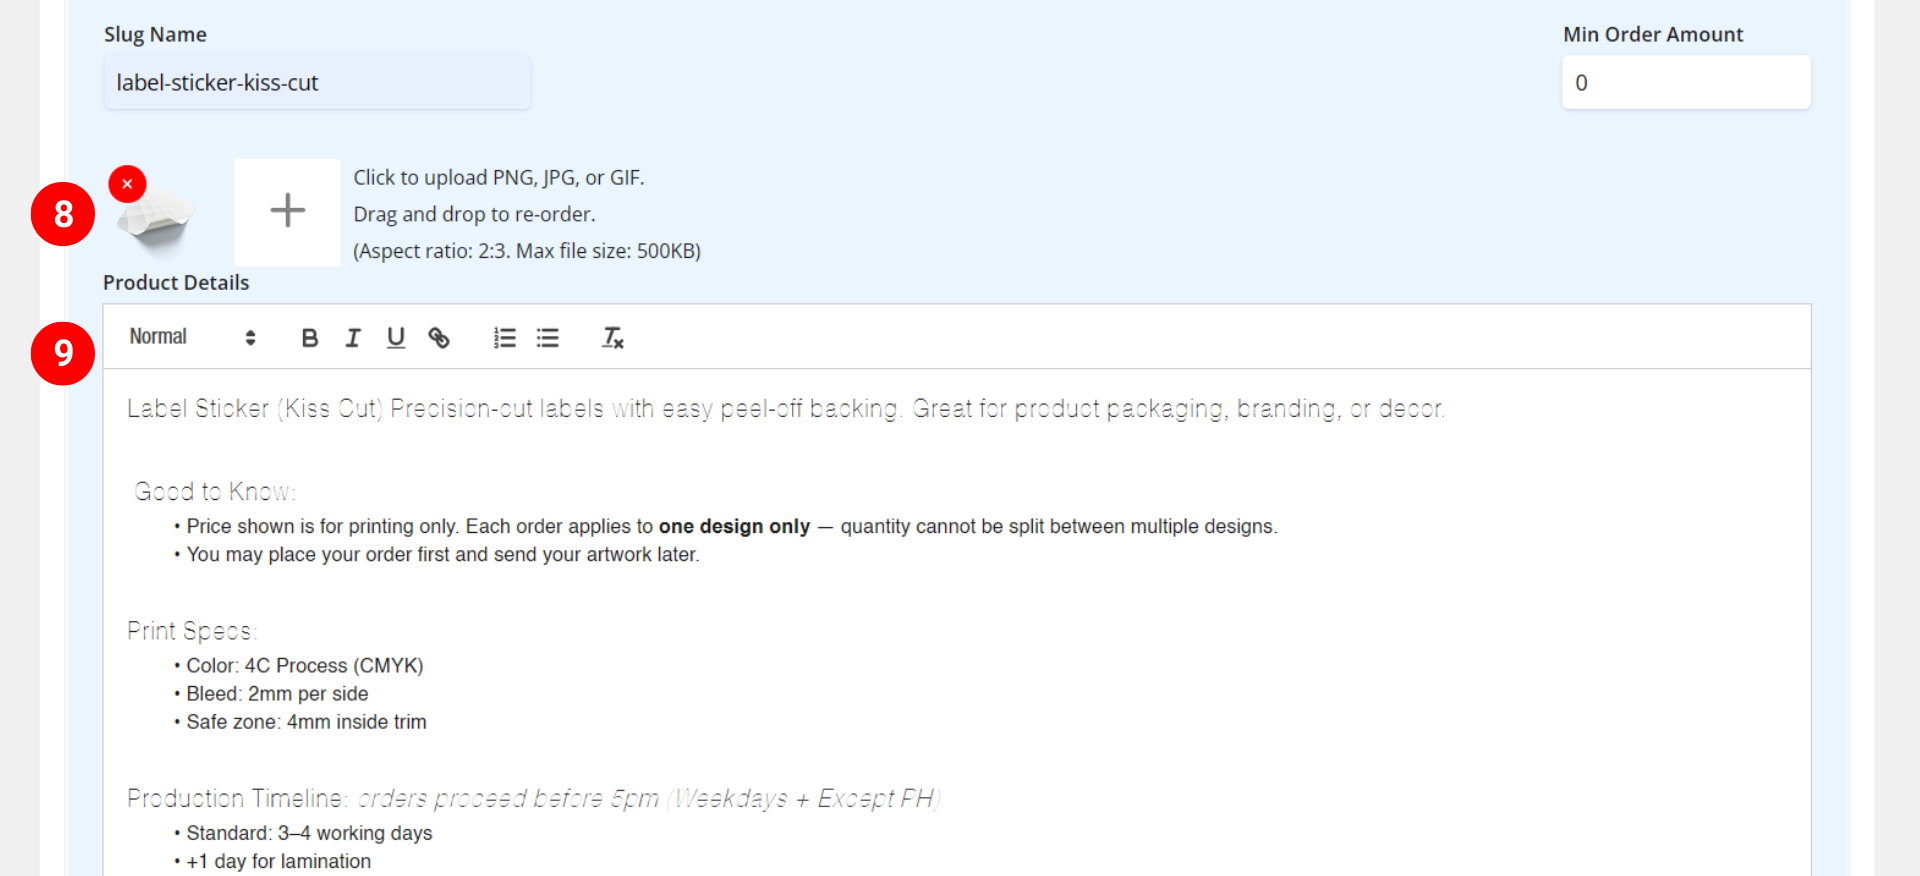
8. Upload your label sticker product image
9. Fill in your product description, important information that needs to be communicated to customers, such as “Good to know”, printing specs, production timeline, etc
🔗 Related tutorial: SC-Sheet Product Creation
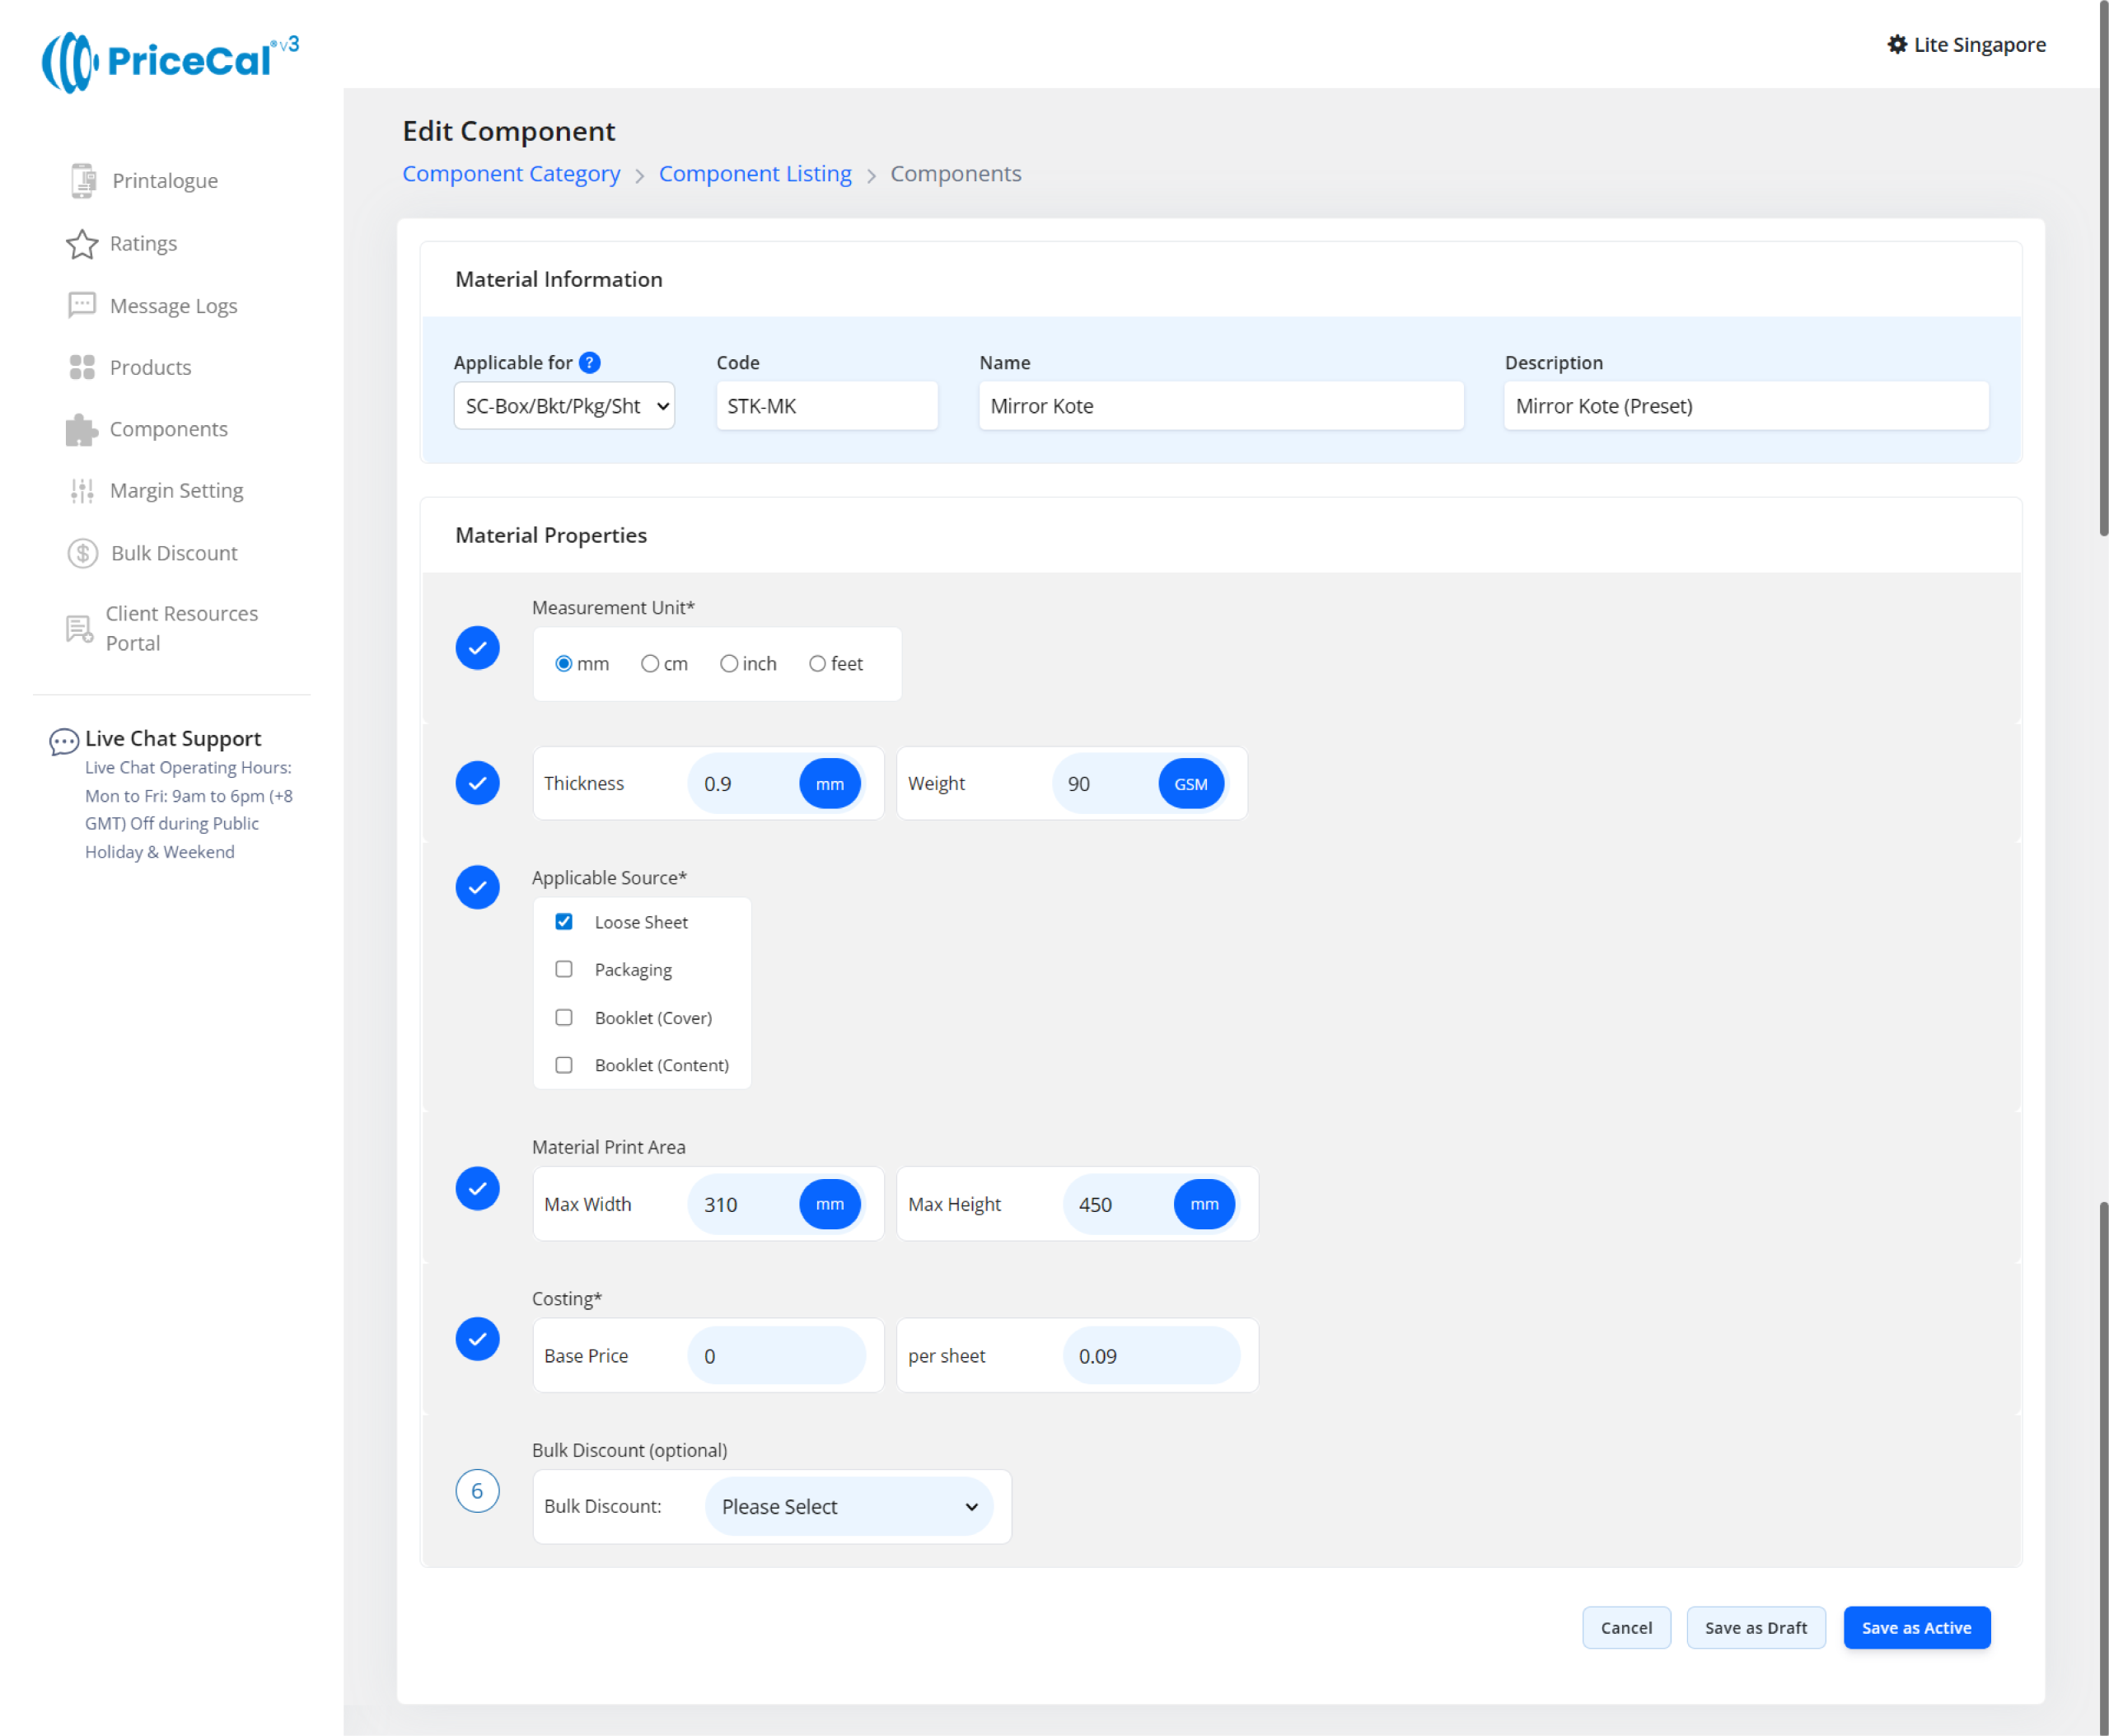
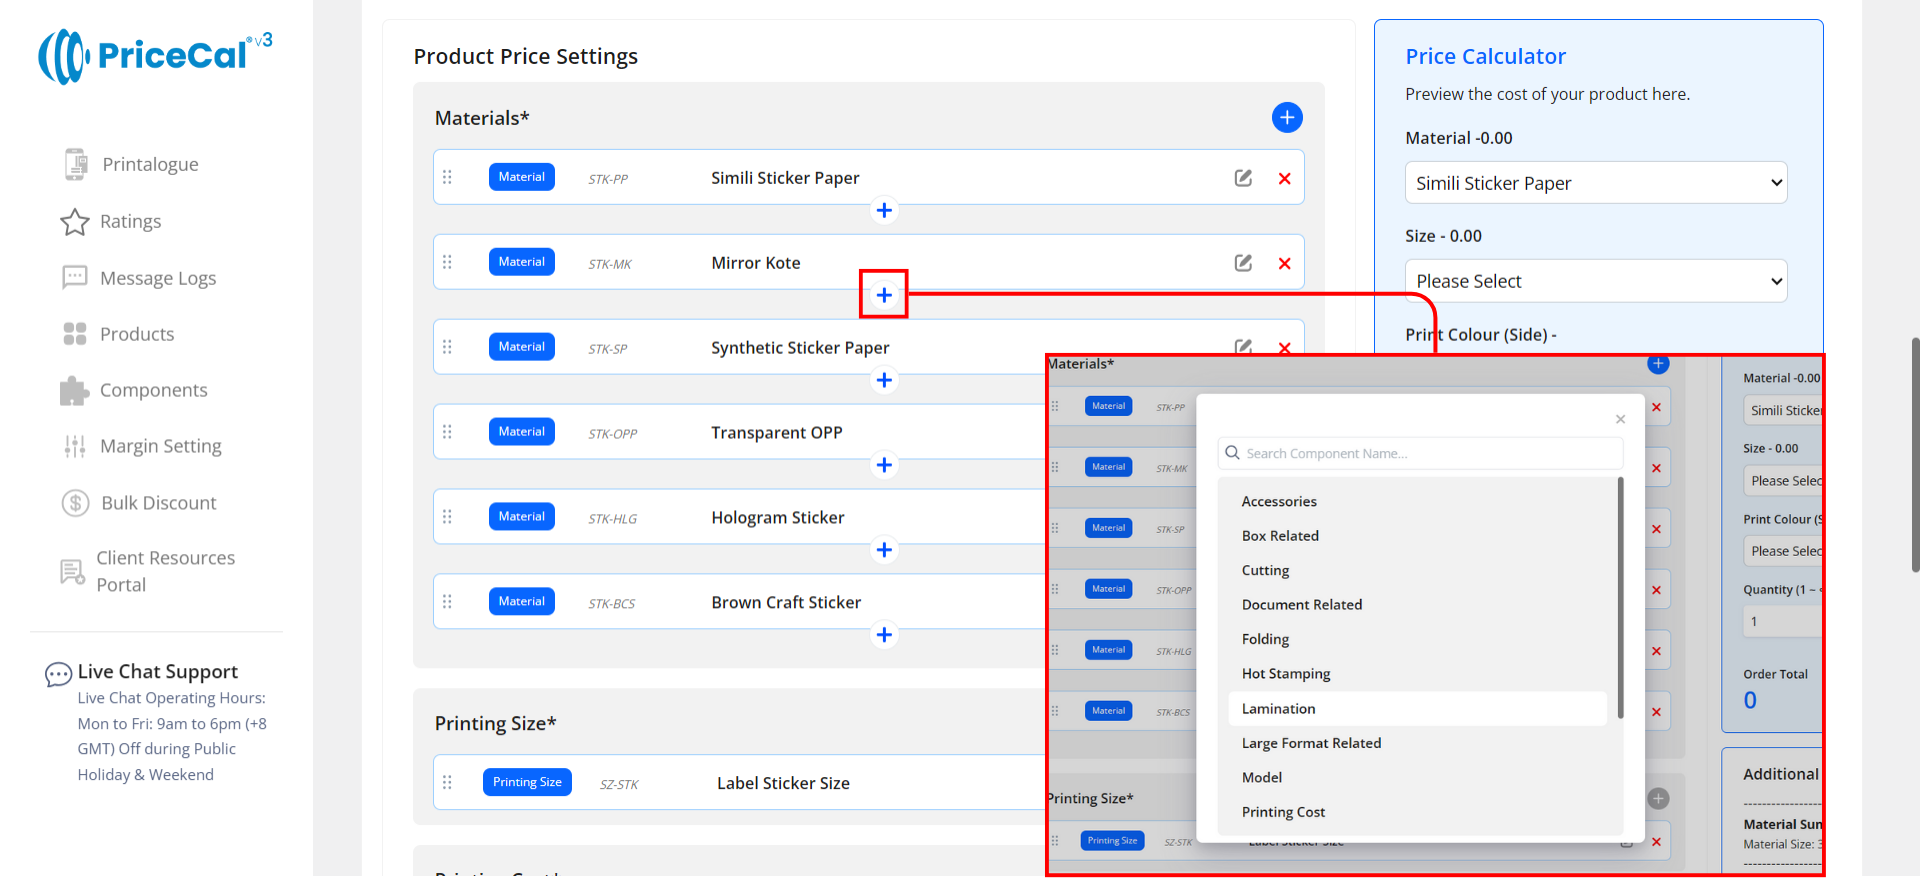
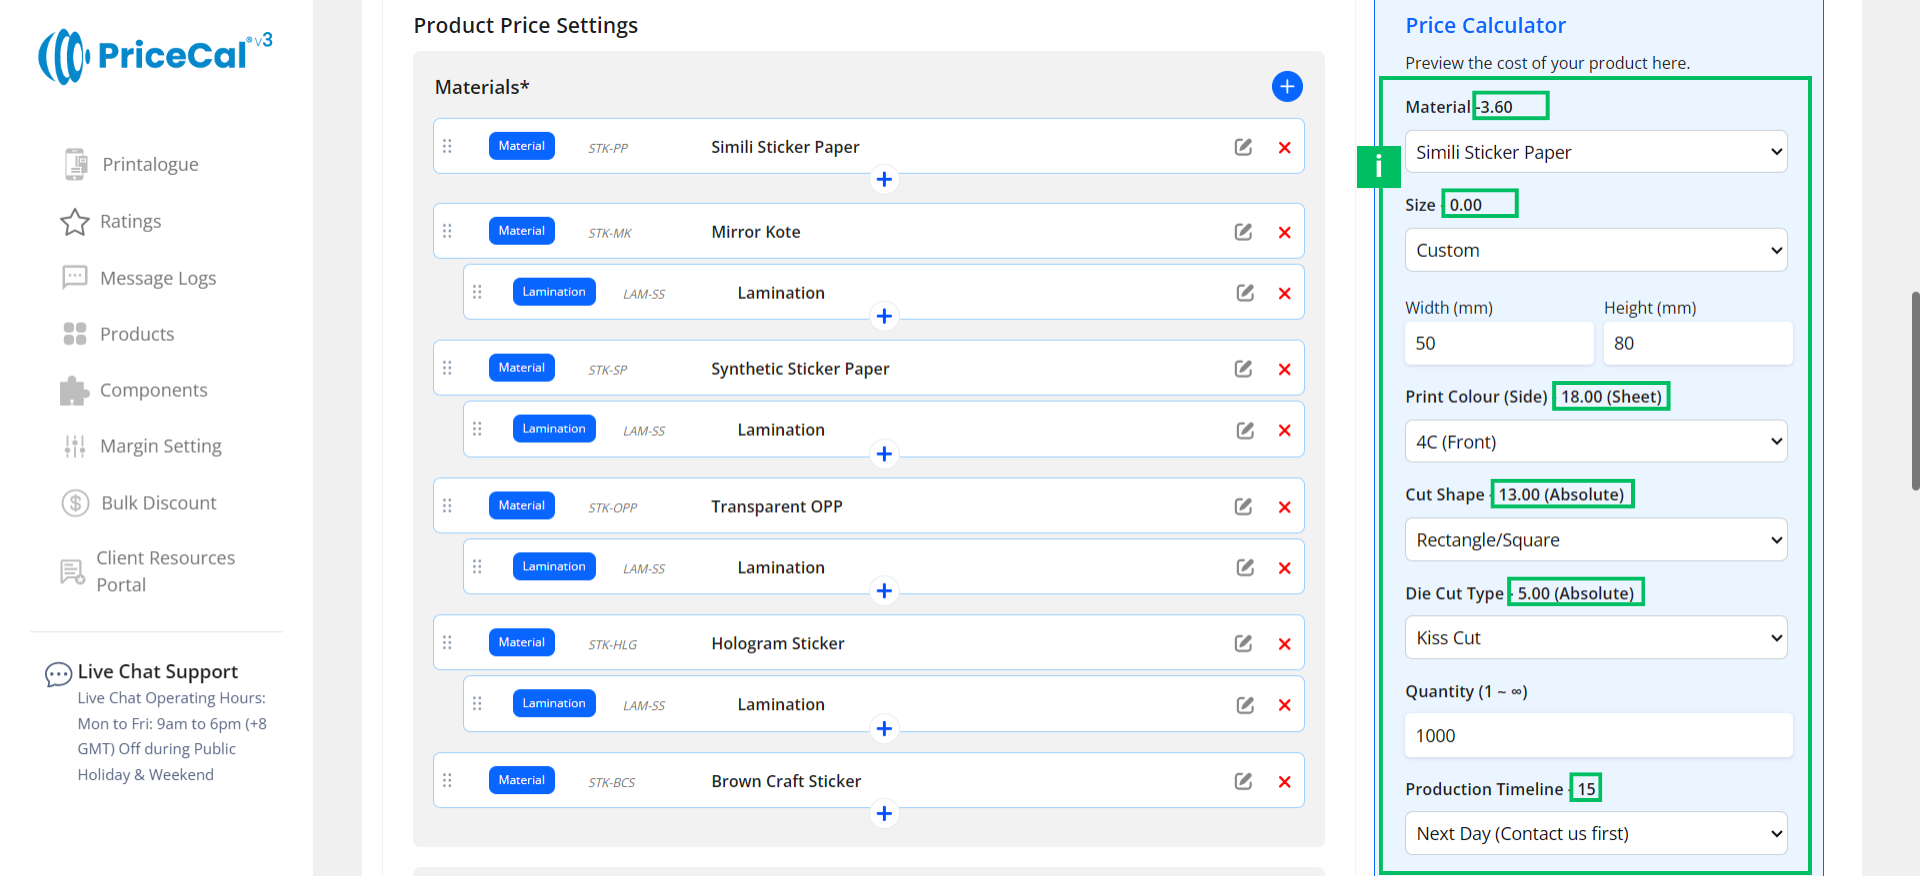
B. Add Material
- Example: Mirror Kote
- Add more paper options if needed
i. Edit current component
ii. Add new component directly without going to the Component page.
iii. Hovering the mouse over a component will display its description, making it easy to understand what this component is before selecting it.
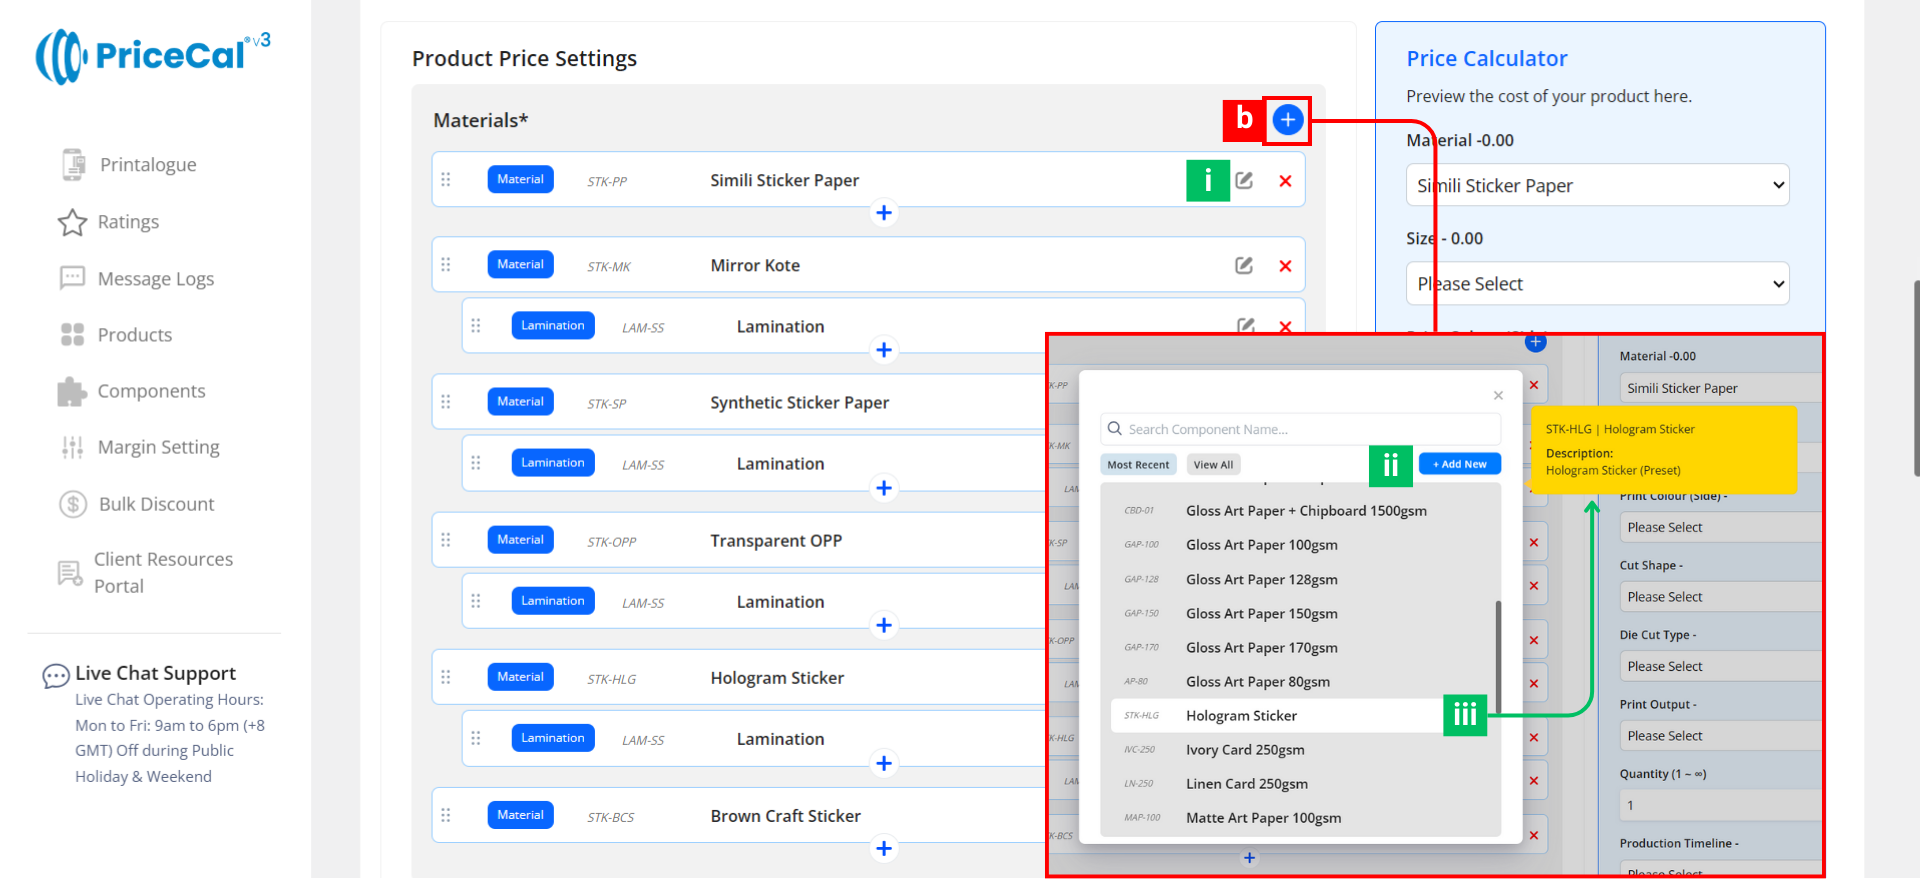
This image shows how a sheet-form Material component is typically set up, so you can understand what each field means before creating your own.
🔗 Related tutorial: Material Component Setup (Full Guide)
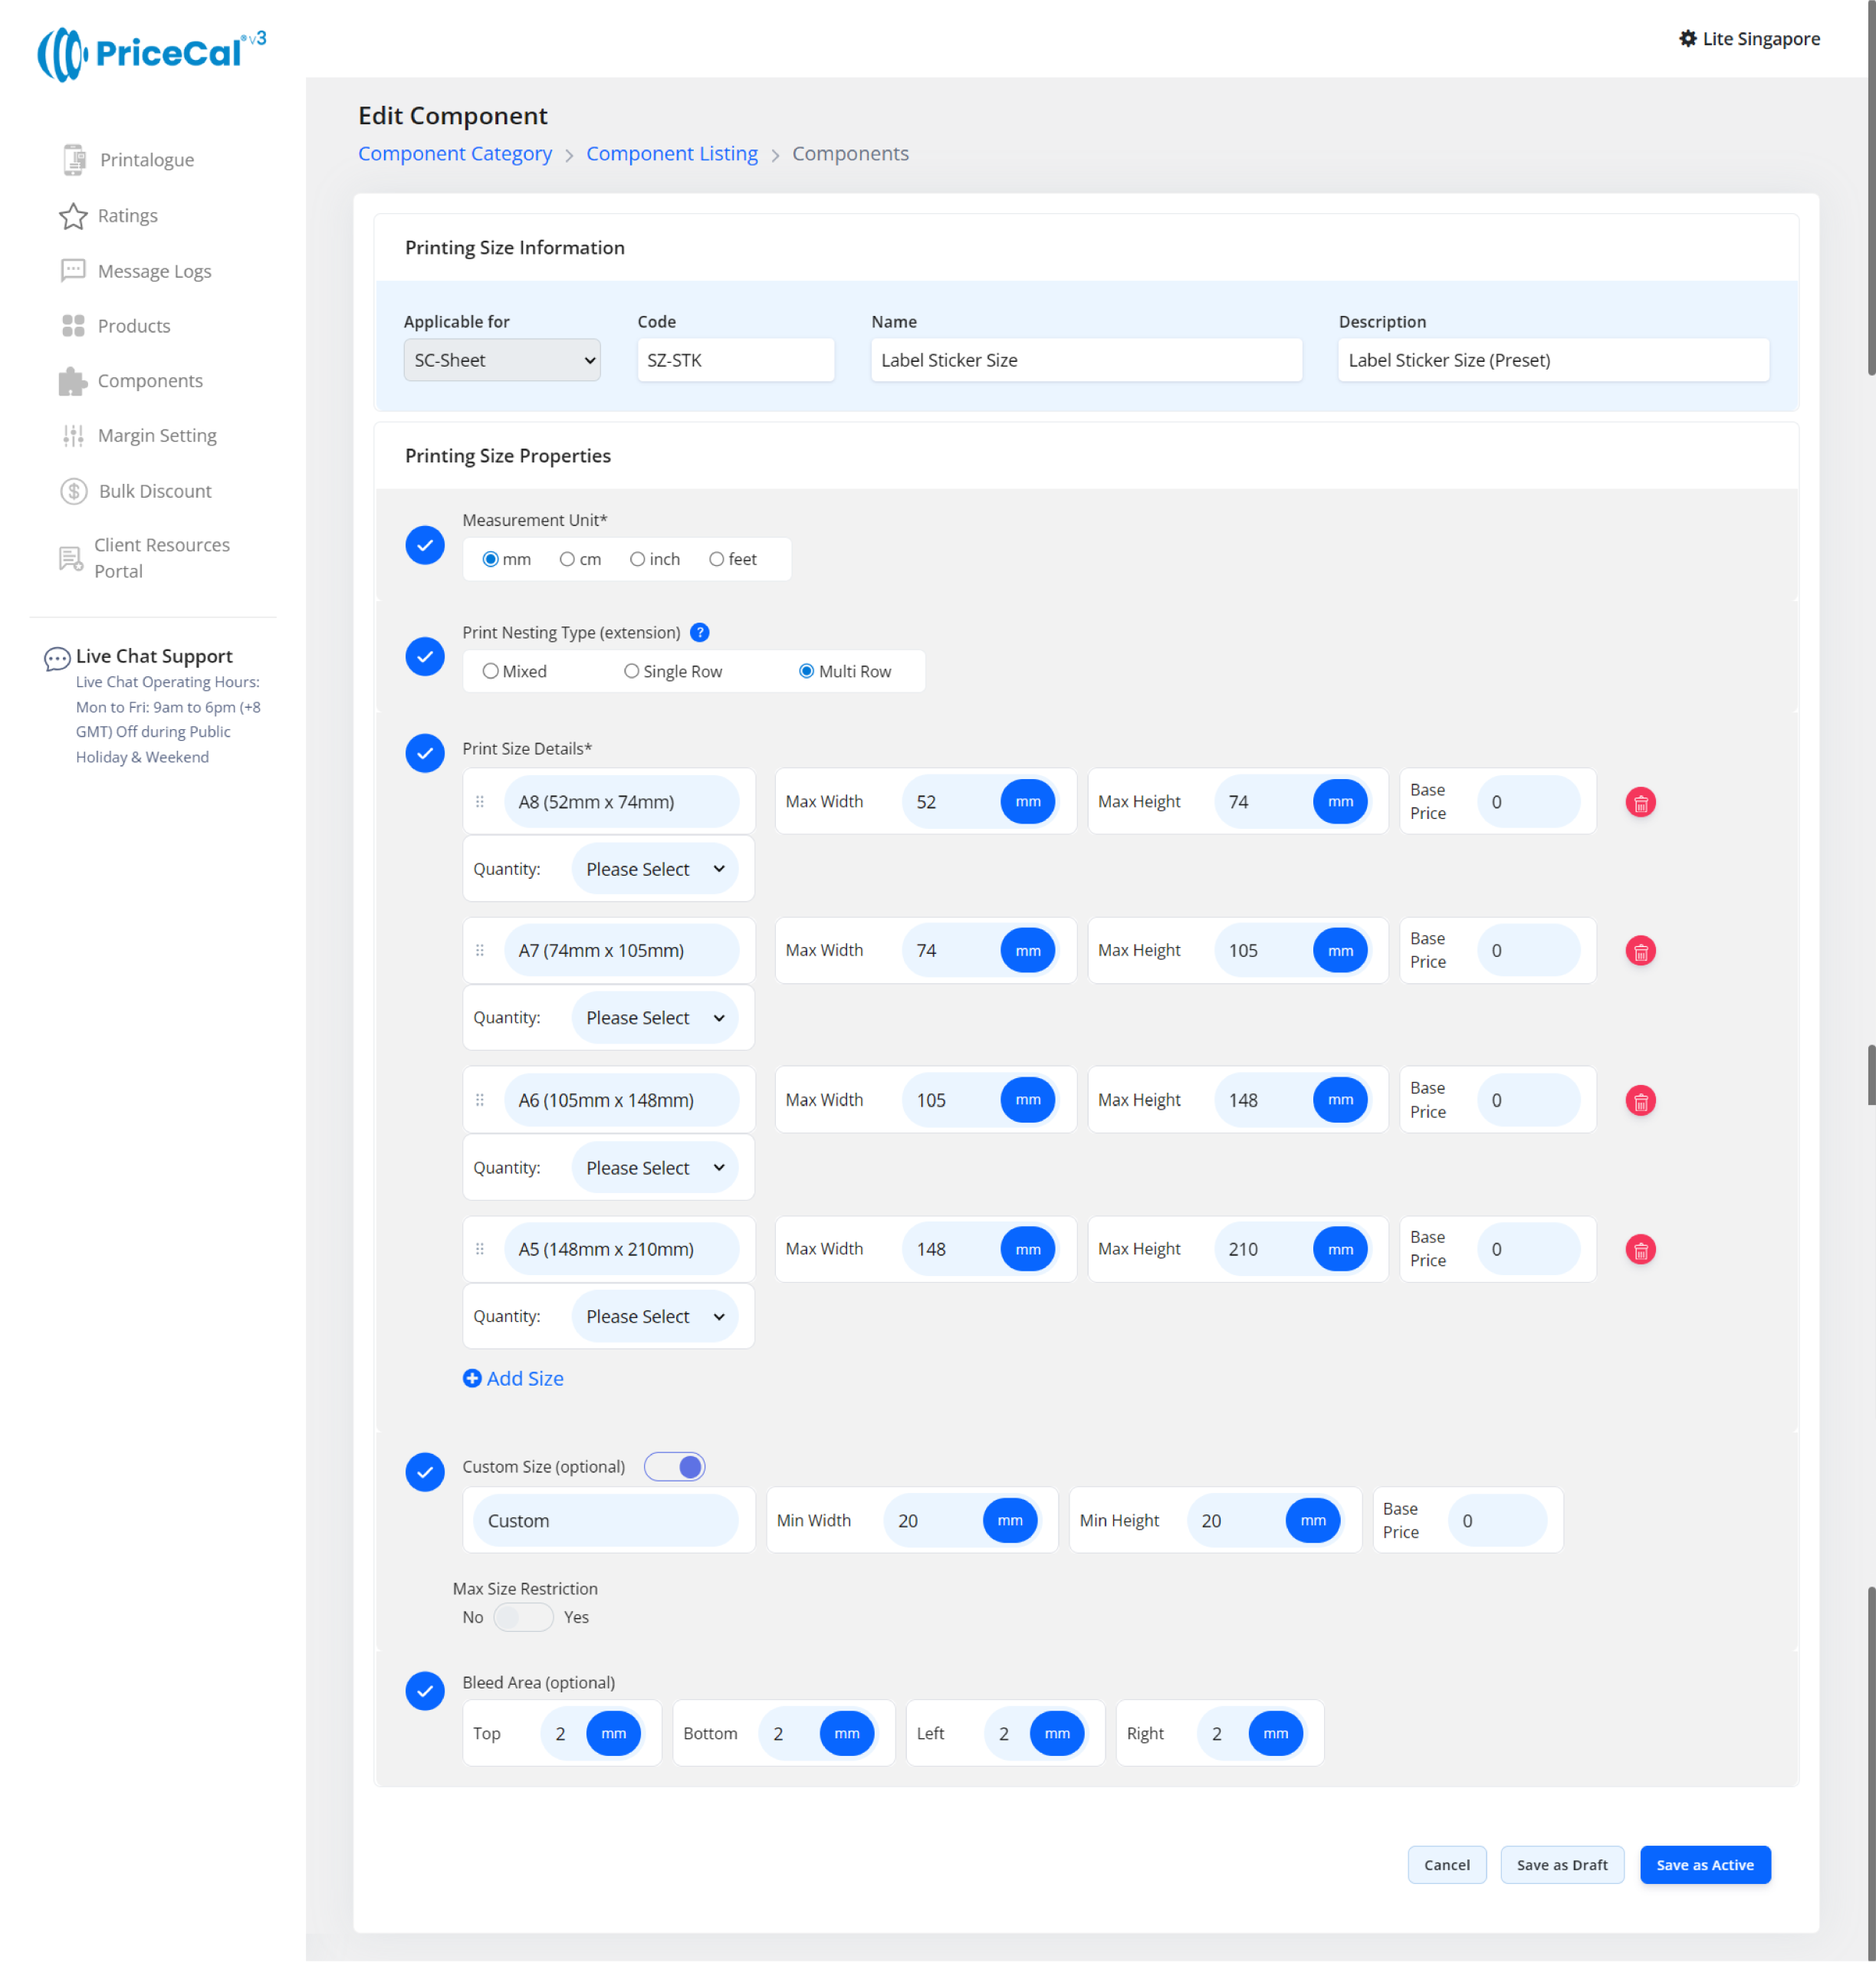
C. Define Printing Size
- Size label: Label Sticker Size
- Nesting type: Multi-Row Extension
- Enable bleed in the printing size component
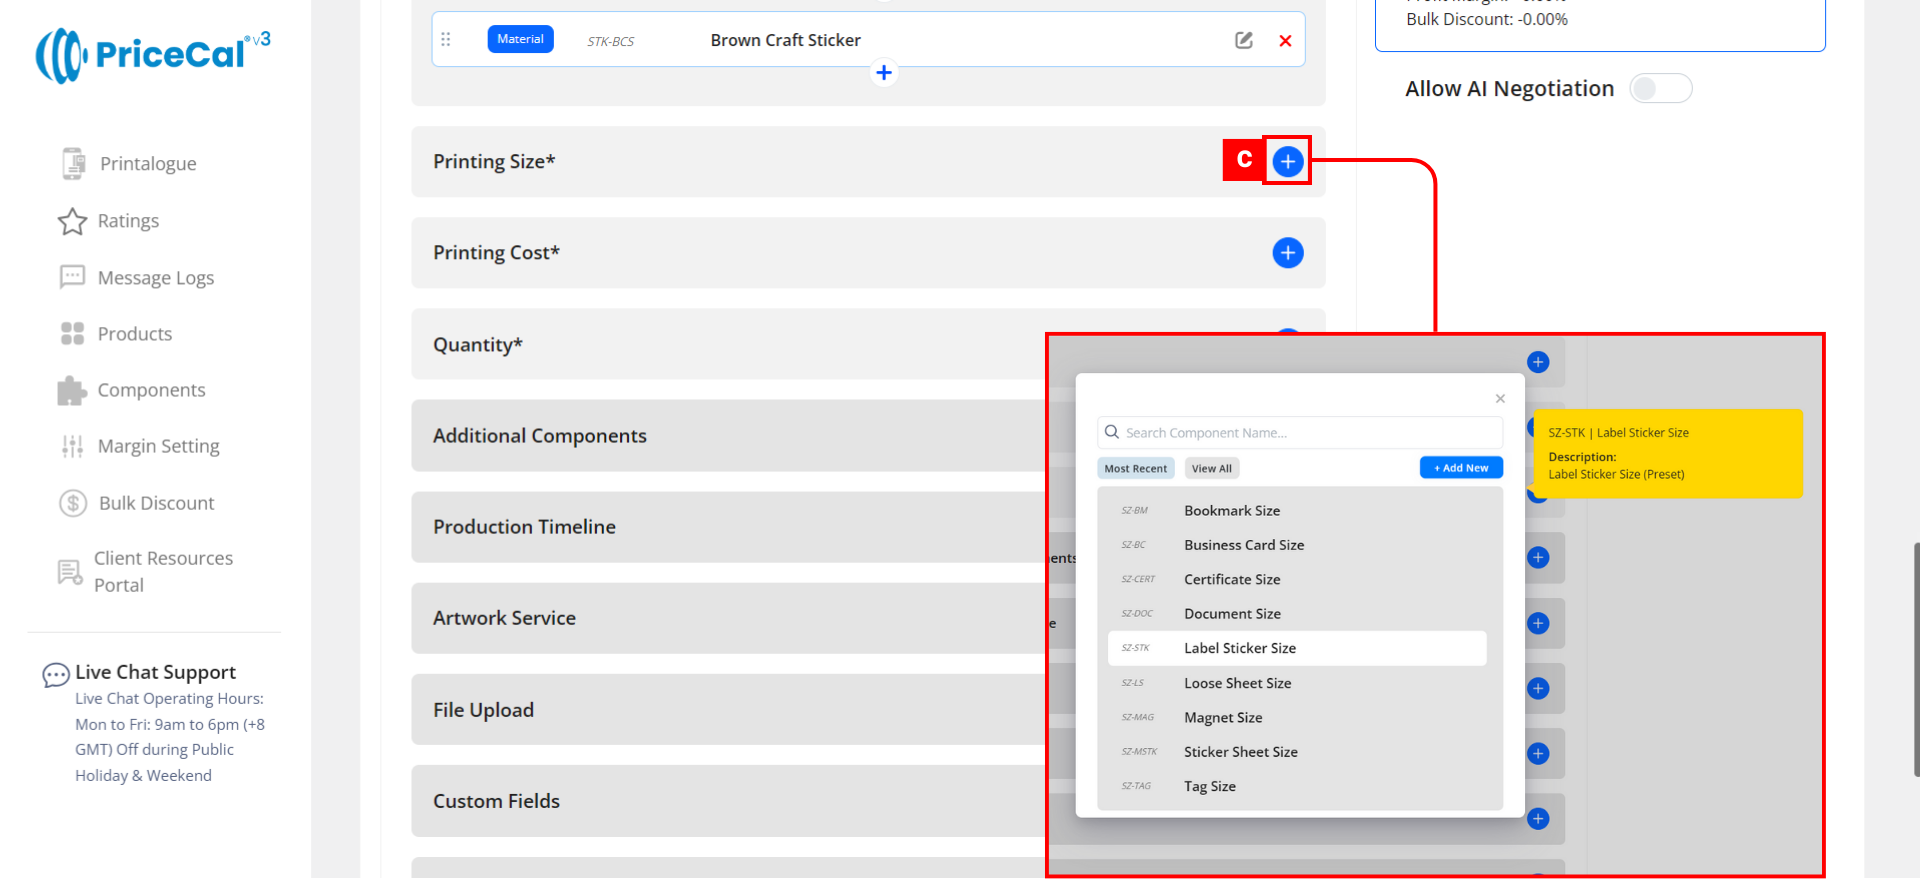
This image shows how a label sticker printing size component is typically set up, so you can understand what each field means before creating your own.
🔗 Related tutorial: SC-Sheet Printing Size Setup (Full Guide)
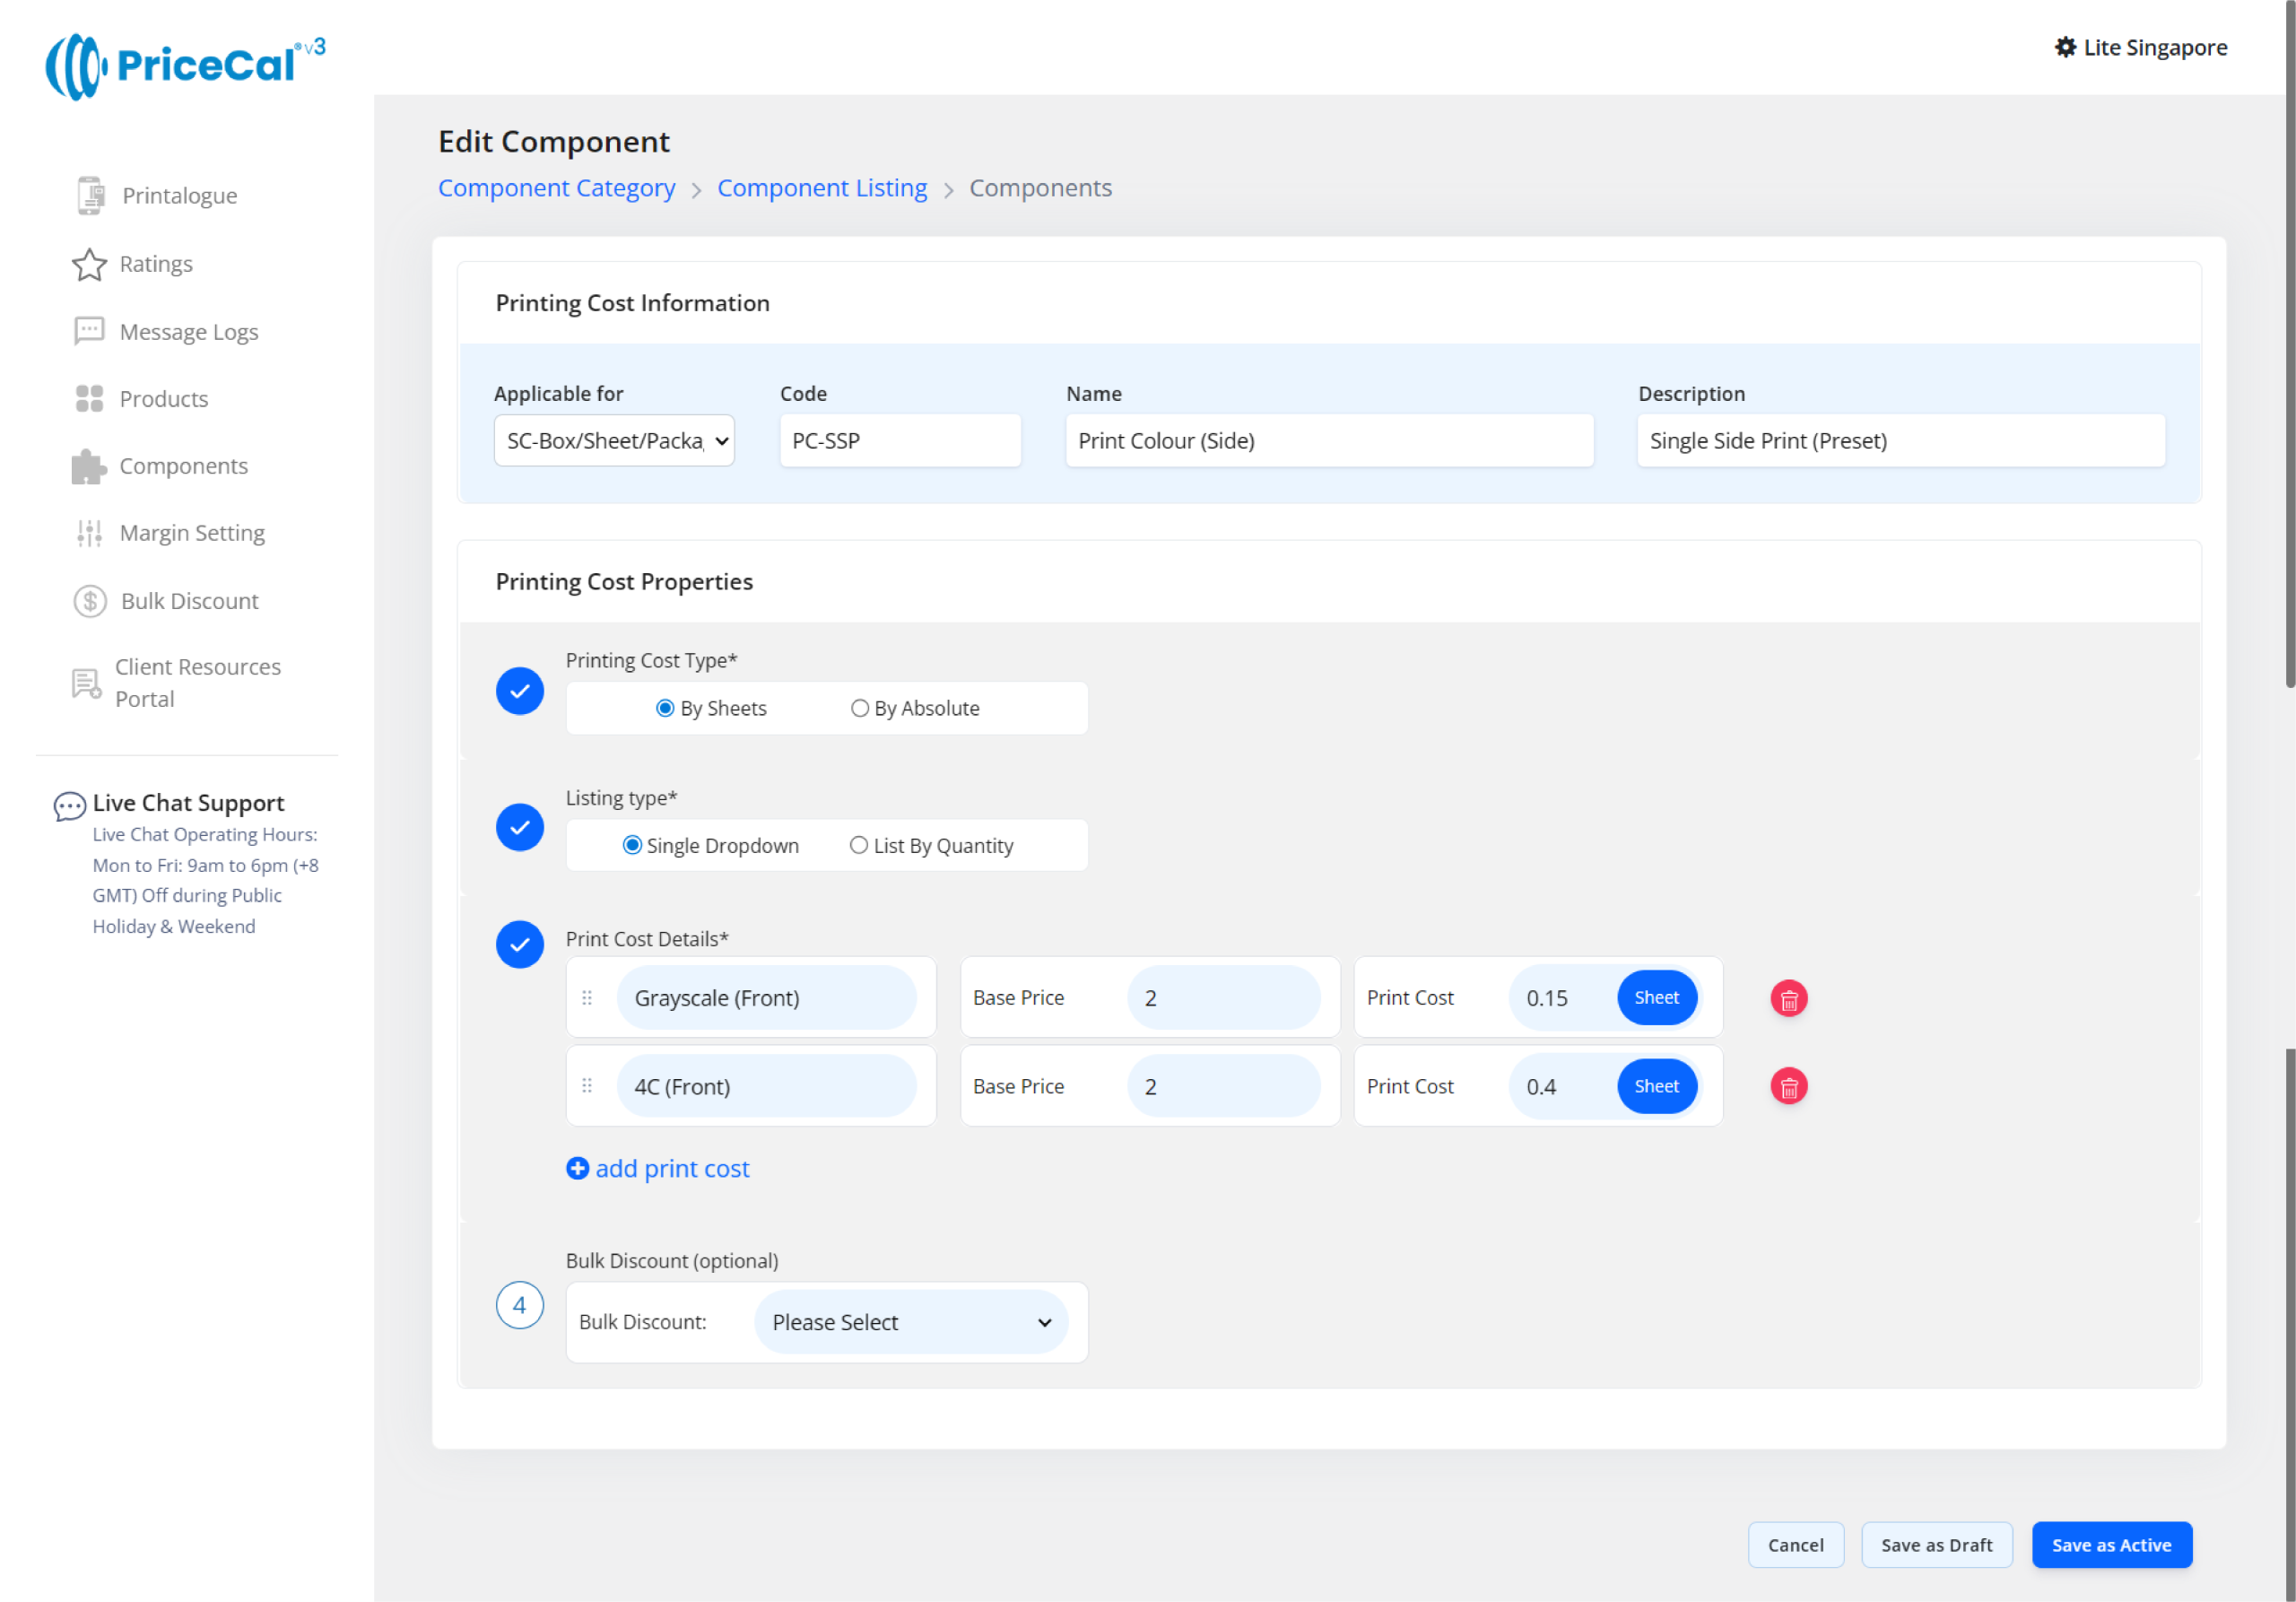
D. Set Printing Cost
- Select printing side (Single Side) or printing type (Digital / Offset)
- Define cost per sheet X per side
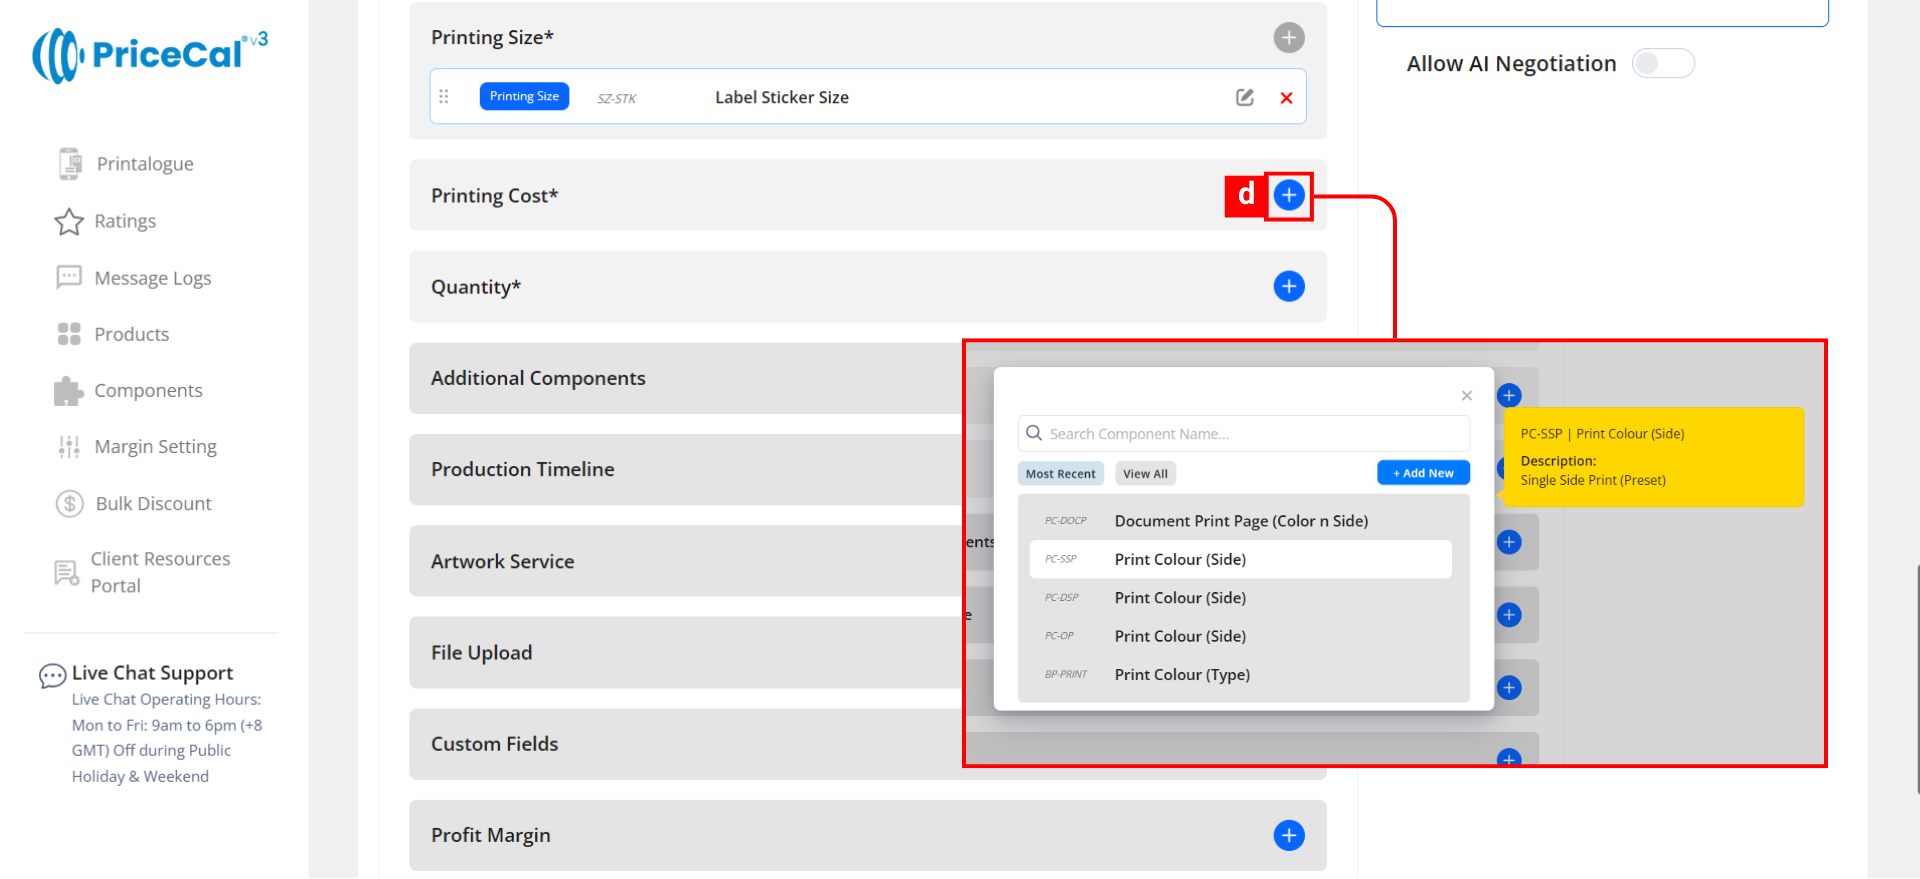
This image shows how a Single side printing cost (printing colour/side) component is typically set up for label sticker or the other products can be double side printed, so you can understand what each field means before creating your own.
🔗 Related tutorial: Printing Cost Setup (Full Guide)
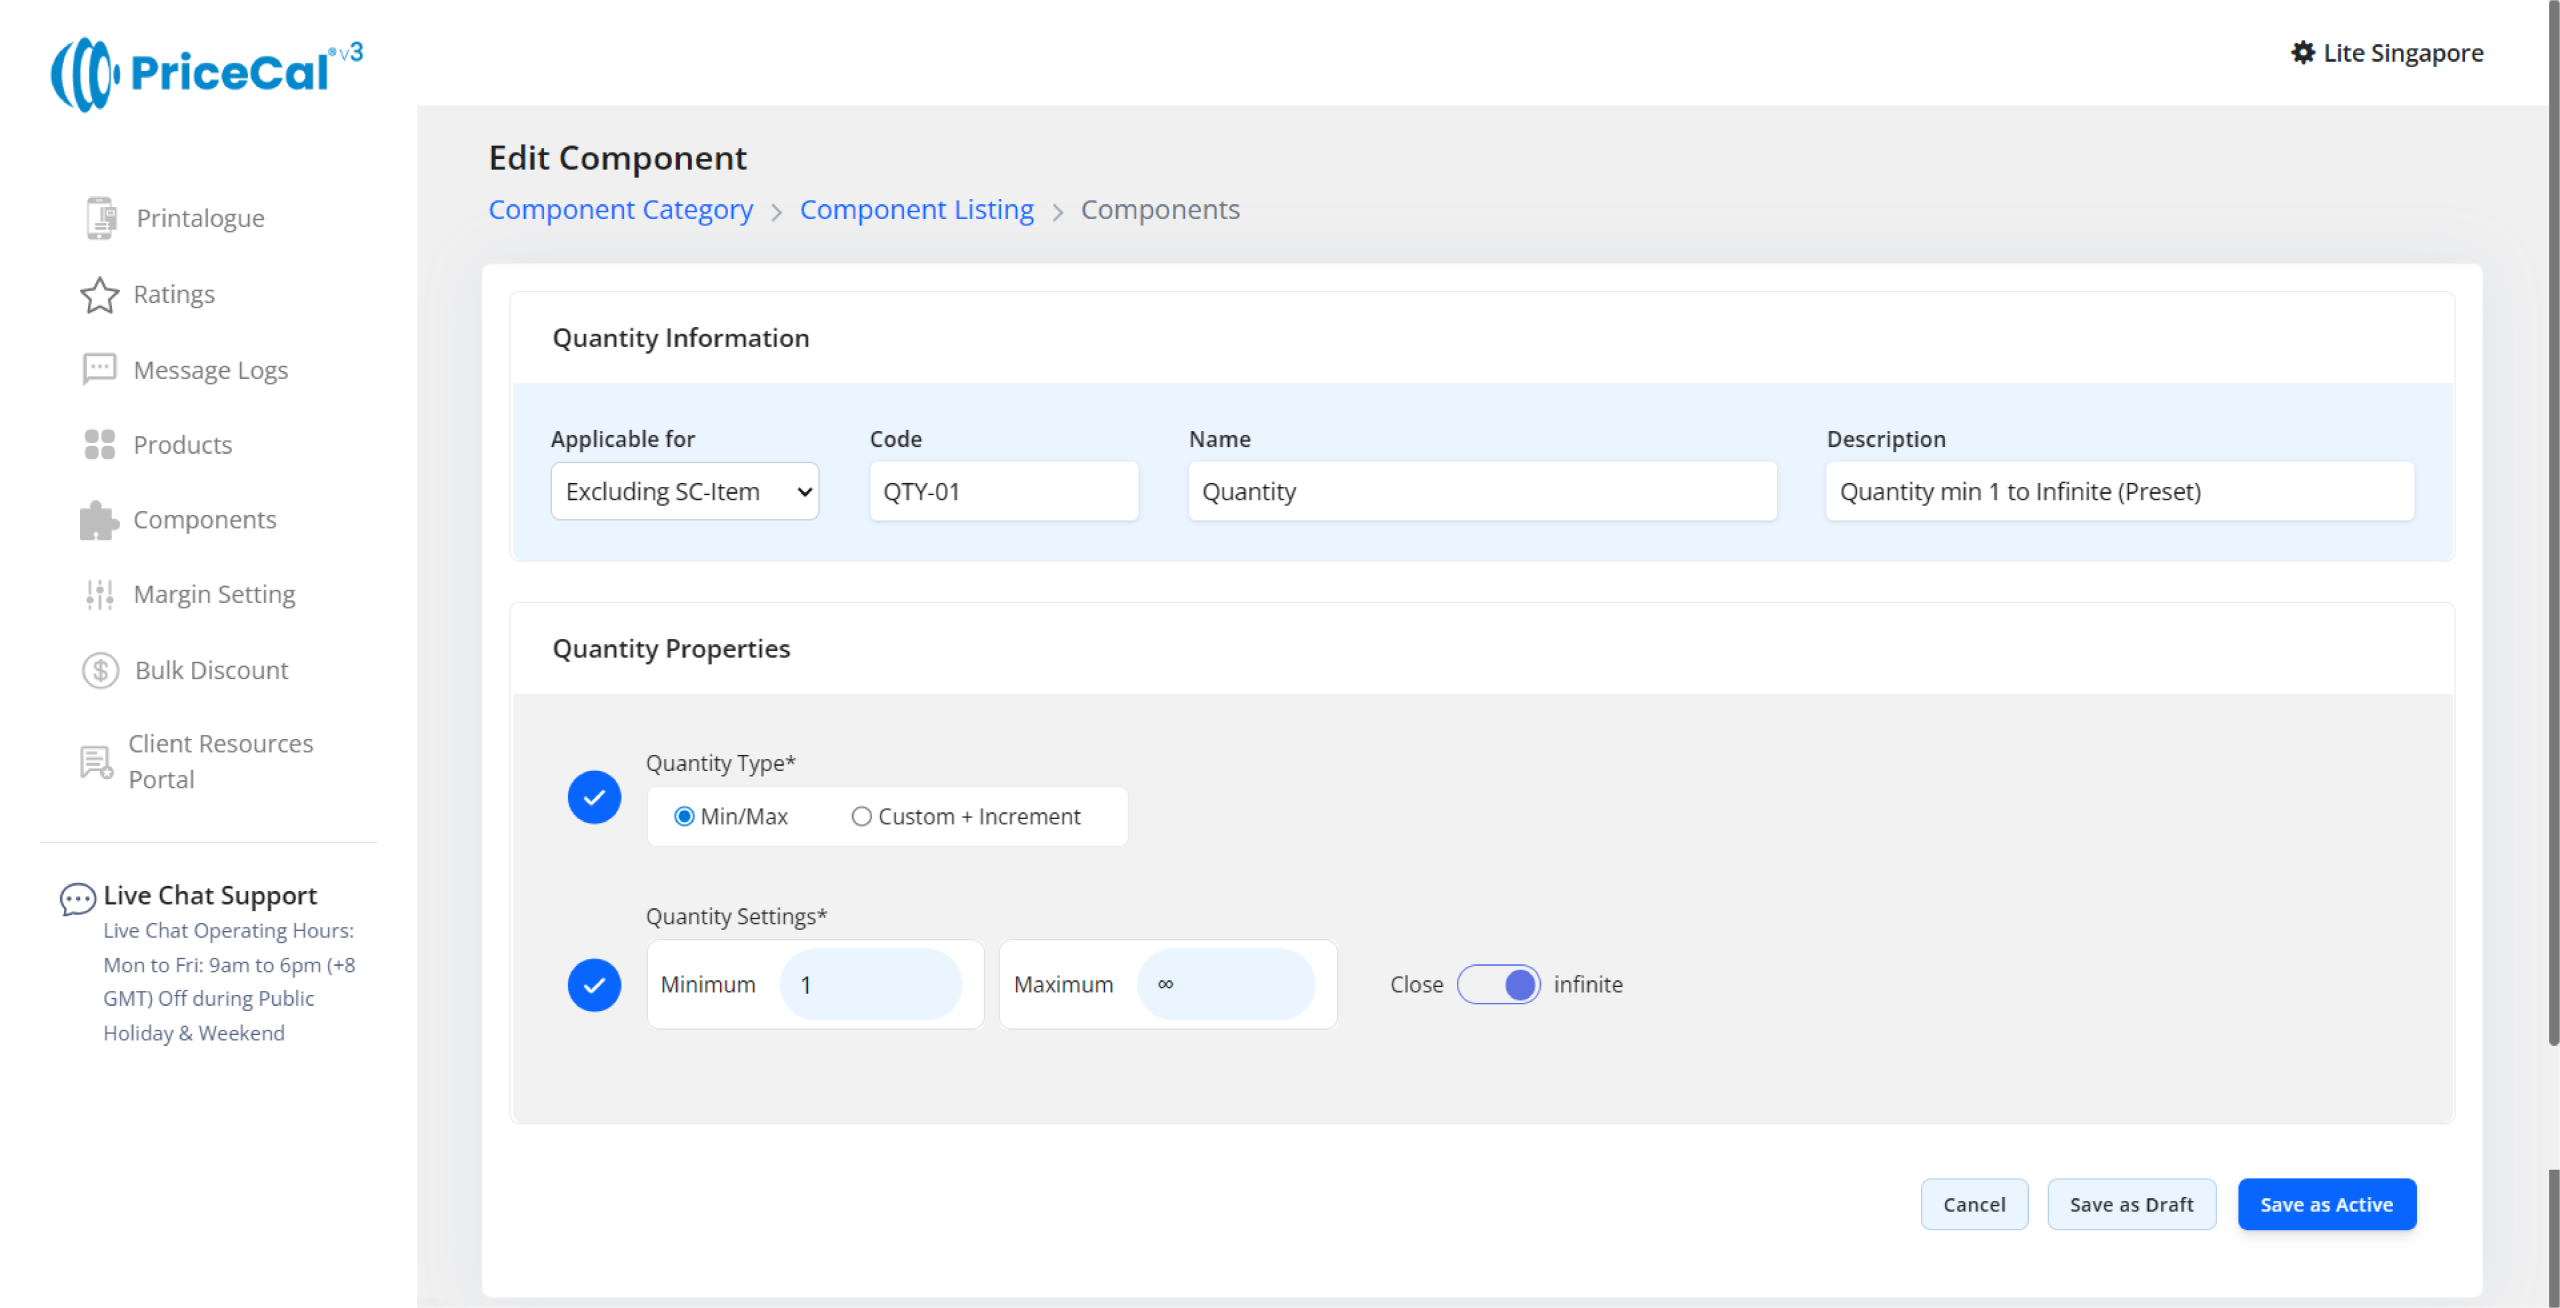
E. Quantity Selection
- We can use “Min/Max” to set a preset quantity, set up a minimum and maximum quantity.
- Customers can enter the quantity they want to print based on the minimum and maximum quantity ranges you set.
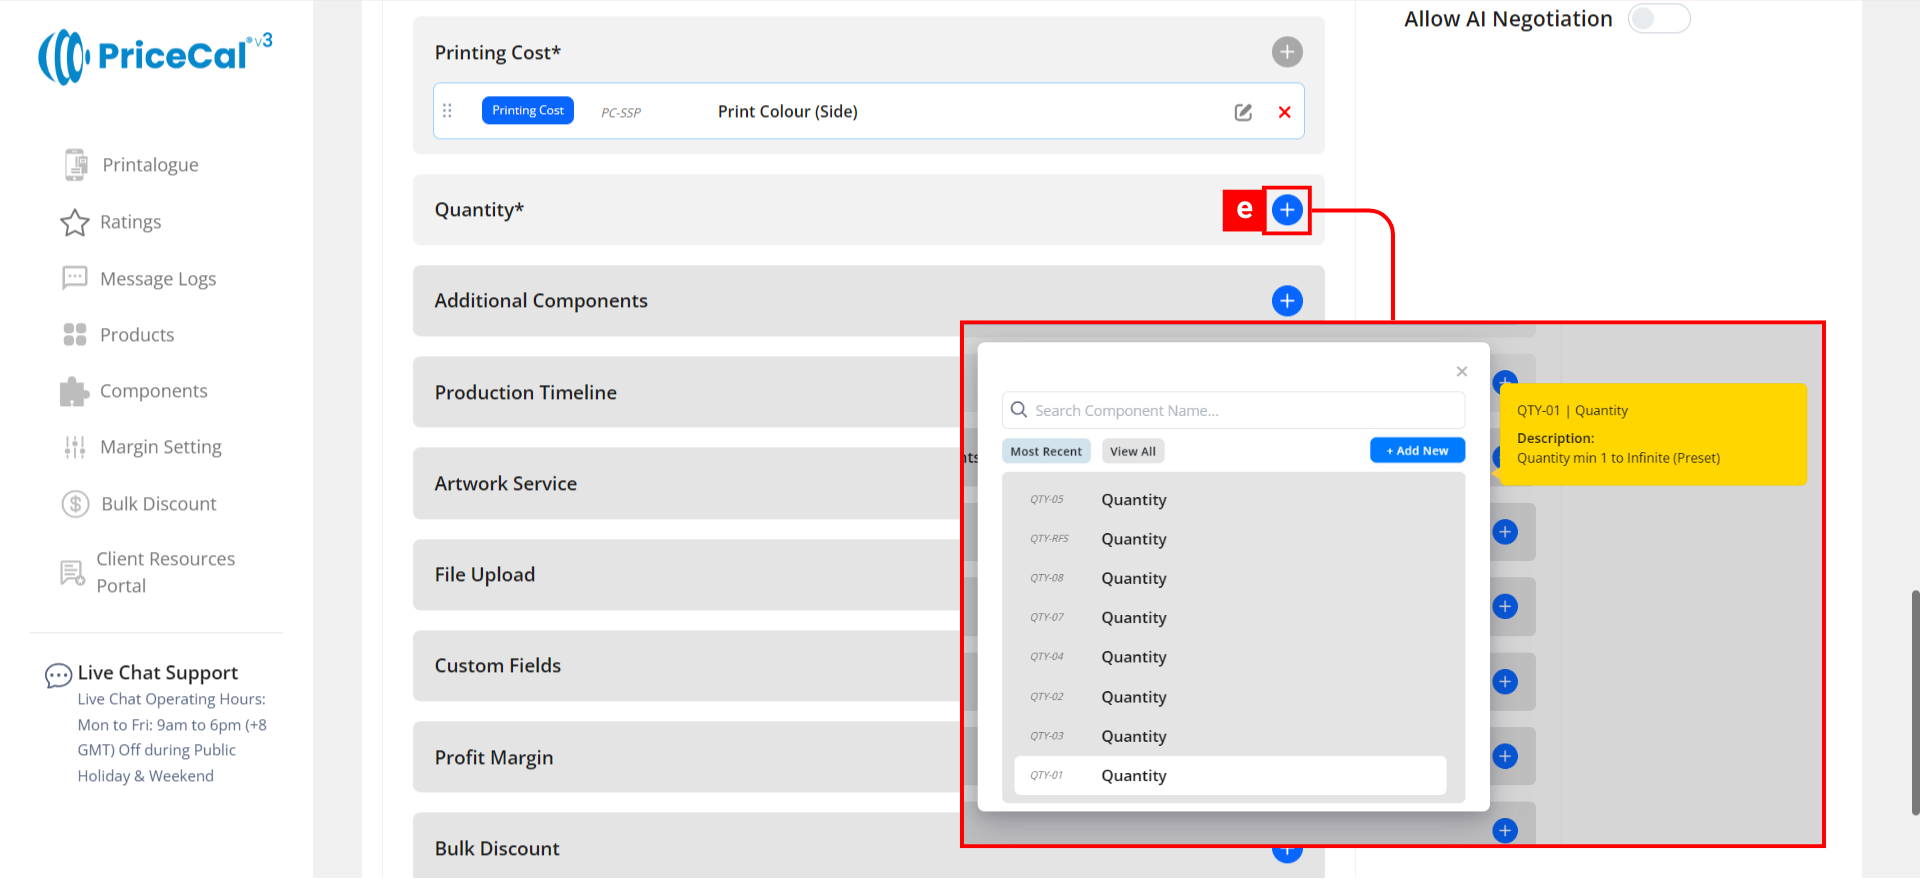
This image shows how a quantity component is typically set up, so you can understand what each field means before creating your own.
🔗 Related tutorial: Quantity Component (Full Guide)
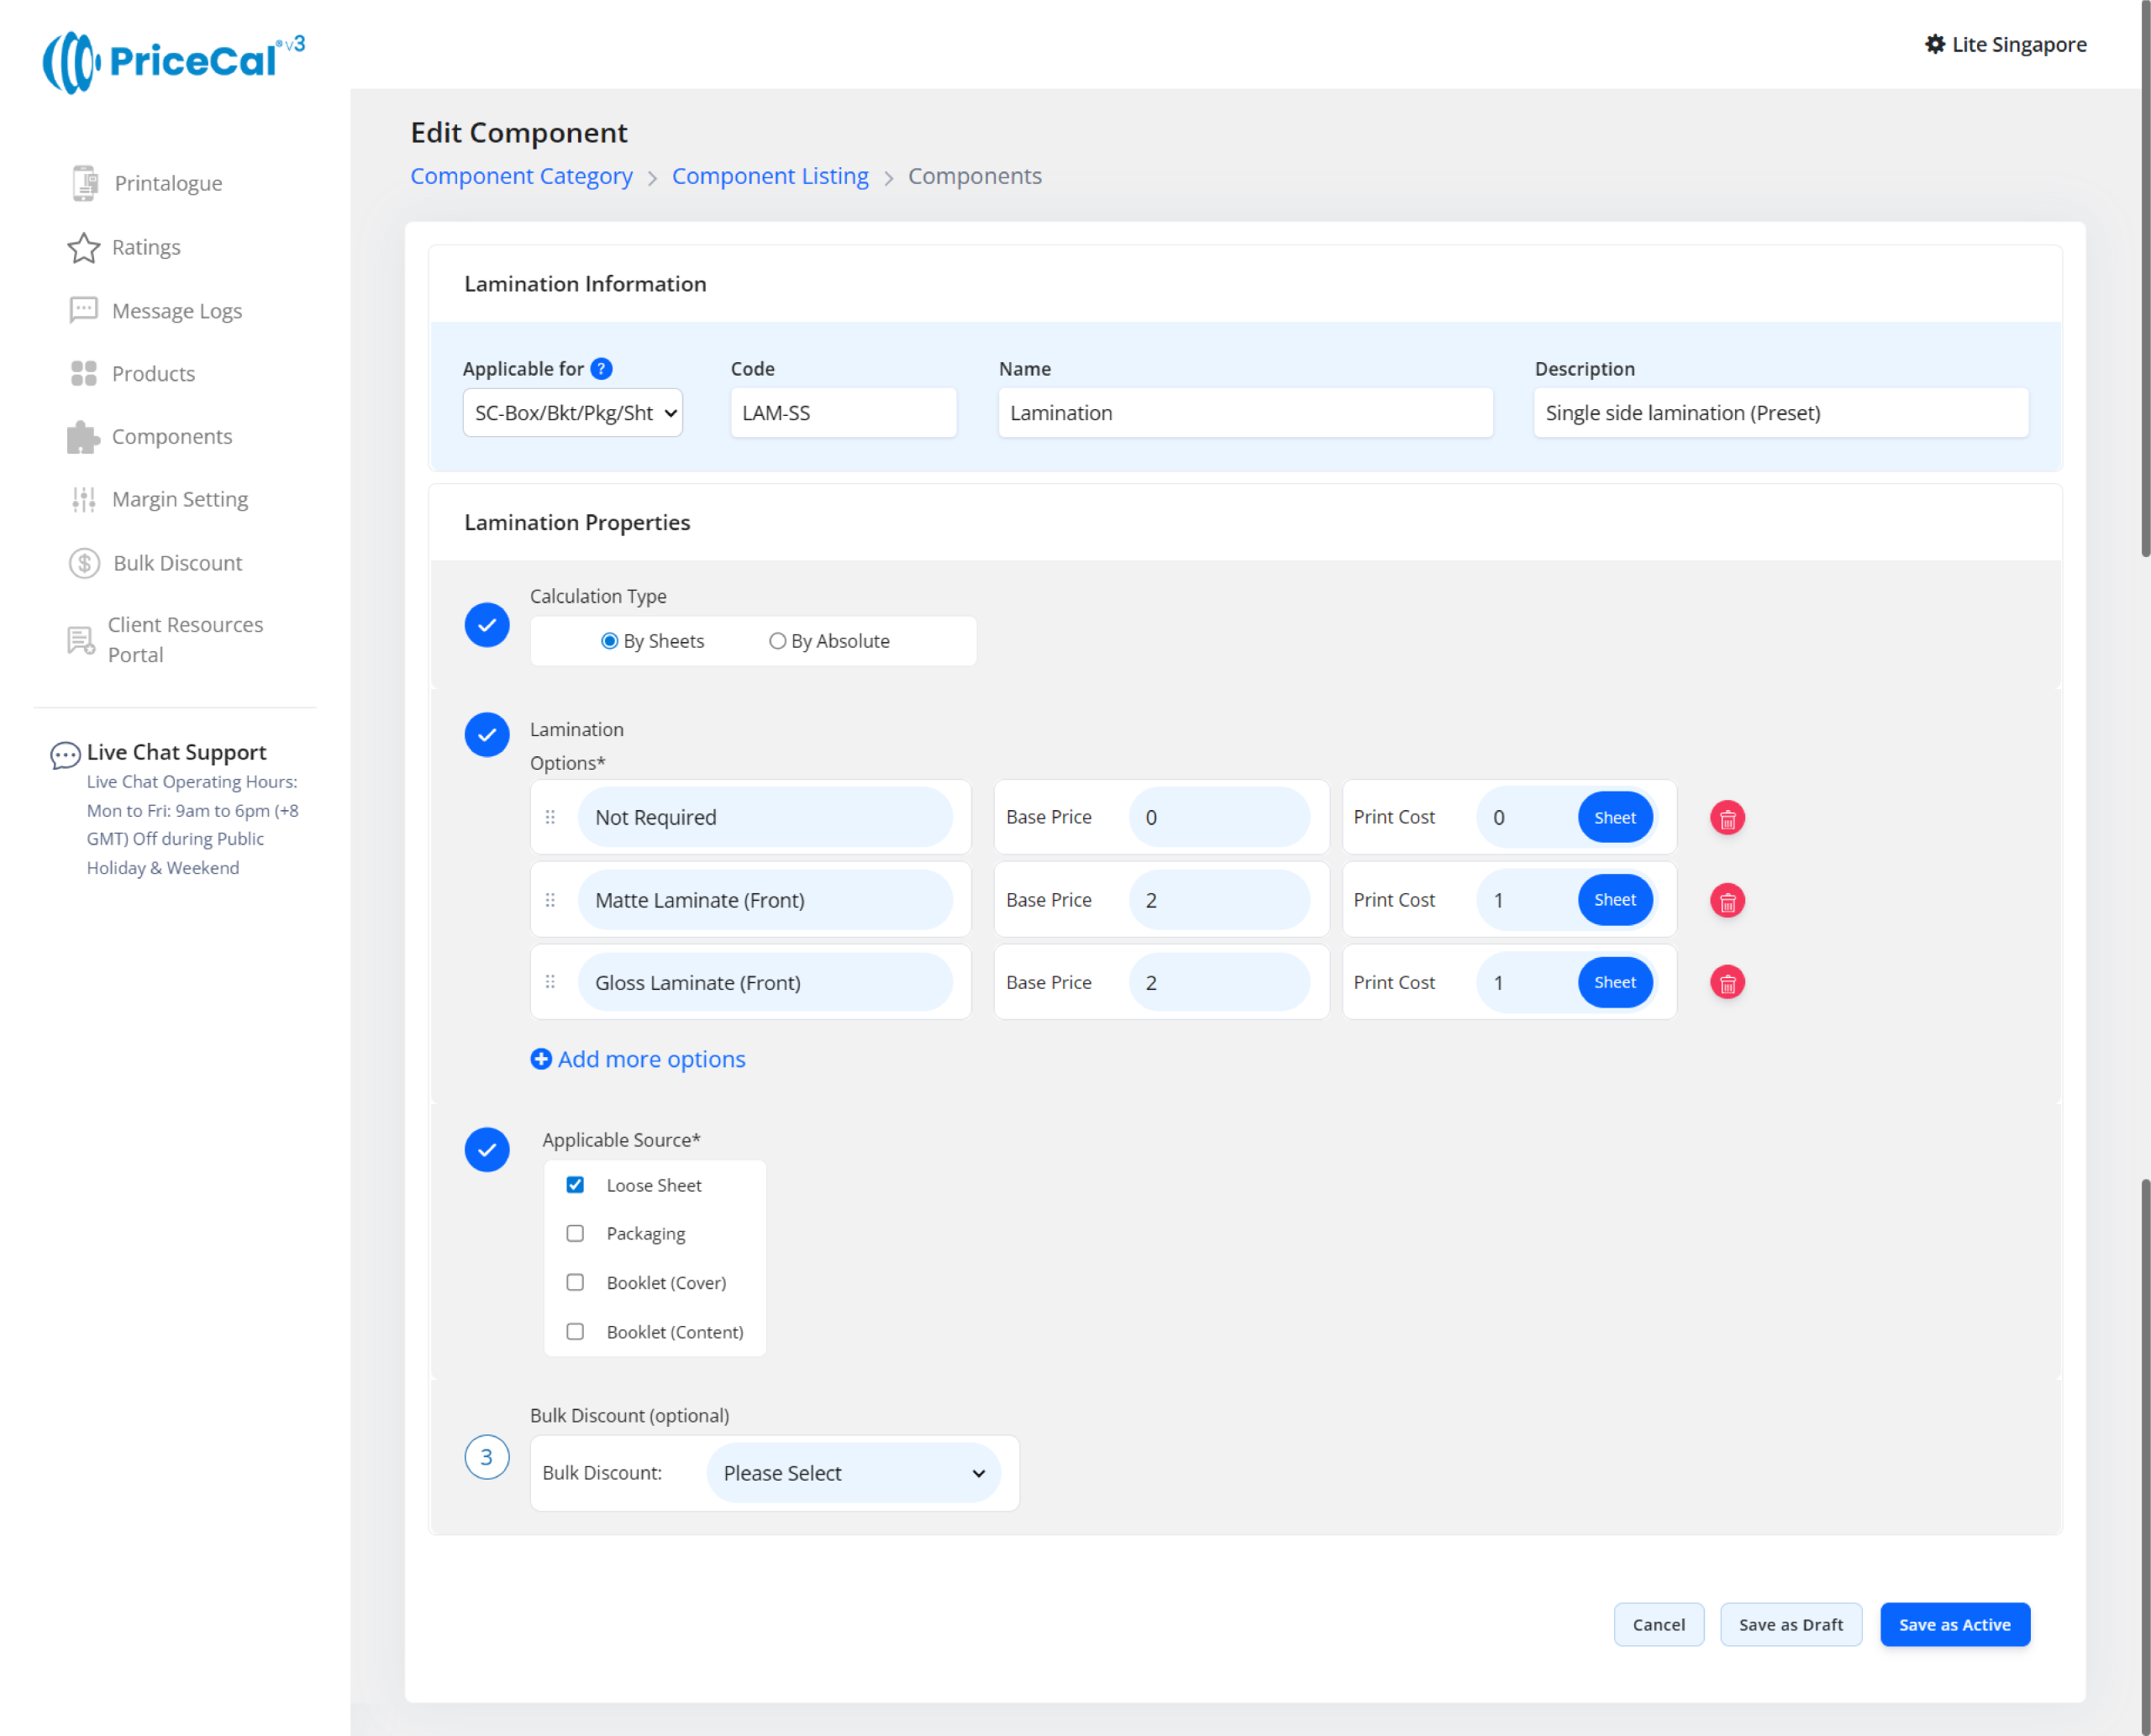
F. Optional Add-ons
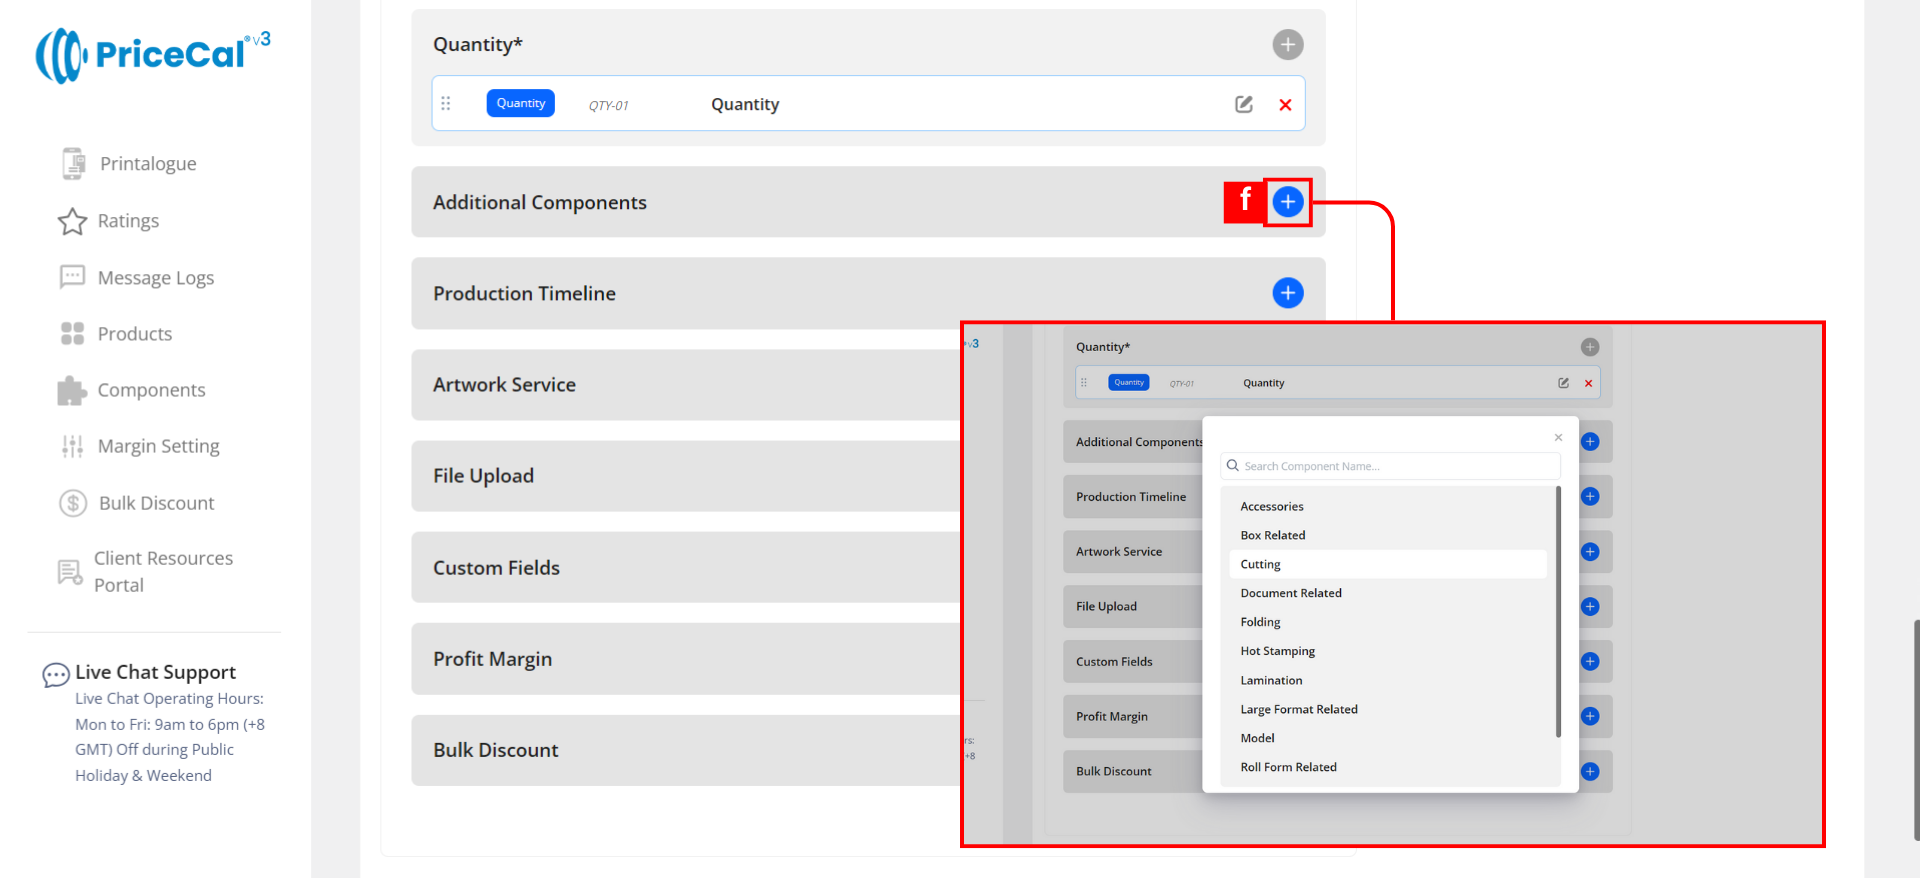
-
Custom Component: choose the finishing component category like Lamination, Cutting. And add the component.
Tips 💡: You can add unique components to a material.For example, if custom component lamination cannot be used on all materials, then we need to attach the lamination component under the applicable materials.

This image shows how a custom component is typically set up, so you can understand what each field means before creating your own.
– Lamination (by sheet)
– Cutting (by absolute): We will provide two different cutting options for your convenience.
1. Cut Shape
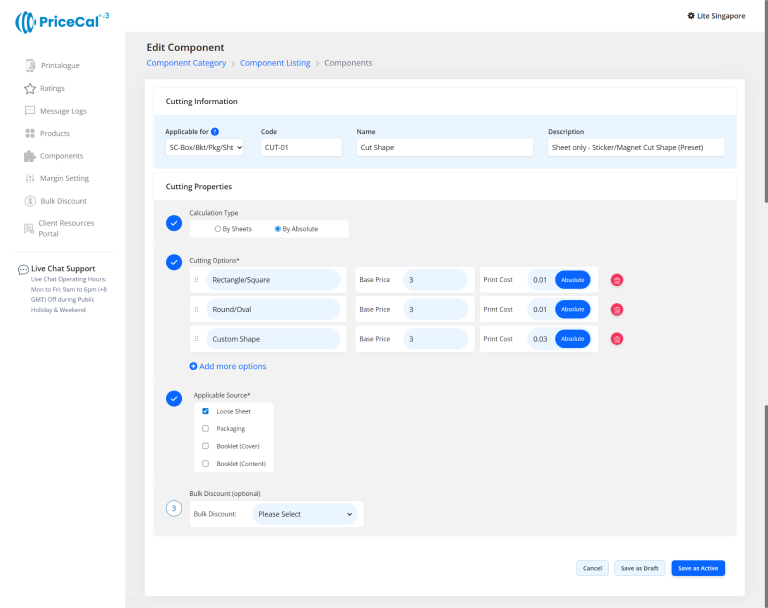
2. Cutting Type (if you have different cutting methods)
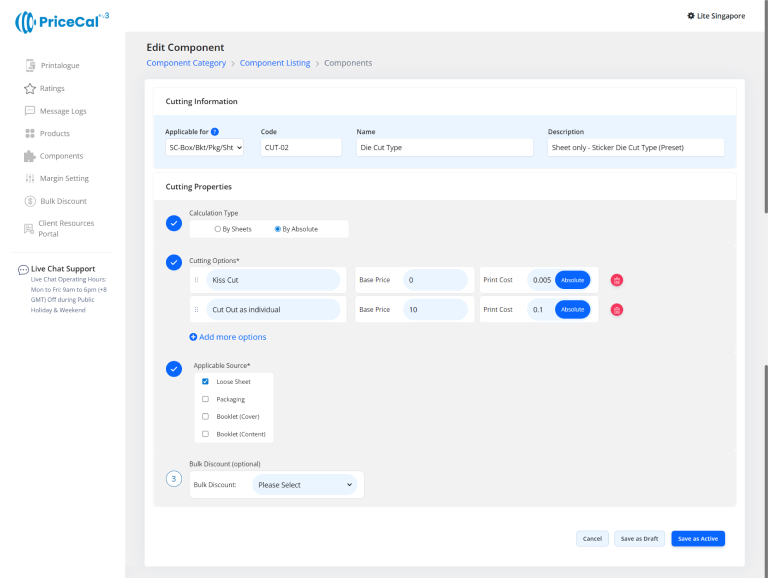
🔗 Related tutorial: Custom Component (Full Guide)
-
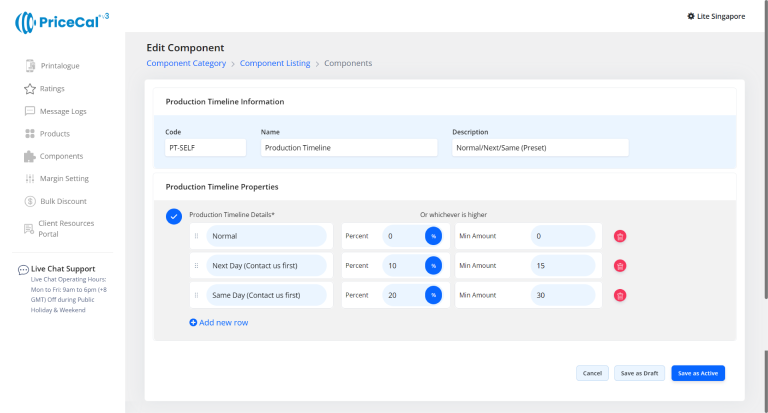
Production timeline: As this is in-house production, you can control production time to provide flexible production speeds (Normal/Next Day/Same Day).
-
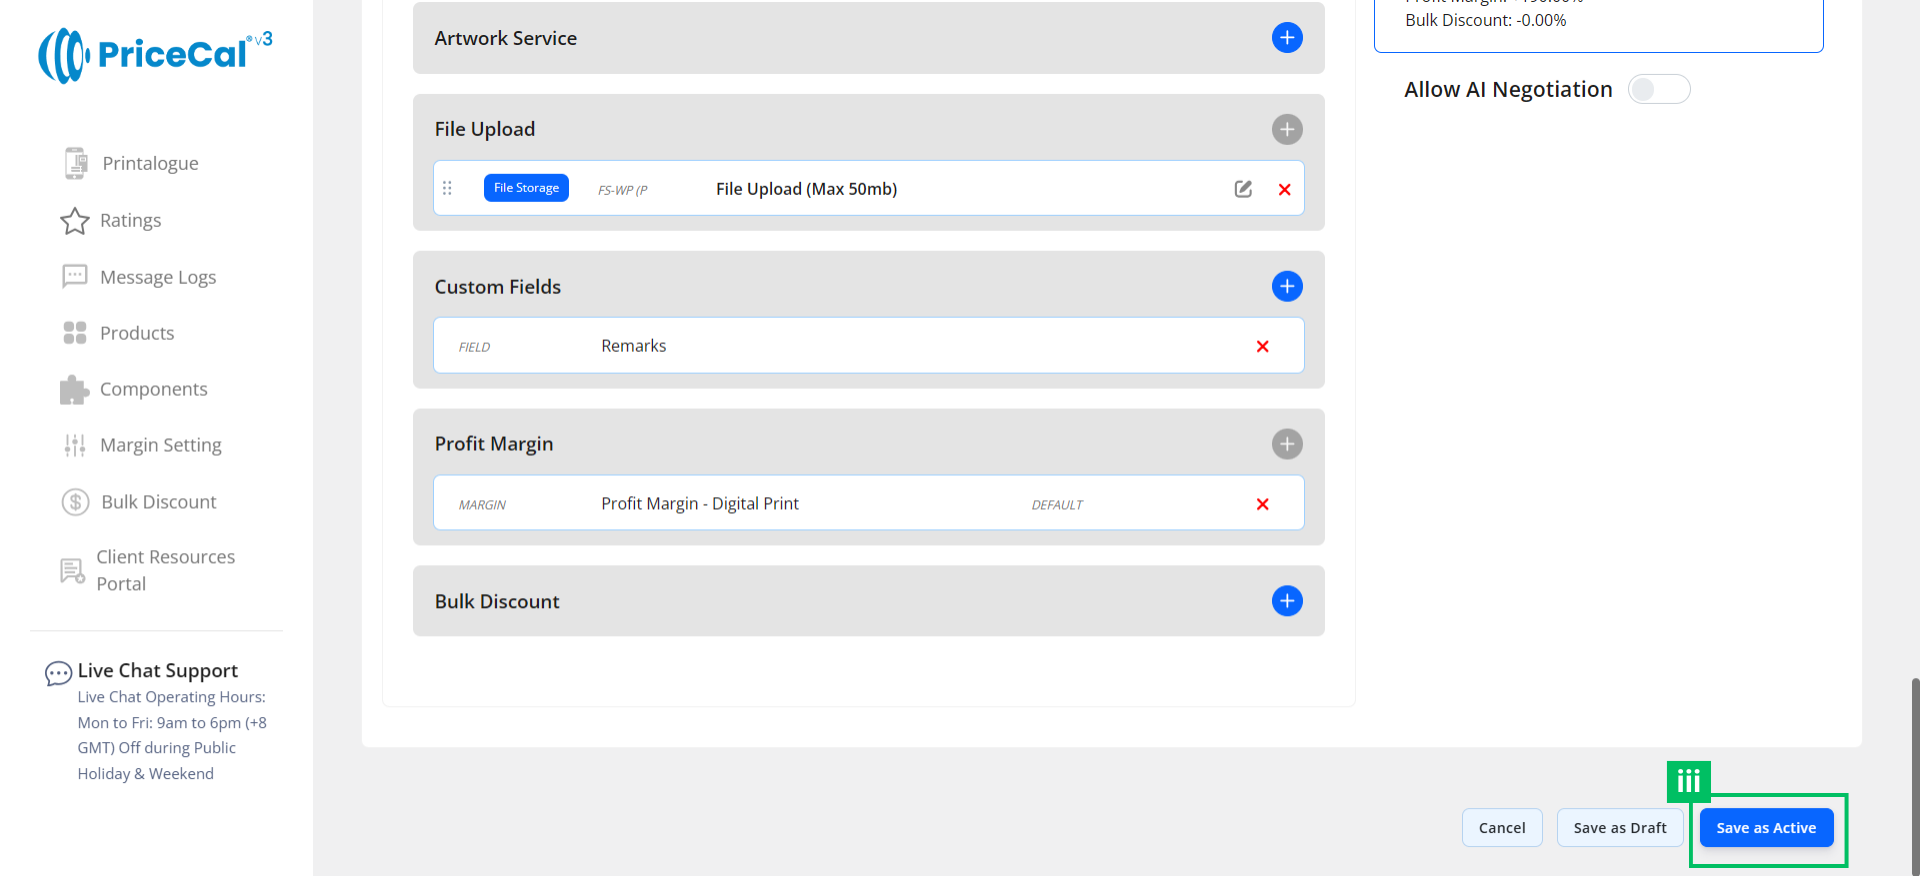
Artwork Service: If you offer any artwork services, please set the design service option.
-
File Upload: Enable file upload and select storage location (WordPress or Dropbox). [Only displayed after integration into WordPress website]
-
Custom Fields: Collect extra info or artwork links (e.g., Google Drive link, ).[Only displayed after integration into WordPress website]
-
Profit Margin: Apply different profit percentage levels for label sticker product or digital print product category.
-
Bulk Discount: If you want to automatically apply discounts to bulk orders, apply a Bulk Discount to the product.


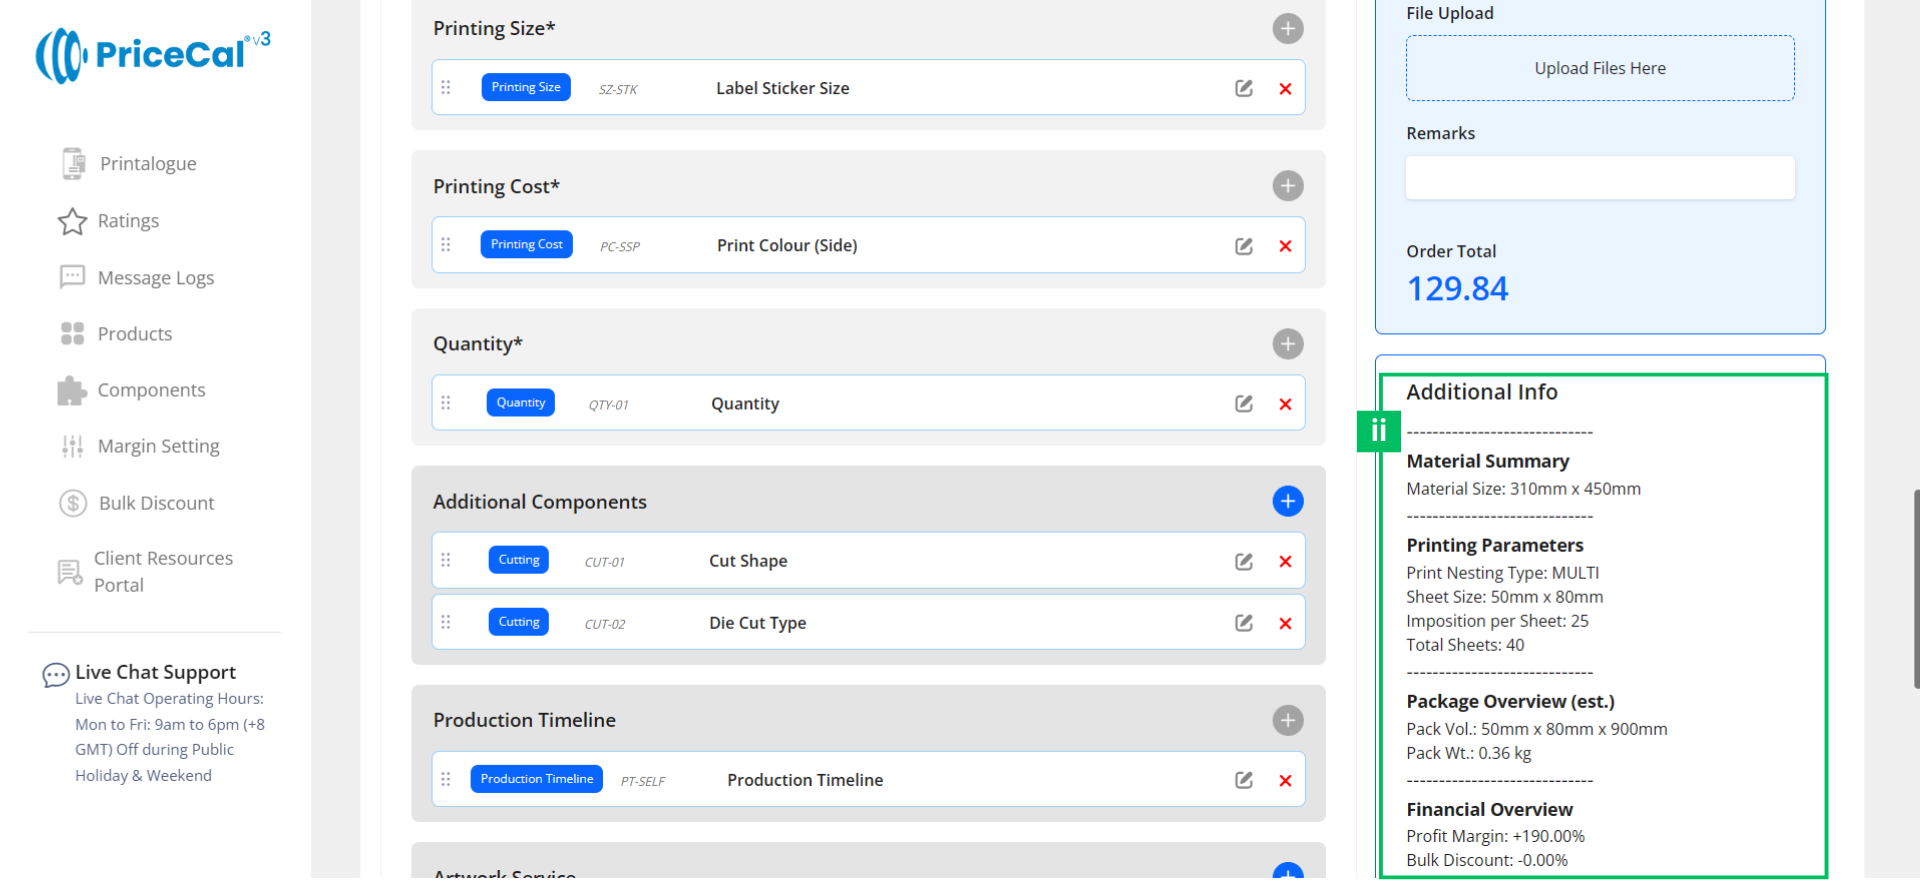
G. Preview & Publish
i. Check cost breakdown: You can view the corresponding costs based on the selected print size and quantity.
ii. Check the additional inform: Get instant calculation insights
-
- Material Summary – Shows the maximum print area of the material selected in the Price Calculator.
- Printing Parameters – Displays the nesting type, sheet size, imposition per sheet, and total sheets required.
Example (sticker 50mm × 80mm, 1000pcs):- The selected sheet size (print size) is 50mm × 80mm.
- For production, the system adds 2mm bleed on each side, so the working size becomes 54mm × 84mm.
- This 93mm × 58mm size is imposed into the maximum print area 310mm × 450mm.
- Final imposition is 25 pcs per material sheet.
- To produce 1000 pcs, total material sheets needed = ⌈1000/25⌉= sheets.
- Package Overview (est.) – Estimates volume and weight based on GSM, material thickness, and quantity.
- Financial Overview – Summarizes the applied profit margin and any bulk discount applied.
iii. Click Save as Active
✅ Result:
Customers choose size, paper, quantity → price is calculated automatically based on sheet usage.
Final Outcome (Customer Experience)
Customers can:
- Choose label size, material, and quantity
- Instantly see accurate pricing
- Add finishing options
- Upload artwork
- Place orders confidently
- Contact the print shop via WhatsApp
✅ Result: Automated, production-accurate pricing for in-house label sticker printing.